DMX-LED-SCHEINWERFER-SET - monacor.dkmonacor.dk/import/media/FLE/PARL40SET.pdf · PARL-40SET...
26
BEDIENUNGSANLEITUNG • INSTRUCTION MANUAL • MODE D’EMPLOI ISTRUZIONI PER L’USO • MANUAL DE INSTRUCCIONES INSTRUKCJA OBSLUGI • VEILIGHEIDSVOORSCHRIFTEN SIKKERHEDSOPLYSNINGER • SÄKERHETSFÖRESKRIFTER • TURVALLISUUDESTA DMX-LED-SCHEINWERFER-SET SET OF DMX LED SPOTLIGHTS SET DE PROJECTEURS DMX À LEDS SET DI PROIETTORI DMX A LED PARL-40SET Bestellnummer 38.4790
Transcript of DMX-LED-SCHEINWERFER-SET - monacor.dkmonacor.dk/import/media/FLE/PARL40SET.pdf · PARL-40SET...

BEDIENUNGSANLEITUNG • INSTRUCTION MANUAL • MODE D’EMPLOIISTRUZIONI PER L’USO • MANUAL DE INSTRUCCIONESINSTRUKCJA OBSŁUGI • VEILIGHEIDSVOORSCHRIFTEN
SIKKERHEDSOPLYSNINGER • SÄKERHETSFÖRESKRIFTER • TURVALLISUUDESTA
DMX-LED-SCHEINWERFER-SETSET OF DMX LED SPOTLIGHTSSET DE PROJECTEURS DMX À LEDSSET DI PROIETTORI DMX A LED
PARL-40SET Bestellnummer 38.4790
2
11 11
1 2 3 4 5 6
7 9
8 10
3
wwwwww..iimmggssttaaggeelliinnee..ccoomm
®
Innan du slår på enheten …Vi önskar dig mycket glädje med din nya “imgStage Line” produkt. Läs igenom säkerhetsföre -skrifterna innan en heten tas i bruk för att undvikaskador till följd av felaktig hantering. Behållinstruktionerna för framtida bruk.
Säkerhetsföreskrifterna återfinns på sidan 24.
Ennen kytkemistä …Toivomme Sinulle paljon miellyttäviä hetkiäuuden “img Stage Line” laitteen kanssa. Ennenlaitteen käyttöä pyydämme Sinua huolellisestitutustumaan turvallisuusohjeisiin. Näin vältytvahingoilta, joita virheellinen laitteen käyttö saat-taa aiheuttaa. Ole hyvä ja säilytä käyttöohjeetmyöhempää tarvetta varten.
Turvallisuusohjeet löytyvät sivulta 25.
S FIN
Bevor Sie einschalten …Wir wünschen Ihnen viel Spaß mit Ihrem neuenGerät von „img Stage Line“. Bitte lesen Sie dieseBedienungsanleitung vor dem Betrieb gründlichdurch. Nur so lernen Sie alle Funktionsmöglich-keiten kennen, vermeiden Fehlbedienungen undschützen sich und Ihr Gerät vor eventuellen Schä-den durch unsachgemäßen Gebrauch. HebenSie die Anleitung für ein späteres Nachlesen auf.
Der deutsche Text beginnt auf der Seite 4.
Before switching on …We wish you much pleasure with your new “imgStage Line” unit. Please read these operatinginstructions carefully prior to operating the unit.Thus, you will get to know all functions of the unit,operating errors will be prevented, and yourselfand the unit will be protected against any damagecaused by improper use. Please keep the oper at-ing instructions for later use.
The English text starts on page 7.
Avant toute installation …Nous vous souhaitons beaucoup de plaisir à uti-liser cet appareil “img Stage Line”. Lisez ce modedʼemploi entièrement avant toute utilisation. Uni-quement ainsi, vous pourrez apprendre lʼensem-ble des possibilités de fonctionnement de lʼappa-reil, éviter toute manipulation erronée et vousprotéger, ainsi que lʼappareil, de dommageséventuels engendrés par une utilisation inadap-tée. Conservez la notice pour pouvoir vous yreporter ultérieurement.
La version française se trouve page 10.
Prima di accendere …Vi auguriamo buon divertimento con il vostronuovo apparecchio di “img Stage Line”. Leggeteattentamente le istruzioni prima di mettere in fun-zione lʼapparecchio. Solo così potete conosceretutte le funzionalità, evitare comandi sbagliati eproteggere voi stessi e lʼapparecchio da even-tuali danni in seguito ad un uso improprio. Con-servate le istruzioni per poterle consultare anchein futuro.
Il testo italiano inizia a pagina 13.
D
A
CH
GB
Antes de la utilización …Le deseamos una buena utilización para su nue -vo aparato “img Stage Line”. Por favor, lea estasin s trucciones de uso atentamente antes de ha cerfuncionar el aparato. De esta manera conocerátodas las funciones de la unidad, se pre vendránerrores de operación, usted y el apa rato estaránprotegidos en contra de todo daño cau sado porun uso inadecuado. Por favor, guarde las instruc-ciones para una futura utilización.
La versión española comienza en la página 16.
Voor u inschakelt …Wij wensen u veel plezier met uw nieuwe appa-raat van “img Stage Line”. Lees de veiligheids-voorschriften grondig door, alvorens het apparaatin gebruik te nemen. Zo behoedt u zichzelf en hetapparaat voor eventuele schade door ondeskun-dig gebruik. Bewaar de handleiding voor latereraadpleging.
De veiligheidsvoorschriften vindt u op pagina 22.
Przed uruchomieniem …Życzymy zadowolenia z nowego produktu “imgStage Line”. Dzięki tej instrukcji obsługi będąpaństwo w stanie poznać wszystkie funkcje tegourządzenia. Stosując się do instrukcji uniknąpaństwo błędów i ewentualnego uszkodzeniaurządzenia na skutek nieprawidłowego użytko-wania. Prosimy zachować instrukcję.
Tekst polski zaczyna się na stronie 19.
Før du tænder …Tillykke med dit nye “img Stage Line” produkt.Læs sikkerhedsanvisningerne nøje før ibrugtag-ning, for at beskytte Dem og enheden mod ska-der, der skyldes forkert brug. Gem manualen tilsenere brug.
Sikkerhedsanvisningerne findes på side 23.
F
B
CH
I
E
NL
B
PL
DK
4
D
A
CH
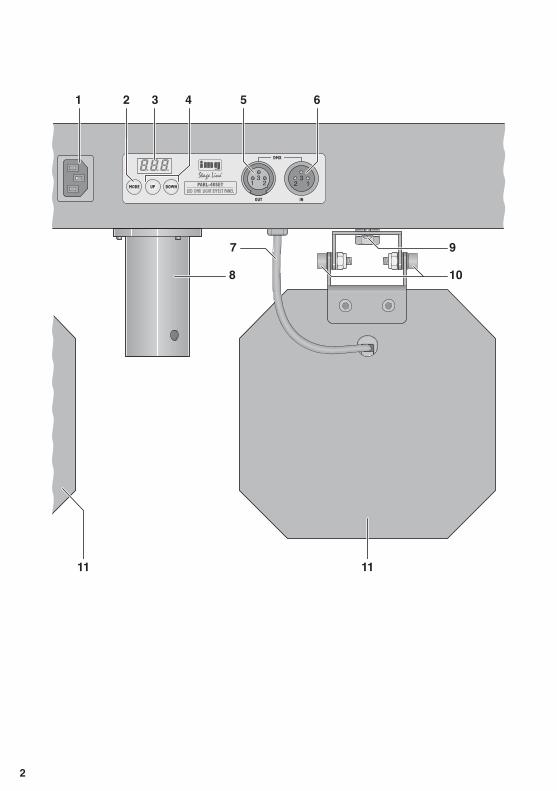
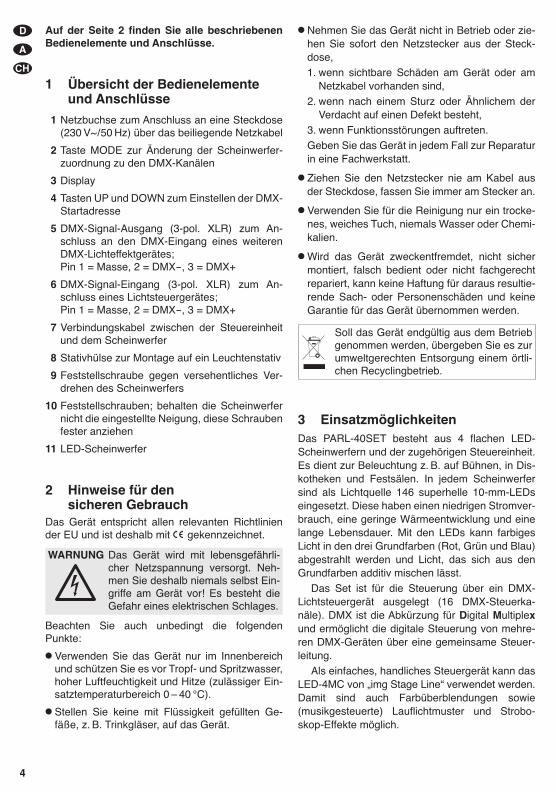
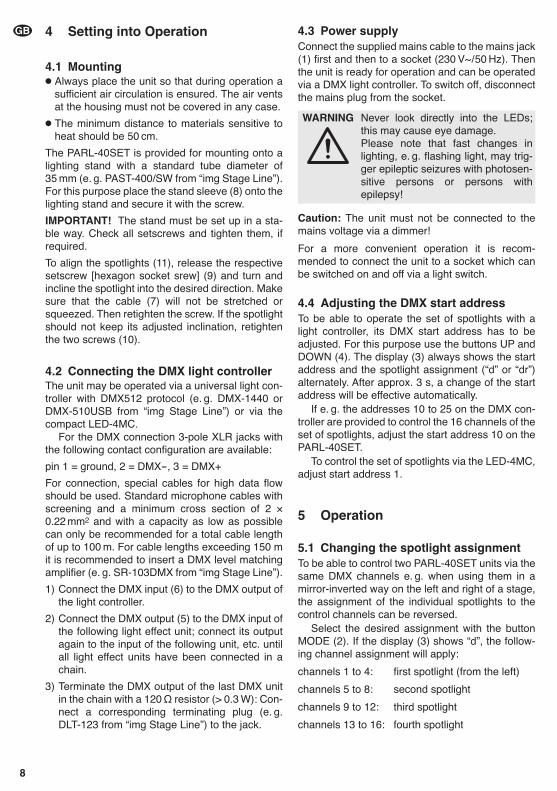
Auf der Seite 2 finden Sie alle be schriebenenBe dienelemente und Anschlüsse.
1 Übersicht der Bedienelemente und Anschlüsse
1 Netzbuchse zum Anschluss an eine Steckdose(230 V~/50 Hz) über das beiliegende Netzkabel
2 Taste MODE zur Änderung der Scheinwerfer -zuordnung zu den DMX-Kanälen
3 Display
4 Tasten UP und DOWN zum Einstellen der DMX-Startadresse
5 DMX-Signal-Ausgang (3-pol. XLR) zum An -schluss an den DMX-Eingang eines weiterenDMX-Licht effektgerätes;Pin 1 = Masse, 2 = DMX-, 3 = DMX+
6 DMX-Signal-Eingang (3-pol. XLR) zum An -schluss eines Lichtsteuergerätes;Pin 1 = Masse, 2 = DMX-, 3 = DMX+
7 Verbindungskabel zwischen der Steuereinheitund dem Scheinwerfer
8 Stativhülse zur Montage auf ein Leuchtenstativ
9 Feststellschraube gegen versehentliches Ver-drehen des Scheinwerfers
10 Feststellschrauben; behalten die Scheinwerfernicht die eingestellte Neigung, diese Schraubenfester anziehen
11 LED-Scheinwerfer
2 Hinweise für den sicheren Gebrauch
Das Gerät entspricht allen relevanten Richtliniender EU und ist deshalb mit gekennzeichnet.
Beachten Sie auch unbedingt die folgendenPunkte:
� Verwenden Sie das Gerät nur im Innenbereichund schützen Sie es vor Tropf- und Spritzwasser,hoher Luftfeuchtigkeit und Hitze (zulässiger Ein-satztemperaturbereich 0 – 40 °C).
� Stellen Sie keine mit Flüssigkeit gefüllten Ge -fäße, z. B. Trinkgläser, auf das Gerät.
� Nehmen Sie das Gerät nicht in Betrieb oder zie -hen Sie sofort den Netzstecker aus der Steck-dose,1. wenn sichtbare Schäden am Gerät oder am
Netzkabel vorhanden sind,2. wenn nach einem Sturz oder Ähnlichem der
Verdacht auf einen Defekt besteht,3. wenn Funktionsstörungen auftreten.Geben Sie das Gerät in jedem Fall zur Reparaturin eine Fachwerkstatt.
� Ziehen Sie den Netzstecker nie am Kabel ausder Steckdose, fassen Sie immer am Stecker an.
� Verwenden Sie für die Reinigung nur ein trocke-nes, weiches Tuch, niemals Wasser oder Chemi-kalien.
� Wird das Gerät zweckentfremdet, nicht sichermontiert, falsch bedient oder nicht fachgerechtrepariert, kann keine Haftung für daraus resultie-rende Sach- oder Personenschäden und keineGarantie für das Gerät übernommen werden.
3 EinsatzmöglichkeitenDas PARL-40SET besteht aus 4 flachen LED-Scheinwerfern und der zugehörigen Steuereinheit.Es dient zur Beleuchtung z. B. auf Bühnen, in Dis-kotheken und Festsälen. In jedem Scheinwerfersind als Lichtquelle 146 superhelle 10-mm-LEDseingesetzt. Diese haben einen niedrigen Stromver-brauch, eine geringe Wärmeentwicklung und einelange Lebensdauer. Mit den LEDs kann farbigesLicht in den drei Grundfarben (Rot, Grün und Blau)abgestrahlt werden und Licht, das sich aus denGrundfarben additiv mischen lässt.
Das Set ist für die Steuerung über ein DMX-Lichtsteuergerät ausgelegt (16 DMX-Steuerka-näle). DMX ist die Abkürzung für Digital Multiplexund ermöglicht die digitale Steuerung von mehre-ren DMX-Geräten über eine gemeinsame Steuer-leitung.
Als einfaches, handliches Steuergerät kann dasLED-4MC von „img Stage Line“ verwendet werden.Damit sind auch Farbüberblendungen sowie(musikgesteuerte) Lauflichtmuster und Strobo-skop-Effekte möglich.
Soll das Gerät endgültig aus dem Betriebgenommen werden, übergeben Sie es zurumweltgerechten Entsorgung einem örtli-chen Recyclingbetrieb.
WARNUNG Das Gerät wird mit lebensgefährli-cher Netzspannung versorgt. Neh-men Sie deshalb niemals selbst Ein-griffe am Gerät vor! Es besteht dieGefahr eines elektrischen Schlages.
5
D
A
CH
4 Inbetriebnahme
4.1 Montage� Platzieren Sie das Gerät immer so, dass im Be -
trieb eine ausreichende Luftzirkulation gewähr-leistet ist. Die Lüftungsöffnungen am Gehäusedürfen auf keinen Fall abgedeckt werden.
� Der Abstand zu hitzeempfindlichen Materialiensollte mindestens 50 cm betragen.
Das PARL-40SET ist für die Montage auf einemLeuchtenstativ mit einem Standard-Rohrdurch-messer von 35 mm vorgesehen (z. B. PAST-400/SW von „img Stage Line“). Dazu die Stativ-hülse (8) auf das Leuchtenstativ aufsetzen und mitder Schraube sichern.
WICHTIG! Das Stativ muss standsicher aufgestelltwerden. Alle Feststellschrauben überprüfen undggf. festziehen.
Zum Ausrichten der Scheinwerfer (11) die jeweiligeFeststellschraube [Inbus] (9) lösen und denScheinwerfer in die gewünschte Richtung drehenund neigen. Dabei darauf achten, dass das Kabel(7) nicht gedehnt oder gequetscht wird. DieSchraube anschließend wieder festdrehen. Sollteein Scheinwerfer seine eingestellte Neigung nichthalten, die beiden Schrauben (10) fester anziehen.
4.2 DMX-Lichtsteuergerät anschließenDie Bedienung kann über ein universelles Licht-steuergerät mit DMX512-Protokoll (z. B. DMX-1440 oder DMX-510USB von „img Stage Line“)erfolgen oder über das kompakte LED-4MC.
Für die DMX-Verbindung sind 3-polige XLR-An -schlüsse mit folgender Kontaktbelegung vorhan-den:
Pin 1 = Masse, 2 = DMX-, 3 = DMX+
Zum Anschluss sollten spezielle Kabel für hohenDatenfluss verwendet werden. Normale abge-schirmte Mikrofonkabel mit einem Leitungsquer-schnitt von mindestens 2 × 0,22 mm2 und möglichstgeringer Kapazität sind nur bei einer Gesamtkabel-länge bis 100 m zu empfehlen. Bei Leitungslängenab 150 m wird grundsätzlich das Zwischen schalteneines DMX-Aufholverstärkers empfohlen (z. B. SR-103DMX von „img Stage Line“).
1) Den DMX-Eingang (6) mit dem DMX-Ausgangdes Lichtsteuergerätes verbinden.
2) Den DMX-Ausgang (5) mit dem DMX-Eingangdes nächsten Lichteffektgerätes verbinden. Des-sen Ausgang wieder mit dem Eingang des nach-folgenden Gerätes verbinden usw., bis alle Licht- effektgeräte in einer Kette angeschlossen sind.
3) Den DMX-Ausgang des letzten DMX-Gerätesder Kette mit einem 120-Ω-Widerstand (> 0,3 W)ab schließen: In die Buchse einen entsprechen-den Abschlussstecker (z. B. DLT-123 von „imgStage Line“) stecken.
4.3 StromversorgungDas beiliegende Netzkabel zuerst in die Netzbuchse(1) stecken und dann in eine Steckdose (230 V~/50 Hz). Danach ist das Gerät betriebsbereit undlässt sich über ein DMX-Lichtsteuergerät bedienen.Zum Ausschalten den Netzstecker aus der Steck-dose ziehen.
Vorsicht: Das Gerät darf nicht über einen Dimmeran die Netzspannung angeschlossen werden!
Um einen besseren Bedienkomfort zu erhalten, istes empfehlenswert, das Gerät an eine Steckdosean zu schließen, die sich über einen Lichtschalterein- und ausschalten lässt.
4.4 DMX-Startadresse einstellenUm das Scheinwerferset mit einem Lichtsteuerge-rät be dienen zu können, muss seine DMX-Start-adresse eingestellt werden. Dazu die Tasten UPund DOWN (4) verwenden. Die Startadresse wirdim Display (3) immer im Wechsel mit der Schein-werferzuordnung („d“ oder „dr“) angezeigt. EineÄnderung der Startadresse wird nach ca. 3 s auto-matisch wirksam.
Sind z. B. am DMX-Steuergerät die Adressen 10bis 25 zum Steuern der 16 Kanäle des Scheinwer-fersets vorgesehen, am PARL-40SET die Start-adresse 10 einstellen.
Soll das Scheinwerferset über das LED-4MCgesteuert werden, die Startadresse 1 einstellen.
5 Bedienung
5.1 Änderung der ScheinwerferzuordnungUm z. B. bei der Verwendung zweier PARL-40SETlinks und rechts auf einer Bühne beide Geräte überdieselben DMX-Kanäle spiegelsymmetrisch steu-ern zu können, ist die Zuordnung der einzelnenScheinwerfer zu den Steuerkanälen umkehrbar.
WARNUNG Blicken Sie nicht direkt in die LEDs,das kann zu Augenschäden führen.Beachten Sie, dass sehr schnelleLichtwechsel bei fotosensiblen Men-schen und Epileptikern epileptischeAnfälle auslösen können!
6
D
A
CH
Diese Bedienungsanleitung ist urheberrechtlich für MONACOR ® INTERNATIONAL GmbH & Co. KG ge schützt. Eine Reproduktion für eigene kommerzielle Zwecke – auch auszugsweise – ist untersagt.
Mit der Taste MODE (2) die gewünschte Zuord-nung auswählen. Wird im Display (3) „d“ angezeigt,gilt folgende Kanalzuordnung:
Kanal 1 – 4: erster Scheinwerfer (von links)
Kanal 5 – 8: zweiter Scheinwerfer
Kanal 9 – 12: dritter Scheinwerfer
Kanal 13 – 16: vierter Scheinwerfer
Wird im Display „dr“ angezeigt, gilt folgende Kanal-zuordnung:
Kanal 1 – 4: vierter Scheinwerfer (von links)
Kanal 5 – 8: dritter Scheinwerfer
Kanal 9 – 12: zweiter Scheinwerfer
Kanal 13 – 16: erster Scheinwerfer
5.2 Funktionen
6 Reinigung des GerätesDie Kunststoffscheiben vor den LEDs sollten inregelmäßigen Abständen, je nach Verschmutzungdurch Staub, Rauch oder andere Schmutzpartikelvon außen gereinigt werden. Nur dann kann dasLicht in maximaler Helligkeit abgestrahlt werden.Zum Säubern den Netzstecker aus der Steck-dose ziehen. Nur ein weiches, sauberes Tuch undein mildes Reinigungsmittel verwenden. Anschlie-ßend die Scheibe trocken wischen.
Zum Reinigen der anderen Gehäuseteile nur einweiches, sauberes Tuch benutzen. Auf keinen Falleine Flüssigkeit verwenden, diese könnte in dasGerät laufen und es beschädigen.
7 Technische Daten
Lichtquelle: . . . . . . . . . 4 × 146 LEDs (40 rote,68 grüne, 38 blaue)
Durchmesser: . . . . . 10 mmAbstrahlwinkel: . . . . 20°
Stromversorgung: . . . 230 V~ / 50 Hz
Leistungsaufnahme: . max. 70 VA
Einsatztemperatur: . . . 0 – 40 °C
Abmessungen: . . . . . . 915 × 275 × 62 mm
Gewicht: . . . . . . . . . . . 9,1 kg
Änderungen vorbehalten.
DMX-Wert Funktion
Kanal 1, 5, 9, 13: Rot-Anteil
0 – 255 Helligkeit Rot
Kanal 2, 6, 10, 14: Grün-Anteil
0 – 255 Helligkeit Grün
Kanal 3, 7, 11, 15: Blau-Anteil
0 – 255 Helligkeit Blau
Kanal 4, 8, 12, 16: Dimmer und Stroboskop
0 – 127 Dimmer
128 – 227 Stroboskop: langsam → schnell
228 – 255 maximale Helligkeit, Stroboskop aus
All operating elements and connections de -scribed can be found on page 2.
1 Operating Elements and Connections
1 Mains jack for connection to a socket (230 V~ /50 Hz) via the supplied mains cable
2 Button MODE to change the spotlight assign-ment to the DMX channels
3 Display
4 Buttons UP and DOWN to adjust the DMX startaddress
5 DMX signal output (3-pole XLR) for connectionto the DMX input of another DMX light effectunit;pin 1 = ground, 2 = DMX-, 3 = DMX+
6 DMX signal input (3-pole XLR) for connection ofa light controller;pin 1 = ground, 2 = DMX-, 3 = DMX+
7 Connection cable between the control unit andthe spotlight
8 Stand sleeve for mounting onto a lighting stand
9 Setscrew against accidental displacement ofthe spotlight
10 Setscrews; in case the spotlights do not keeptheir inclination as adjusted, retighten thesescrews
11 LED spotlight
2 Safety NotesThe unit corresponds to all required directives ofthe EU and is therefore marked with .
Please observe the following items in any case:
� The unit is suitable for indoor use only. Protect itagainst dripping water and splash water, high airhumidity, and heat (admissible ambient tempera-ture range 0 – 40 °C).
� Do not place any vessels filled with liquid, e. g.drinking glasses, on the unit.
� Do not operate the unit or immediately discon-nect the mains plug from the mains socket1. if the unit or the mains cable is visibly dam-
aged,2. if a defect might have occurred after the unit
was dropped or suffered a similar accident,3. if malfunctions occur.In any case the unit must be repaired by skilledpersonnel.
� Never pull the mains cable for disconnecting themains plug from the mains socket, always seizethe plug.
� For cleaning only use a dry, soft cloth, never usechemicals or water.
� No guarantee claims for the unit and no liabilityfor any resulting personal damage or materialdamage will be accepted if the unit is used forother purposes than originally intended, if it is notsafely mounted or not correctly operated, or if it isnot repaired in an expert way.
3 ApplicationsThe PARL-40SET consists of 4 flat LED spotlightsand the corresponding control unit. It serves as anillumination, e. g. on stage, in discotheques, andfestival rooms. As a light source, 146 extra bright10 mm LEDs are used in each spotlight. TheseLEDs have a low power consumption, a low heatdevelopment and a long life. The LEDs allow toradiate coloured light in the three primary colours(red, green and blue) and light which can be mixedfrom the primary colours by addition.
The set is designed for control via a DMX lightcontroller (16 DMX control channels). DMX is shortfor Digital Multiplex and allows the digital control ofseveral DMX units via a common control line.
The LED-4MC from “img Stage Line” is suitableas a basic, easy-to-handle controller. Thus, alsocolour transitions and (music-controlled) runninglight patterns and stroboscope effects are possible.
If the unit is to be put out of operationdefinitively, take it to a local recycling plantfor a disposal which is not harmful to theenvironment.
WARNING The unit uses hazardous mains volt-age. Leave servicing to skilled per-sonnel only; inexpert handling mayresult in electric shock.
7
GB
4 Setting into Operation
4.1 Mounting� Always place the unit so that during operation a
sufficient air circulation is ensured. The air ventsat the housing must not be covered in any case.
� The minimum distance to materials sensitive toheat should be 50 cm.
The PARL-40SET is provided for mounting onto alighting stand with a standard tube diameter of35 mm (e. g. PAST-400/SW from “img Stage Line”).For this purpose place the stand sleeve (8) onto thelighting stand and secure it with the screw.
IMPORTANT! The stand must be set up in a sta-ble way. Check all setscrews and tighten them, ifrequired.
To align the spotlights (11), release the respectivesetscrew [hexagon socket srew] (9) and turn andincline the spotlight into the desired direction. Makesure that the cable (7) will not be stretched orsqueezed. Then retighten the screw. If the spotlightshould not keep its adjusted inclination, retightenthe two screws (10).
4.2 Connecting the DMX light controllerThe unit may be operated via a universal light con-troller with DMX512 protocol (e. g. DMX-1440 orDMX-510USB from “img Stage Line”) or via thecompact LED-4MC.
For the DMX connection 3-pole XLR jacks withthe following contact configuration are available:
pin 1 = ground, 2 = DMX-, 3 = DMX+
For connection, special cables for high data flowshould be used. Standard microphone cables withscreening and a minimum cross section of 2 ×0.22 mm2 and with a capacity as low as possiblecan only be recommended for a total cable lengthof up to 100 m. For cable lengths exceeding 150 mit is recommended to insert a DMX level matchingamplifier (e. g. SR-103DMX from “img Stage Line”).
1) Connect the DMX input (6) to the DMX output ofthe light controller.
2) Connect the DMX output (5) to the DMX input ofthe following light effect unit; connect its outputagain to the input of the following unit, etc. untilall light effect units have been connected in achain.
3) Terminate the DMX output of the last DMX unitin the chain with a 120 Ω resistor (> 0.3 W): Con-nect a corresponding terminating plug (e. g.DLT-123 from “img Stage Line”) to the jack.
4.3 Power supplyConnect the supplied mains cable to the mains jack(1) first and then to a socket (230 V~ / 50 Hz). Thenthe unit is ready for operation and can be operatedvia a DMX light controller. To switch off, disconnectthe mains plug from the socket.
Caution: The unit must not be connected to themains voltage via a dimmer!
For a more convenient operation it is recom-mended to connect the unit to a socket which canbe switched on and off via a light switch.
4.4 Adjusting the DMX start addressTo be able to operate the set of spotlights with alight controller, its DMX start address has to beadjusted. For this purpose use the buttons UP andDOWN (4). The display (3) always shows the startaddress and the spotlight assignment (“d” or “dr”)alternately. After approx. 3 s, a change of the startaddress will be effective automatically.
If e. g. the addresses 10 to 25 on the DMX con-troller are provided to control the 16 channels of theset of spotlights, adjust the start address 10 on thePARL-40SET.
To control the set of spotlights via the LED-4MC,adjust start address 1.
5 Operation
5.1 Changing the spotlight assignmentTo be able to control two PARL-40SET units via thesame DMX channels e. g. when using them in amirror-inverted way on the left and right of a stage,the assignment of the individual spotlights to thecontrol channels can be reversed.
Select the desired assignment with the buttonMODE (2). If the display (3) shows “d”, the follow-ing channel assignment will apply:
channels 1 to 4: first spotlight (from the left)
channels 5 to 8: second spotlight
channels 9 to 12: third spotlight
channels 13 to 16: fourth spotlight
WARNING Never look directly into the LEDs;this may cause eye damage.Please note that fast changes inlighting, e. g. flashing light, may trig-ger epileptic seizures with photosen-sitive persons or persons withepilepsy!
8
GB

If the display shows “dr”, the following channelassignment will apply:
channels 1 to 4: fourth spotlight (from the left)
channels 5 to 8: third spotlight
channels 9 to 12: second spotlight
channels 13 to 16: first spotlight
5.2 Functions
6 Cleaning of the UnitThe plastic panes in front of the LEDs should becleaned from the outside at regular intervals,depending on impurities caused by dust, smoke orother dirt particles. Only this will ensure that thelight is radiated at maximum brightness. For clean-ing, disconnect the mains plug from the socket.Only use a soft, clean cloth and a mild detergent.Then wipe the pane dry.
For cleaning the other parts of the housing, onlyuse a soft, clean cloth. Never use any fluid; it mayleak into the unit and cause damage.
7 Specifications
Light source: . . . . . . . 4 × 146 LEDs (40 red, 68 green, 38 blue)
diameter: . . . . . . . . 10 mmbeam angle: . . . . . . 20°
Power supply: . . . . . . 230 V~ / 50 Hz
Power consumption: . 70 VA max.
Ambient temperature: 0 – 40 °C
Dimensions: . . . . . . . . 915 × 275 × 62 mm
Weight: . . . . . . . . . . . . 9.1 kg
Subject to technical modification.
DMX Value Functions
channels 1, 5, 9, 13: proportion of red
0 – 255 brightness of red
channels 2, 6, 10, 14: proportion of green
0 – 255 brightness of green
channels 3, 7, 11, 15: proportion of blue
0 – 255 brightness of blue
channels 4, 8, 12, 16: dimmer and stroboscope
0 – 127 dimmer
128 – 227 stroboscope: slow → fast
228 – 255 maximum brightness, stroboscope off
9
GB
All rights reserved by MONACOR ® INTERNATIONAL GmbH & Co. KG. No part of this instruction manual maybe reproduced in any form or by any means for any commercial use.

Vous trouverez page 2, lʼensemble des élé-ments et branchements.
1 Eléments et branchements1 Prise secteur à relier à une prise 230 V~ / 50 Hz
via le cordon secteur livré
2 Touche MODE pour modifier l'attribution desprojecteurs aux canaux DMX
3 Affichage
4 Touches UP et DOWN pour régler l'adresse dedémarrage DMX
5 Sortie signal DMX (XLR 3 pôles) pour brancherà l'entrée DMX d'un autre jeu de lumière DMX :Pin 1 = masse, 2 = DMX-, 3 = DMX+
6 Entrée signal DMX (XLR, 3 pôles) pour bran-cher à un contrôleur :Pin 1 = masse, 2 = DMX-, 3 = DMX+
7 Cordon de liaison entre l'unité de commande etle projecteur
8 Insert pour pied permettant un montage sur unpied de lumière
9 Vis de fixation pour éviter tout mouvement duprojecteur par erreur
10 Vis de réglages : si les projecteurs ne conser-vent pas leur inclinaison réglée, vissez forte-ment les vis
11 Projecteur à LEDS
2 Conseils dʼutilisation et de sécurité
Lʼappareil répond à toutes les directives néces-saires de lʼUnion européenne et porte donc le sym-bole .
Respectez scrupuleusement les points suivants :
� Lʼappareil nʼest conçu que pour une utilisation enintérieur. Protégez-le de tout type de projectionsd'eau, des éclaboussures, d'une humidité élevéede l'air et de la chaleur (plage de température defonctionnement autorisée : 0 – 40 °C).
� En aucun cas, vous ne devez pas poser d'objetcontenant du liquide ou un verre sur l'appareil.
� Ne faites pas fonctionner l'appareil ou débran-chez-le immédiatement du secteur lorsque :1. des dommages visibles apparaissent sur l'ap-
pareil ou sur le cordon secteur,2. après une chute ou un cas similaire, vous avez
un doute sur l'état de l'appareil,3. des dysfonctionnements apparaissent.Dans tous les cas, les dommages doivent êtreréparés par un technicien spécialisé.
� Ne débranchez jamais l'appareil en tirant sur lecordon secteur ; retirez toujours le cordon sec-teur en tirant la fiche.
� Pour le nettoyage, utilisez seulement un chiffonsec et doux, en aucun cas, de produits chimiquesou d'eau.
� Nous déclinons toute responsabilité en cas dedommages matériels ou corporels résultants sil'appareil est utilisé dans un but autre que celuipour lequel il a été conçu, s'il n'est pas montédʼune manière sûre, sʼil nʼest pas correctementutilisé ou n'est pas réparé par une personne habi-litée, en outre, la garantie deviendrait caduque.
3 Possibilités dʼutilisationLe PARL-40SET se compose de 4 projecteurs àLEDs très plats et d'une unité de commande cor-respondante. Il permet un éclairage par exemplesur scène, dans des discothèques ou salles desfêtes. Chaque projecteur possède 146 LEDs 10 mmextrêmement claires comme source lumineuse.Elles ont une faible consommation, un faible déga-gement de chaleur et une longue durée de vie. LesLEDs permettent de projeter une lumière de cou-leur dans les trois couleurs primaires (rouge, vert etbleu) et une lumière pouvant être mixée, par ajout,à partir des couleurs primaires.
Le set est configuré pour la gestion via uncontrôleur DMX (16 canaux de commande DMX).DMX est l'abréviation de Digital Multiplex et permetla gestion digitale de plusieurs appareils DMX viaun câble de commande commun.
Le LED-4MC de “img Stage Line” peut être uti-lisé comme contrôleur simple et facile à utiliser.Ainsi on peut également réaliser des transitions decouleurs et des modèles de lumière défilants(gérés par la musique) et des effets stroboscope.
Lorsque l'appareil est définitivement retirédu service, vous devez le déposer dansune usine de recyclage adaptée pourcontribuer à son élimination non polluante.
AVERTISSEMENT Lʼappareil est alimenté par unetension dangereuse. Ne touchezjamais l'intérieur de l'appareil !Risque de décharge électrique.
10
F
B
CH

4 Fonctionnement
4.1 Montage� Placez toujours l'appareil de telle sorte que pen-
dant son fonctionnement, une circulation suffi-sante de l'air soit assurée. Les ouïes de ventila-tion du boîtier ne doivent en aucun cas êtreobturées.
� La distance avec des matériaux sensibles à lachaleur devrait être de 50 cm au moins.
Le PARL-40SET est prévu pour un montage sur unpied de lumière avec un diamètre de tube standardde 35 mm (par exemple PAST-400 / SW de “imgStage Line”). Pour ce faire, placez l'insert pour pied(8) sur le pied de lumière et vissez avec la vis.
IMPORTANT ! Le pied doit être monté de manièresûre et solide. Vérifiez toutes les vis de réglages, sibesoin, revissez-les.
Pour orienter les projecteurs (11), desserrez la visde réglage (vis à six pans creux) correspondante(9), tournez et inclinez le projecteur dans la direc-tion voulue. Veillez à ce que le câble (7) ne soit pastordu ou étiré. Revissez ensuite la vis. Si le projec-teur ne conserve pas son inclinaison réglée, revis-sez les deux vis (10).
4.2 Branchement du contrôleur DMXL'appareil peut être utilisé avec un contrôleur uni-versel avec protocole DMX512 (par exemple DMX-1440 ou DMX-510USB de “img Stage Line”) ou viale LED-4MC compact.
Pour la connexion DMX, l'appareil possède desprises XLR 3 pôles avec la configuration suivante :
pin 1 = masse, 2 = DMX-, 3 = DMX+
Pour le branchement, il est recommandé d'utiliserdes câbles spécifiques pour des flots importants dedonnées. Lʼemploi de câbles micro usuels avecblindage et une section de 2 × 0,22 mm2 au moinset la capacité la plus faible possible n'est recom-mandé que pour des longueurs de câble de 100 mmaximum. Pour des longueurs de liaison à partir de150 m, il est recommandé d'insérer un amplifica-teur DMX de signal (par exemple SR-103DMX de“img Stage Line”).
1) Reliez lʼentrée DMX (6) à la sortie DMX ducontrôleur.
2) Reliez la sortie DMX (5) à lʼentrée DMX du jeude lumière suivant. Reliez sa sortie à lʼentrée duprochain appareil et ainsi de suite jusquʼà ce quetous les jeux de lumière soient reliés dans unechaîne.
3) Terminez la sortie DMX du dernier jeu delumière DMX de la chaîne avec une résistance120 Ω (> 0,3 W) : reliez un bouchon correspon-dant (par exemple DLT-123 de “img Stage Line”)à la prise.
4.3 AlimentationReliez le cordon secteur livré tout d'abord à la prise(1) et l'autre extrémité du cordon à une prise sec-teur 230 V~ / 50 Hz. L'appareil est alors prêt à fonc-tionner et peut être géré via un contrôleur DMX.Pour éteindre, débranchez le cordon secteur.
Attention : L'appareil ne doit pas être relié à la ten-sion d'alimentation via un dimmer.
Pour un meilleur confort dʼutilisation, il est recom-mandé de relier lʼappareil à une prise secteur pou-vant être allumée et éteinte via un interrupteur.
4.4 Réglage de l'adresse de démarrage DMXPour pouvoir utiliser le set avec un contrôleur, il fautrégler son adresse de démarrage DMX. Pour cefaire, utilisez les touches UP et DOWN (4).L'adresse de démarrage est indiquée sur l'affi-chage (3) toujours en alternance avec l'attributiondes projecteurs (“d” ou “dr”). Toute modification del'adresse de démarrage est effective automatique-ment 3 secondes plus tard.
Si par exemple sur le contrôleur DMX, lesadresses 10 à 25 sont prévues pour gérer les16 canaux du set, sur le PARL-40SET, réglezl'adresse de démarrage 10.
Si le set de projecteurs doit être géré via le LED-4MC, réglez l'adresse de démarrage 1.
5 Utilisation
5.1 Modification de l'attribution des projecteurs
Pour utiliser deux PARL-40SET via les mêmescanaux DMX, par exemple en mode miroir àgauche et à droite de la scène, l'attribution dechaque projecteur aux canaux de commande estréversible.
AVERTISSEMENT Ne regardez jamais directementles LEDs, cela pourrait causerdes troubles de la vision.N'oubliez pas que des change-ments très rapides de lumièrepeuvent déclencher des crisesd'épilepsie chez les personnesphotosensibles et épileptiques.
11
F
B
CH

Avec la touche MODE (2), sélectionnez l'attribu-tion souhaitée. Si sur l'affichage (3), “d” est visible,l'attribution des canaux est la suivante :
canal 1 – 4 premier projecteur(en partant de la gauche)
canal 5 – 8 deuxième projecteur
canal 9 – 12 troisième projecteur
canal 13 – 16 quatrième projecteur
Si sur l'affichage (3), “dr” est visible, l'attribution descanaux est la suivante :
canal 1 – 4 quatrième projecteur (en partant de la gauche)
canal 5 – 8 troisième projecteur
canal 9 – 12 deuxième projecteur
canal 13 – 16 premier projecteur
5.2 Fonctions
6 Nettoyage de l'appareilLes vitres plastiques devant les LEDs devraientêtre nettoyées régulièrement de l'extérieur, detoute poussière, fumée ou autres particules desalissure. C'est à cette condition que la lumièresera émise avec une luminosité maximale. Avantle nettoyage, débranchez la fiche secteur dusecteur. Utilisez uniquement un tissu propre etdoux et un produit de nettoyage doux. Essuyezpuis séchez la vitre.
Pour nettoyer les autres éléments du boîtier, uti-lisez exclusivement un tissu doux et propre. N'utili-sez en aucun cas de liquide, il pourrait couler dansl'appareil et créer des dégâts.
7 Caractéristiques techniques
Source de lumière : . . 4 × 146 LEDs (40 rouges,68 vertes, 38 bleues)
Diamètre : . . . . . . . 10 mmAngle de rayonnement : . . . . 20°
Alimentation : . . . . . . . 230 V~ / 50 Hz
Consommation : . . . . . 70 VA max.
Température fonc. : . . 0 – 40 °C
Dimensions : . . . . . . . 915 × 275 × 62 mm
Poids : . . . . . . . . . . . . 9,1 kg
Tout droit de modification réservé.
Valeur DMX Fonction
Canal 1, 5, 9, 13 : part de rouge
0 – 255 luminosité rouge
Canal 2, 6, 10, 14 : part de vert
0 – 255 luminosité vert
Canal 3, 7, 11, 15 : part de bleu
0 – 255 luminosité bleu
Canal 4, 8, 12, 16 : dimmer et stroboscope
0 – 127 dimmer
128 – 227 stroboscope : lent → rapide
228 – 255 luminosité maximale, stroboscope éteint
12
F
B
CH
Notice dʼutilisation protégée par le copyright de MONACOR ® INTERNATIONAL GmbH & Co. KG. Toute repro-duction même partielle à des fins commerciales est interdite.
A pagina 2 trovate tutti gli elementi di comandoe collegamenti descritti.
1 Elementi di comando e collegamenti
1 Presa per il collegamento con una presa di rete(230 V~ / 50 Hz) tramite il cavo in dotazione
2 Tasto MODE per cambiare lʼassegnazione deiproiettori rispetto ai canali DMX
3 Display
4 Tasti UP e DOWN per impostare lʼindirizzo distart DMX
5 Uscita dei segnali DMX (XLR a 3 poli) per il col-legamento con lʼingresso DMX di unʼulterioreunità per effetti di lucepin 1 = massa, 2 = DMX-, 3 = DMX+
6 Ingresso dei segnali DMX (XLR a 3 poli) per ilcollegamento di unʼunità di comando luce;pin 1 = massa, 2 = DMX-, 3 = DMX+
7 Cavo di collegamento fra unità di comando eproiettore
8 Boccola per stativo per il montaggio su uno sta-tivo per lampade
9 Vite di bloccaggio per escludere lo spostamentoinvolontario del proiettore
10 Viti di bloccaggio; se i proiettori non manten-gono lʼinclinazione impostata, stringere di più leviti
11 Proiettore a LED
2 Avvertenze di sicurezzaQuestʼapparecchio è conforme a tutte le direttiverichieste dellʼUE e pertanto porta la sigla .
Si devono osservare assolutamente anche iseguenti punti:
� Usare lʼapparecchio solo allʼinterno di locali e pro-teggerlo dallʼacqua gocciolante e dagli spruzzidʼacqua, da alta umidità dellʼaria e dal calore(temperatura dʼimpiego ammessa fra 0 e 40 °C).
� Non depositare sullʼapparecchio dei contenitoririempiti di liquidi, p. es. bicchieri.
� Non mettere in funzione lʼapparecchio e staccaresubito la spina rete se:
1. lʼapparecchio o il cavo rete presentano deidanni visibili;
2. dopo una caduta o dopo eventi simili sussisteil sospetto di un difetto;
3. lʼapparecchio non funziona correttamente.
Per la riparazione rivolgersi sempre ad unʼoffi-cina competente.
� Staccare il cavo rete afferrando la spina, senzatirare il cavo.
� Per la pulizia usare solo un panno morbido,asciutto; non impiegare in nessun caso prodottichimici o acqua.
� el caso dʼuso improprio, di montaggio non sicuro,dʼimpiego scorretto o di riparazione non a regoladʼarte dellʼapparecchio, non si assume nessunaresponsabilità per eventuali danni consequen-ziali a persone o a cose e non si assume nessunagaranzia per lʼapparecchio.
3 Possibilità dʼimpiegoIl PARL-40SET è composto da 4 proiettori piatti aLED con relativa unità di comando. Serve allʼillumi-nazione, p. es. sul palcoscenico, in discoteche o insale per feste. In ogni proiettore sono disposticome sorgenti luminose 146 LED superluminosi di10 mm che consumano poca corrente, sviluppanopoco calore e offrono una lunga durata. Con essi sipuò irradiare della luce colorata nei tre colori fon-damentali (rosso, verde e blu) nonché la luce che sipuò miscelare dai colori fondamentali.
Il set è previsto per il comando tramite unʼunitàDMX di comando luce (16 canali DMX di coman -do). DMX è lʼabbreviazione per Digital Multiplex epermette il comando digitale di più apparecchiDMX per mezzo di una linea comune di comando.
Come unità di comando semplice, manegge-vole, si può usare la LED-4MC di “img Stage Line”con la quale si possono effettuare anche dissol-venze di colori nonché disegni di luci scorrevoli(comandati dalla musica) ed effetti stroboscopici.
Se si desidera eliminare lʼapparecchiodefinitivamente, consegnarlo per lo smalti-mento ad unʼistituzione locale per il rici-claggio.
AVVERTIMENTO Lʼapparecchio funziona con peri-colosa tensione di rete. Non inter-venire mai personalmente al suointerno! Esiste il pericolo di unascarica elettrica.
13
I

4 Messa in funzione
4.1 Montaggio� Collocare lʼapparecchio sempre in modo tale che
durante il funzionamento sia garantita una circo-lazione sufficiente dellʼaria. Le aperture di aera-zione del contenitore non devono essere copertein nessun caso.
� La distanza da materiali sensibili al calore nondeve essere inferiore a 50 cm.
Il PARL-40SET è previsto per il montaggio su unostativo per lampade con diametro standard del tubodi 35 mm (p. es. PAST-400/SW di “img StageLine”). Inserire la boccola (8) sullo stativo e assicu-rarla con la vite.
IMPORTANTE! Lo stativo deve essere collocato inmodo sicuro. Verificare tutte le viti di fissaggio estringerle se necessario.
Per orientare i proiettori (11) allentare la relativavite di bloccaggio [brugola] (9) e girare o inclinare ilproiettore come desiderato. Fare attenzione che ilcavo (7) non venga tirato o schiacciato. Quindistringere nuovamente la vite. Se un proiettore nondovesse mantenere lʼinclinazione impostata, strin-gere di più le due viti (10).
4.2 Collegare unʼunità di comando luceIl comando può essere fatto per mezzo di unʼunitàuniversale di comando luce con protocolloDMX512 (p. es. DMX-1440 o DMX-510USB di “imgStage Line”) oppure per mezzo della LED-4MCcompatta.
Per il collegamento DMX sono presenti dei con-tatti XLR a 3 poli con la seguente piedinatura:
pin 1 = massa, 2 = DMX-, 3 = DMX+
Per il collegamento si dovrebbero usare cavi spe-ciali per un forte flusso di dati. Lʼimpiego di normalicavi schermati per microfoni di sezione minima di2 × 0,22 mm2 e con capacità possibilmente bassa èconsigliabile solo nel caso di una lunghezza com-plessiva inferiore a 100 m. Nel caso di lunghezzeoltre i 150 m si consiglia per principio lʼimpiego diun amplificatore DMX (p. es. SR-103DMX di “imgStage Line”).
1) Collegare lʼingresso DMX (6) con lʼuscita DMXdellʼunità di comando luce.
2) Collegare lʼuscita DMX (5) con lʼingresso DMXdellʼunità successiva per effetti di luce, e la suauscita con lʼingresso del apparecchio a valle, fin-ché tutte le unità per effetti di luce sono collegateformando una catena.
3) Terminare lʼuscita DMX dellʼultima unità DMXdella catena con una resistenza di 120 Ω(> 0,3 W): inserire nella presa un terminatoreadatto (p. es. DLT-123 di “img Stage Line”).
4.3 AlimentazioneInserire il cavo rete in dotazione prima nella presa(1) e quindi in una presa di rete (230 V~ / 50 Hz). Aquesto punto, lʼapparecchio è pronto per lʼuso epuò essere comandato da unʼunità DMX dicomando luce. Per spegnere, staccare la spinadella presa.
Attenzione: Lʼapparecchio non deve essere colle-gato con la tensione di rete per mezzo di un dim-mer!
Per maggiore comodità è consigliabile collegarelʼapparecchio con una presa di rete comandata daun interruttore di luce.
4.4 Impostare lʼindirizzo di start DMXPer poter comandare il set di proiettori con unʼunitàdi comando luce, occorre impostare il suo indirizzodi start DMX. Per fare ciò usare i tasti UP e DOWN(4). Lʼindirizzo di start è visualizzato sul display (3),alternandosi con lʼassegnazione dei proiettori (“d” o“dr”). Dopo 3 s ca., una modifica dellʼindirizzo distart ha effetto automaticamente.
Se, per esempio, sullʼunità di comando DMX, gliindirizzi 10 a 25 sono previsti per il comando dei16 canali del set di proiettori, impostare sul PARL-40SET lʼindirizzo di start 10.
Se il set di proiettori deve essere comandato tra-mite la LED-4MC impostare lʼindirizzo di start 1.
5 Funzionamento
5.1 Modifica dellʼassegnazione dei proiettori
Per esempio, usando due PARL-40SET a sinistra ea destro del palcoscenico, per poter comandareentrambi tramite gli stessi canali DMX in modorispecchiato, lʼassegnazione dei singoli proiettoririspetto ai canali di comando è reversibile.
AVVERTIMENTO Non guardare direttamente neiLED per escludere possibili danniagli occhi.Tenete presente che i velocicambi di luce possono provocareattacchi dʼepilessia presso per-sone fotosensibili o epilettici!
14
I

Con il tasto MODE (2) si sceglie lʼassegnazionedesiderata. Se sul display (3) si vede “d”, è validala seguente assegnazione dei canali:
Canali 1 – 4: primo proiettore (da sinistra)
Canali 5 – 8: secondo proiettore
Canali 9 – 12: terzo proiettore
Canali 13 – 16: quarto proiettore
Se sul display si vede “dr”, è valida la seguenteassegnazione dei canali:
Canali 1 – 4: quarto proiettore (da sinistra)
Canali 5 – 8: terzo proiettore
Canali 9 – 12: secondo proiettore
Canali 13 – 16: primo proiettore
5.2 Funzioni
6 Pulizia dellʼapparecchioAd intervalli regolari, a seconda della presenza dipolvere, di fumo o di altre particelle, conviene pulirei dischi di plastica posti davanti ai LED. Solo allorala luce può essere irradiata alla massima lumino-sità. Per la pulizia staccare la spina dalla presa.Usare solo un panno morbido, pulito e un deter-gente delicato. Quindi asciugare i dischi.
Per pulire le altre parti del contenitore usare soloun panno morbido, pulito. Non usare in nessuncaso dei liquidi che potrebbero penetrare nellʼap-parecchio danneggiandolo.
7 Dati tecnici
Sorgenti luminosi: . . . 4 × 146 LED (40 rossi,68 verdi, 38 blu)
Diametro: . . . . . . . . 10 mmAngolo dʼirradiazione: . . . . . 20°
Alimentazione: . . . . . . 230 V~ / 50 Hz
Potenza assorbita: . . . max. 70 VA
Temperatura dʼesercizio: . . . . . . . . . 0 – 40 °C
Dimensioni: . . . . . . . . 915 × 275 × 62 mm
Peso . . . . . . . . . . . . . . 9,1 kg
Con riserva di modifiche tecniche.
Valore DMX Funzione
Canali 1, 5, 9, 13: Parte di rosso
0 – 255 Luminosità rosso
Canali 2, 6, 10, 14: Parte di verde
0 – 255 Luminosità verde
Canali 3, 7, 11, 15: Parte di blu
0 – 255 Luminosità blu
Canali 4, 8, 12, 16: Dimmer e stroboscopio
0 – 127 Dimmer
128 – 227 Stroboscopio: lento → veloce
228 – 255 Luminosità massima, stroboscopio spento
15
I
La MONACOR ® INTERNATIONAL GmbH & Co. KG si riserva ogni diritto di elaborazione in qualsiasi forma dellepresenti istruzioni per lʼuso. La riproduzione – anche parziale – per propri scopi commerciali è vietata.
Todos los elementos de funcionamiento y lasconexiones que se describen pueden encon-trarse en la página 2.
1 Elementos de Funcionamiento y Conexiones
1 Toma de corriente para la conexión a unenchufe (230 V~ / 50 Hz) mediante el cable decorriente entregado
2 Botón MODE para cambiar la asignación deproyectores a los canales DMX
3 Visualizador
4 Botones UP y DOWN para ajustar la direcciónde inicio DMX
5 Salida de señal DMX (XLR 3 polos) para conec-tar a la entrada DMX de otro aparato de efectosde luces DMX;Pin 1 = masa, 2 = DMX-, 3 = DMX+
6 Entrada de señal DMX (XLR 3 polos) paraconectar un controlador;Pin 1 = masa, 2 = DMX-, 3 = DMX+
7 Cable de conexión entre el controlador y el pro-yector
8 Vaso para el montaje en un pie
9 Tornillo de presión contra desplazamientosaccidentales del proyector
10 Tornillos de presión; si los proyectores no man-tienen su inclinación ajustada, apriete de nuevoestos tornillos
11 Proyector LED
2 Notas de SeguridadEl aparato cumple con todas las directivas requeri-das por la UE y por lo tanto está marcado con elsímbolo .
Preste atención a los siguientes puntos bajo cual-quier circunstancia:
� El aparato está adecuado sólo para utilizarlo eninteriores. Proteja el aparato de goteos y salpica-duras, elevada humedad del aire y calor (tempe-ratura ambiente admisible: 0 – 40 ºC).
� No coloque ningún recipiente lleno de líquidoencima del aparato, como por ejemplo un vaso.
� No utilice el aparato y desconecte inmediata-mente la toma de corriente del enchufe si:1. El aparato o el cable de corriente están visi-
blemente dañados.2. El aparato ha sufrido daños después de una
caída o accidente similar.3. No funciona correctamente.Sólo el personal cualificado puede reparar elaparato bajo cualquier circunstancia.
� No tire nunca del cable de corriente para desco-nectar el enchufe de la toma de corriente, tiresiempre del enchufe.
� Utilice sólo un paño suave y seco para la lim-pieza, no utilice nunca ni productos químicos niagua.
� No podrá reclamarse garantía o responsabilidadalguna por cualquier daño personal o materialresultante si el aparato se utiliza para otros finesdiferentes a los originalmente concebidos, si nose monta de un modo seguro, no se utiliza ade-cuadamente o no se repara por expertos.
3 AplicacionesEl PARL-40SET está formado por 4 reflectoresLED planos y el correspondiente controlador. Sirvecomo iluminación p. ej. en escenarios, discotecas,o salas de fiestas. Como fuente de luz, se utilizan146 LEDs de 10 mm de gran brillo en cada proyec-tor. Estos LEDs tienen un bajo consumo, despren-den poco calor y tienen una larga duración. LosLEDs permiten radiar luz coloreada en los trescolores primarios (rojo, verde, azul) y luz quepuede mezclarse con la suma de los colores pri-marios.
El conjunto está diseñado para el controlmediante un controlador DMX (16 canales de con-trol DMX). DMX es la abreviatura de Digital Multi-plex y permite el control digital de varios aparatosDMX mediante una línea de control común.
El LED-4MC de “img Stage Line” está adecuadocomo controlador básico y de fácil manejo. De estemodo se pueden hacer las transiciones de color yla ejecución de figuras luminosas (controladas pormúsica) y efectos estroboscópicos.
Si va a poner el aparato fuera de serviciodefinitivamente, llévelo a la planta de reci-claje de la zona para que su eliminaciónno sea perjudicial para el medio ambiente.
ADVERTENCIA El aparato utiliza un voltaje peli-groso. Deje el mantenimiento parael personal cualificado; el manejoinexperto puede producir una des-carga eléctrica.
16
E
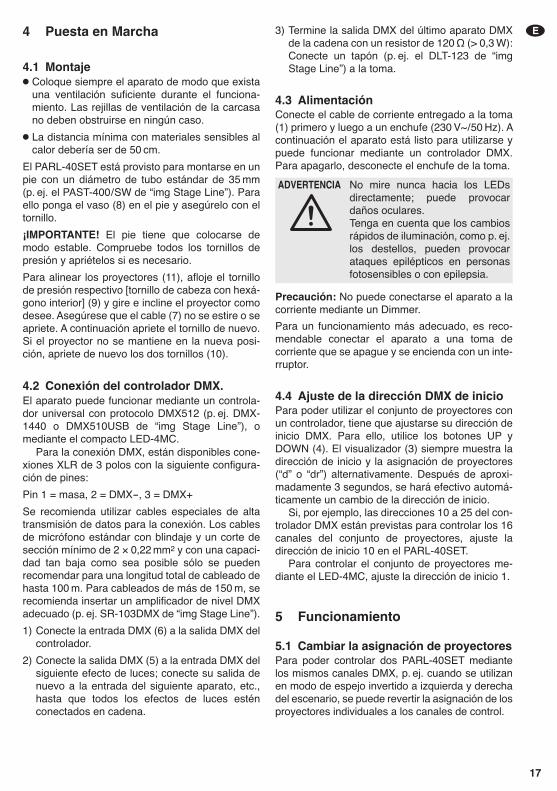
4 Puesta en Marcha
4.1 Montaje� Coloque siempre el aparato de modo que exista
una ventilación suficiente durante el funciona-miento. Las rejillas de ventilación de la carcasano deben obstruirse en ningún caso.
� La distancia mínima con materiales sensibles alcalor debería ser de 50 cm.
El PARL-40SET está provisto para montarse en unpie con un diámetro de tubo estándar de 35 mm(p. ej. el PAST-400 / SW de “img Stage Line”). Paraello ponga el vaso (8) en el pie y asegúrelo con eltornillo.
¡IMPORTANTE! El pie tiene que colocarse demodo estable. Compruebe todos los tornillos depresión y apriételos si es necesario.
Para alinear los proyectores (11), afloje el tornillode presión respectivo [tornillo de cabeza con hexá-gono interior] (9) y gire e incline el proyector comodesee. Asegúrese que el cable (7) no se estire o seapriete. A continuación apriete el tornillo de nuevo.Si el proyector no se mantiene en la nueva posi-ción, apriete de nuevo los dos tornillos (10).
4.2 Conexión del controlador DMX.El aparato puede funcionar mediante un controla-dor universal con protocolo DMX512 (p. ej. DMX-1440 o DMX510USB de “img Stage Line”), omediante el compacto LED-4MC.
Para la conexión DMX, están disponibles cone-xiones XLR de 3 polos con la siguiente configura-ción de pines:
Pin 1 = masa, 2 = DMX-, 3 = DMX+
Se recomienda utilizar cables especiales de altatransmisión de datos para la conexión. Los cablesde micrófono estándar con blindaje y un corte desección mínimo de 2 × 0,22 mm2 y con una capaci-dad tan baja como sea posible sólo se puedenrecomendar para una longitud total de cableado dehasta 100 m. Para cableados de más de 150 m, serecomienda insertar un amplificador de nivel DMXadecuado (p. ej. SR-103DMX de “img Stage Line”).
1) Conecte la entrada DMX (6) a la salida DMX delcontrolador.
2) Conecte la salida DMX (5) a la entrada DMX delsiguiente efecto de luces; conecte su salida denuevo a la entrada del siguiente aparato, etc.,hasta que todos los efectos de luces esténconectados en cadena.
3) Termine la salida DMX del último aparato DMXde la cadena con un resistor de 120 Ω (> 0,3 W):Conecte un tapón (p. ej. el DLT-123 de “imgStage Line”) a la toma.
4.3 AlimentaciónConecte el cable de corriente entregado a la toma(1) primero y luego a un enchufe (230 V~ / 50 Hz). Acontinuación el aparato está listo para utilizarse ypuede funcionar mediante un controlador DMX.Para apagarlo, desconecte el enchufe de la toma.
Precaución: No puede conectarse el aparato a lacorriente mediante un Dimmer.
Para un funcionamiento más adecuado, es reco-mendable conectar el aparato a una toma decorriente que se apague y se encienda con un inte-rruptor.
4.4 Ajuste de la dirección DMX de inicioPara poder utilizar el conjunto de proyectores conun controlador, tiene que ajustarse su dirección deinicio DMX. Para ello, utilice los botones UP yDOWN (4). El visualizador (3) siempre muestra ladirección de inicio y la asignación de proyectores(“d” o “dr”) alternativamente. Después de aproxi-madamente 3 segundos, se hará efectivo automá-ticamente un cambio de la dirección de inicio.
Si, por ejemplo, las direcciones 10 a 25 del con-trolador DMX están previstas para controlar los 16canales del conjunto de proyectores, ajuste ladirección de inicio 10 en el PARL-40SET.
Para controlar el conjunto de proyectores me -diante el LED-4MC, ajuste la dirección de inicio 1.
5 Funcionamiento
5.1 Cambiar la asignación de proyectoresPara poder controlar dos PARL-40SET mediantelos mismos canales DMX, p. ej. cuando se utilizanen modo de espejo invertido a izquierda y derechadel escenario, se puede revertir la asignación de losproyectores individuales a los canales de control.
ADVERTENCIA No mire nunca hacia los LEDsdirectamente; puede provocardaños oculares.Tenga en cuenta que los cambiosrápidos de iluminación, como p. ej.los destellos, pueden provocarataques epilépticos en personasfotosensibles o con epilepsia.
17
E
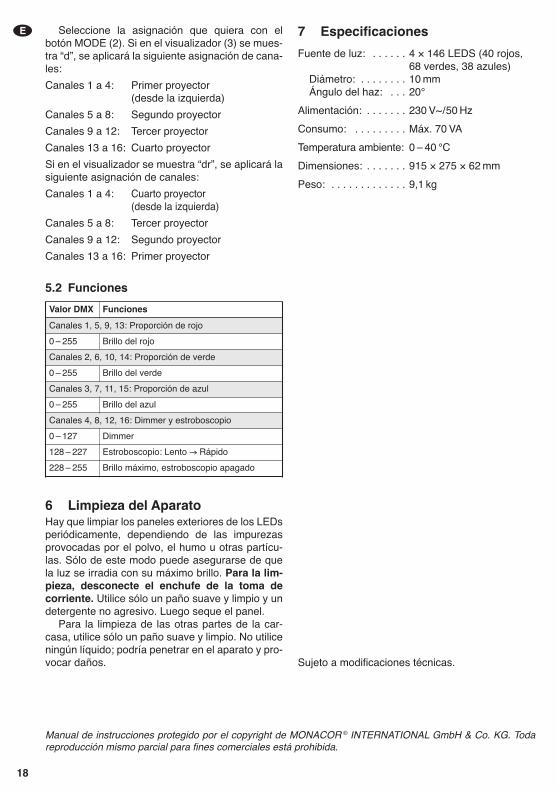
Seleccione la asignación que quiera con elbotón MODE (2). Si en el visualizador (3) se mues-tra “d”, se aplicará la siguiente asignación de cana-les:
Canales 1 a 4: Primer proyector (desde la izquierda)
Canales 5 a 8: Segundo proyector
Canales 9 a 12: Tercer proyector
Canales 13 a 16: Cuarto proyector
Si en el visualizador se muestra “dr”, se aplicará lasiguiente asignación de canales:
Canales 1 a 4: Cuarto proyector (desde la izquierda)
Canales 5 a 8: Tercer proyector
Canales 9 a 12: Segundo proyector
Canales 13 a 16: Primer proyector
5.2 Funciones
6 Limpieza del AparatoHay que limpiar los paneles exteriores de los LEDsperiódicamente, dependiendo de las impurezasprovocadas por el polvo, el humo u otras partícu-las. Sólo de este modo puede asegurarse de quela luz se irradia con su máximo brillo. Para la lim-pieza, desconecte el enchufe de la toma decorriente. Utilice sólo un paño suave y limpio y undetergente no agresivo. Luego seque el panel.
Para la limpieza de las otras partes de la car-casa, utilice sólo un paño suave y limpio. No utiliceningún líquido; podría penetrar en el aparato y pro-vocar daños.
7 Especificaciones
Fuente de luz: . . . . . . 4 × 146 LEDS (40 rojos,68 verdes, 38 azules)
Diámetro: . . . . . . . . 10 mmÁngulo del haz: . . . 20°
Alimentación: . . . . . . . 230 V~ / 50 Hz
Consumo: . . . . . . . . . Máx. 70 VA
Temperatura ambiente: 0 – 40 °C
Dimensiones: . . . . . . . 915 × 275 × 62 mm
Peso: . . . . . . . . . . . . . 9,1 kg
Sujeto a modificaciones técnicas.
Valor DMX Funciones
Canales 1, 5, 9, 13: Proporción de rojo
0 – 255 Brillo del rojo
Canales 2, 6, 10, 14: Proporción de verde
0 – 255 Brillo del verde
Canales 3, 7, 11, 15: Proporción de azul
0 – 255 Brillo del azul
Canales 4, 8, 12, 16: Dimmer y estroboscopio
0 – 127 Dimmer
128 – 227 Estroboscopio: Lento → Rápido
228 – 255 Brillo máximo, estroboscopio apagado
18
E
Manual de instrucciones protegido por el copyright de MONACOR ® INTERNATIONAL GmbH & Co. KG. Todareproducción mismo parcial para fines comerciales está prohibida.
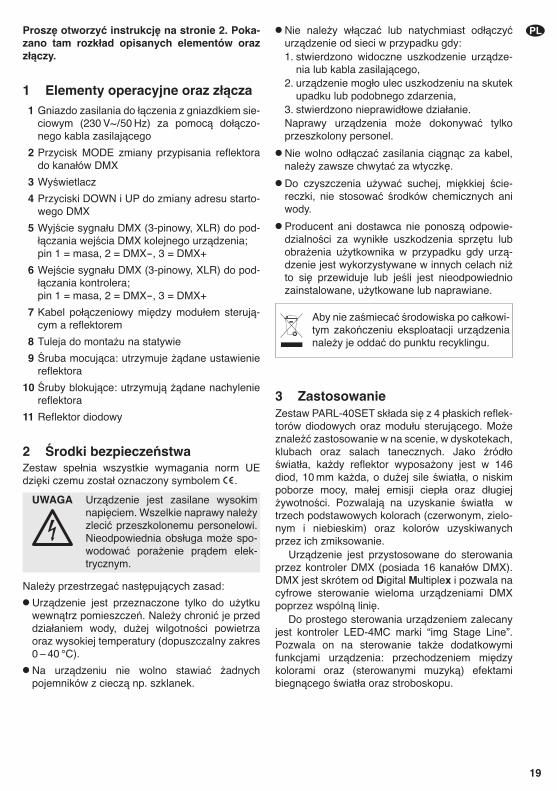
Proszę otworzyć instrukcję na stronie 2. Poka-zano tam rozkład opisanych elementów orazzłączy.
1 Elementy operacyjne oraz złącza 1 Gniazdo zasilania do łączenia z gniazdkiem sie-
ciowym (230 V~ / 50 Hz) za pomocą dołączo-nego kabla zasilającego
2 Przycisk MODE zmiany przypisania reflektorado kanałów DMX
3 Wyświetlacz
4 Przyciski DOWN i UP do zmiany adresu starto-wego DMX
5 Wyjście sygnału DMX (3-pinowy, XLR) do pod-łączania wejścia DMX kolejnego urządzenia;pin 1 = masa, 2 = DMX-, 3 = DMX+
6 Wejście sygnału DMX (3-pinowy, XLR) do pod-łączania kontrolera;pin 1 = masa, 2 = DMX-, 3 = DMX+
7 Kabel połączeniowy między modułem sterują-cym a reflektorem
8 Tuleja do montażu na statywie
9 Śruba mocująca: utrzymuje żądane ustawieniereflektora
10 Śruby blokujące: utrzymują żądane nachyleniereflektora
11 Reflektor diodowy
2 Środki bezpieczeństwa Zestaw spełnia wszystkie wymagania norm UEdzięki czemu został oznaczony symbolem .
Należy przestrzegać następujących zasad:
� Urządzenie jest przeznaczone tylko do użytkuwewnątrz pomieszczeń. Należy chronić je przeddziałaniem wody, dużej wilgotności powietrzaoraz wysokiej temperatury (dopuszczalny zakres0 – 40 °C).
� Na urządzeniu nie wolno stawiać żadnychpojemników z cieczą np. szklanek.
� Nie należy włączać lub natychmiast odłączyćurządzenie od sieci w przypadku gdy:1. stwierdzono widoczne uszkodzenie urządze-
nia lub kabla zasilającego,2. urządzenie mogło ulec uszkodzeniu na skutek
upadku lub podobnego zdarzenia,3. stwierdzono nieprawidłowe działanie.Naprawy urządzenia może dokonywać tylkoprzeszkolony personel.
� Nie wolno odłączać zasilania ciągnąc za kabel,należy zawsze chwytać za wtyczkę.
� Do czyszczenia używać suchej, miękkiej ście-reczki, nie stosować środków chemicznych aniwody.
� Producent ani dostawca nie ponoszą odpowie-dzialności za wynikłe uszkodzenia sprzętu lubobrażenia użytkownika w przypadku gdy urzą-dzenie jest wykorzystywane w innych celach niżto się przewiduje lub jeśli jest nieodpowiedniozainstalowane, użytkowane lub naprawiane.
3 ZastosowanieZestaw PARL-40SET składa się z 4 płaskich reflek-torów diodowych oraz modułu sterującego. Możeznaleźć zastosowanie w na scenie, w dyskotekach,klubach oraz salach tanecznych. Jako źródłoświatła, każdy reflektor wyposażony jest w 146diod, 10 mm każda, o dużej sile światła, o niskimpoborze mocy, małej emisji ciepła oraz długiejżywotności. Pozwalają na uzyskanie światła wtrzech podstawowych kolorach (czerwonym, zielo-nym i niebieskim) oraz kolorów uzyskiwanychprzez ich zmiksowanie.
Urządzenie jest przystosowane do sterowaniaprzez kontroler DMX (posiada 16 kanałów DMX).DMX jest skrótem od Digital Multiplex i pozwala nacyfrowe sterowanie wieloma urządzeniami DMXpoprzez wspólną linię.
Do prostego sterowania urządzeniem zalecanyjest kontroler LED-4MC marki “img Stage Line”.Pozwala on na sterowanie także dodatkowymifunkcjami urządzenia: przechodzeniem międzykolorami oraz (sterowanymi muzyką) efektamibiegnącego światła oraz stroboskopu.
Aby nie zaśmiecać środowiska po całkowi-tym zakończeniu eksploatacji urządzenianależy je oddać do punktu recyklingu.
UWAGA Urządzenie jest zasilane wysokimnapięciem. Wszelkie naprawy należyzlecić przeszkolonemu personelowi.Nieodpowiednia obsługa może spo-wodować porażenie prądem elek-trycznym.
19
PL

4 Przygotowanie do pracy
4.1 Montaż� Należy zawsze zapewnić swobodną cyrkulację
powietrza wokół urządzenia. Nie wolno takżezakrywać otworów wentylacyjnych.
� Minimalny dystans od materiałów czułych nawysoką temperaturę wynosi 50 cm.
Zestaw PARL-40SET przystosowany jest do mon-tażu na statywie oświetleniowym o przekroju rury35 mm (np. PAST-400 / SW marki “img Stage Line”).W tym celu należy wykorzystać tuleję (8) i zabez-pieczyć połączenie śrubą.
UWAGA! Statyw musi być ustawiony w sposóbstabilny. Należy sprawdzić wszystkie śruby bloku-jące i dokręcić je jeśli trzeba.
Aby ustawić reflektory (11), poluzować odpowied-nie śruby [imbusowe] (9) i ustawić żądane skiero-wanie reflektora. Upewnić się, że kabel połącze-niowy (7) nie będzie zgnieciony lub naciągnięty.Ponownie dokręcić śruby. Aby zmienić nachyleniereflektora, poluzować śruby (10).
4.2 Podłączanie kontrolera DMX Urządzenie może być sterowane poprzez sterow-nik światła z protokołem DMX512 (np. DMX-1440lub DMX-510USB marki “img Stage Line”) lub zapomocą kompaktowego kontrolera LED-4MC.
Złącze DMX w urządzeniu stanowi 3-pinowyXLR o następującej konfiguracji pinów:
pin 1 = masa, 2 = DMX-, 3 = DMX+
Do podłączania należy wykorzystać specjalnykabel o dużej przepływności danych, może to byćkabel mikrofonowy ze standardowym ekranowa-niem o przekroju żył minimum 2 × 0,22 mm2, możli-wie małej pojemności i długości do 100 m. Jeżelidługość przewodu przekracza 150 m, zalecane jest podłączenie wzmacniacza sygnału DMX (np.SR-103DMX marki “img Stage Line”).
1) Połączyć wejście DMX (6) z wyjściem DMX kon-trolera.
2) Podłączyć wyjście DMX (5) do wejścia DMXkolejnego efektu świetlnego. Kolejne urządzeniapodłączać analogicznie, aż wszystkie urządze-nia zostaną połączone.
3) Na wyjście DMX ostatniego z podłączonychpaneli podłączyć opornik 120 Ω (> 0,3 W) lubużyć gotowy wtyk terminujący (np. DLT-123marki “img Stage Line”).
4.3 Zasilanie Podłączyć dołączony kabel zasilający do gniazda(1) na urządzeniu, a następnie do gniazdka siecio-wego (230 V~ / 50 Hz). Urządzenie jest gotowe dopracy i może być sterowane przez kontroler DMX.Aby je wyłączyć, odłączyć wtyczkę od gniazdkasieciowego.
Uwaga: Nie wolno podłączać urządzenia do zasi-lania poprzez ściemniacz (dimmer)!
Aby ułatwić obsługę zaleca się podłączenie urzą-dzenia do gniazdka, które będzie włączane i wyłą-czane razem z oświetleniem.
4.4 Ustawianie adresu startowego DMX Aby móc sterować zestawem za pomocą kontro-lera DMX, konieczne jest ustawienie adresu starto-wego DMX. Służą do tego przyciski UP i DOWN(4). Wyświetlacz (3) zawsze pokazuje osobnoadres startowy oraz przypisanie reflektora (“d” lub“dr”). Aktualizacja wprowadzonego adresu nastę-puje automatycznie po około 3 sekundach.
Jeżeli do sterowania zestawem przewidzianoadresy 10 do 25 kontrolera DMX, ustawić adresstartowy 10 na PARL-40SET.
Do sterowania zestawem poprzez LED-4MCustawić adres startowy 1.
5 Obsługa
5.1 Zmiana przypisania reflektoraAby móc sterować dwoma zestawami PARL-40SET używając tych samych kanałów DMX np. do pracy przeciwnej po obu stronach sceny,konieczne jest odwrotne przypisanie reflektorów zposzczególnych zestawów do kanałów sterują-cych.
Wybrać żądane przypisanie przyciskiem MODE(2). Jeżeli wyświetlacz (3) pokazuje “d”, ustawionejest następujące przypisanie kanałów:
kanały 1 do 4: pierwszy reflektor (od lewej)
kanały 5 do 8: drugi reflektor
kanały 9 do 12: trzeci reflektor
kanały 13 do 16: czwarty reflektor
UWAGA Nie należy patrzeć bezpośrednio nadiody, silne światło może uszkodzićwzrok.Efekt stroboskopu i szybkie zmianyświatła mogą być groźne dla osóbwrażliwych na światło oraz chorychna epilepsję!
20
PL

Jeżeli wyświetlacz (3) pokazuje “dr”, ustawione jestnastępujące przypisanie kanałów:
kanały 1 do 4: czwarty reflektor (od lewej)
kanały 5 do 8: trzeci reflektor
kanały 9 do 12: drugi reflektor
kanały 13 do 16: pierwszy reflektor
5.2 Funkcje
6 Czyszczenie urządzeniaPanele przednie należy czyścić w regularnychodstępach czasowych, w zależności od warunkówpracy urządzenia. Zapewni to uzyskanie maksy-malnej jasności światła. Przed przystąpieniem doczyszczenia należy bezwzględnie odłączyćurządzenie od zasilania. Do czyszczenia obu-dowy używać suchej, miękkiej ściereczki orazłagodnych środków chemicznych. Następniewytrzeć do sucha.
Do czyszczenia obudowy należy używać tylkosuchej, miękkiej ściereczki. Nie wolno używaćwody ani żadnych środków chemicznych, którymogłyby dostać się do wnętrza urządzenia.
7 Specyfikacja
Źródło światła: . . . . . . 4 × 146 diod (40 czerwonych, 68 zielo-nych, 38 niebieskich)
wielkość: . . . . . . . . 10 mmkąt świecenia: . . . . 20°
Zasilanie: . . . . . . . . . . 230 V~ / 50 Hz
Pobór mocy: . . . . . . . . 70 VA max
Zakres temperatur: . . 0 – 40 °C
Wymiary: . . . . . . . . . . 915 × 275 × 62 mm
Waga: . . . . . . . . . . . . . 9,1 kg
Z zastrzeżeniem możliwości zmian.
Wartość DMX Funkcje
kanały 1, 5, 9, 13: proporcja czerwonego
0 – 255 jasność czerwonego
kanały 2, 6, 10, 14: proporcja zielonego
0 – 255 jasność zielonego
kanały 3, 7, 11, 15: proporcja niebieskiego
0 – 255 jasność niebieskiego
kanały 4, 8, 12, 16: ściemniacz i stroboskop
0 – 127 ściemniacz
128 – 227 stroboskop: wolno → szybko
228 – 255 max jasność, stroboskop wyłączony
21
PL
Instrukcje obsługi są chronione prawem copyright for MONACOR ® INTERNATIONAL GmbH & Co. KG. Prze-twarzanie całości lub części instrukcji dla osobistych korzyści finansowych jest zabronione.

22
Lees aandachtig de onderstaande veiligheidsvoor-schriften, alvorens het toestel in gebruik te nemen.Mocht u bijkomende informatie over de bedieningvan het toestel nodig hebben, lees dan de En gelsetekst van deze handleiding.
VeiligheidsvoorschriftenHet apparaat is in overeenstemming met alle vereisteEU-Richtlijnen en is daarom gekenmerkt met .
Let eveneens op het volgende:
� OPGELET:Kijk niet rechtstreeks in de LEDʼs, omdat dit deogen kan beschadigen. Weet dat stroboscoopef-fecten en zeer snelle lichtwisselingen bij fotosen-sibele mensen en epileptici epileptische aanval-len kunnen veroorzaken!
� Het apparaat is enkel geschikt voor gebruik bin-nenshuis; vermijd druip- en spatwater, plaatsenmet een hoge vochtigheid en uitzonderlijk warmeplaatsen (toegestaan omgevingstemperatuurbe-reik: 0 – 40 °C).
� Plaats geen bekers met vloeistof zoals drinkgla-zen etc. op het apparaat.
� Schakel het apparaat niet in of trek onmiddellijkde stekker uit het stopcontact,1. wanneer het apparaat of het netsnoer zicht-
baar beschadigd is,2. wanneer er een defect zou kunnen optreden
nadat het apparaat bijvoorbeeld is gevallen,3. wanneer het apparaat slecht functioneert.Het apparaat moet in elk geval worden herstelddoor een gekwalificeerd vakman.
� Trek de stekker nooit met het snoer uit het stop-contact, maar met de stekker zelf.
� Verwijder het stof met een droge, zachte doek.Gebruik zeker geen water of chemicaliën.
� In geval van ongeoorloofd of verkeerd gebruik,onveilige montage, foutieve bediening of van her-stelling door een niet-gekwalificeerd persoonvervalt de garantie en de aansprakelijkheid voorhieruit resulterende materiële of lichamelijkeschade.
Montage� Plaats het apparaat steeds zo, dat bij het gebruik
voldoende ventilatie is gegarandeerd. De venti-latieopeningen in de behuizing mogen in geengeval zijn afgedekt.
� De afstand tot het bestraalde voorwerp moet tenminste 50 cm bedragen.
Wanneer het apparaat definitief uit bedrijfwordt genomen, bezorg het dan voormilieuvriendelijke verwerking aan eenplaatselijk recyclagebedrijf.
WAARSCHUWING De netspanning van de appa-raat is levensgevaarlijk. Openhet apparaat niet, en zorg datu niets in de ventilatieopenin-gen steekt! U loopt het risicovan een elektrische schok.
NL
B
23
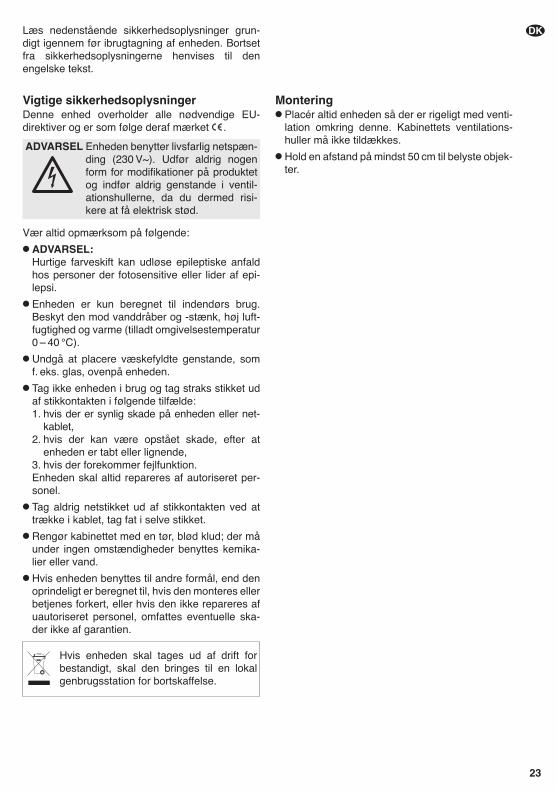
DKLæs nedenstående sikkerhedsoplysninger grun-digt igennem før ibrugtagning af enheden. Bortsetfra sikkerhedsoplysningerne henvises til denengelske tekst.
Vigtige sikkerhedsoplysningerDenne enhed overholder alle nødvendige EU-direktiver og er som følge deraf mærket .
Vær altid opmærksom på følgende:
� ADVARSEL:Hurtige farveskift kan udløse epileptiske anfaldhos personer der fotosensitive eller lider af epi-lepsi.
� Enheden er kun beregnet til indendørs brug.Beskyt den mod vanddråber og -stænk, høj luft-fugtighed og varme (tilladt omgivelsestemperatur0 – 40 °C).
� Undgå at placere væskefyldte genstande, somf. eks. glas, ovenpå enheden.
� Tag ikke enheden i brug og tag straks stikket udaf stikkontakten i følgende tilfælde:1. hvis der er synlig skade på enheden eller net-
kablet,2. hvis der kan være opstået skade, efter at
enheden er tabt eller lignende,3. hvis der forekommer fejlfunktion.Enheden skal altid repareres af autoriseret per-sonel.
� Tag aldrig netstikket ud af stikkontakten ved attrække i kablet, tag fat i selve stikket.
� Rengør kabinettet med en tør, blød klud; der måunder ingen omstændigheder benyttes kemika-lier eller vand.
� Hvis enheden benyttes til andre formål, end denoprindeligt er beregnet til, hvis den monteres ellerbetjenes forkert, eller hvis den ikke repareres af uautoriseret personel, omfattes eventuelle ska-der ikke af garantien.
Montering� Placér altid enheden så der er rigeligt med venti-
lation omkring denne. Kabinettets ventilations-huller må ikke tildækkes.
� Hold en afstand på mindst 50 cm til belyste objek-ter.
Hvis enheden skal tages ud af drift forbestandigt, skal den bringes til en lokalgenbrugsstation for bortskaffelse.
ADVARSEL Enheden benytter livsfarlig netspæn-ding (230 V~). Udfør aldrig nogenform for modifikationer på produktetog indfør aldrig genstande i ventil-ationshullerne, da du dermed risi-kere at få elektrisk stød.
24
Läs igenom säkerhetsföreskrifterna innan enhetentas i bruk. Ytterligare information återfinns påövriga språk i manualen.
SäkerhetsföreskrifterEnheten uppfyller alla krav enligt EU och har därförförsetts med symbolen .
Ge även akt på följande
� VARNING:Titta aldrig direkt in i ljuskällan. Risk för perma-nent ögonskada föreligger. Observera att snabbaljusväxlingar kan ge upphov till epileptiska anfallhos känsliga personer.
� Enheten är endast avsedd för inomhusbruk.Enheten skall skyddas mot vätskor, hög värmeoch hög luftfuktighet. Arbetstemperatur 0 – 40grader C.
� Placera inte föremål innehållande vätskor, t. ex.dricksglas, på enheten.
� Tag omedelbart ur elsladden ur eluttaget omnågot av följande fel uppstår.1. Om enheten eller elsladden har synliga ska-
dor.2. Om enheten skadats av fall eller dylikt.3. Om andra felfunktioner uppstår.Enheten skall alltid lagas av kunnig personal.
� Drag aldrig ur kontakten genom att dra i sladden,utan ta tag i kontaktkroppen.
� Rengör endast med en ren och torr trasa, användaldrig vätskor i någon form då dessa kan rinna inoch orsaka kortslutning.
� Om enheten används för andra ändamål änavsett, om den monteras eller används på fel sätteller inte repareras av auktoriserad personal upp-hör alla garantier att gälla. I dessa fall tas ingetansvar för uppkommen skada på person ellermateriel.
Montering� Placera enheten så att luften kan cirkulera fritt
runt den och täpp inte till kylhålen i chassiet.
� Minimiavstånd till brännbara föremål är 50 cm.
Om enheten skall kasseras skall den läm-nas till återvinning.
VARNING Enheten använder hög spänninginternt (230 V~). Överlåt därför all ser-vice till auktoriserad verkstad. Stoppaaldrig in föremål i ventilationshålen påenheten då detta kan ge upphov tillelektriska överslag med risk för skadapå person och materiel.
S
Ole hyvä ja tutustu seuraaviin ohjeisiin varmistaak-sesi tuotteen turvallisen käytön. Tarvitessasi lisätie-toja tuotteen käytöstä löydät ne muun kielisistäkäyttöohjeista.
TurvallisuudestaLaite vastaa kaikkia vaadittuja EU direktiivejä, jotense on varustettu merkinnällä.
Ole hyvä ja huomioi seuraavat seikat:
� VAROITUS:Älä katso suoraan valonlähteeseen, se voi vauri-oittaa silmää. Erittäin nopeat valon muutoksetsaattavat laukaista epileptisen kohtauksen hen-kilöillä, jotka ovat valoherkkiä tai epileptisiä.
� Laitteet soveltuvat vain sisätilakäyttöön. Suojeleniitä kosteudelta, vedeltä ja kuumuudelta (sallittuympäröivä lämpötila 0 – 40 °C).
� Älä sijoita laitteen päälle mitään nestettä sisältä-vää, kuten vesilasia tms.
� Irrota virtajohto pistorasiasta, äläkä käynnistä lai-tetta, jos1. laitteessa tai virtajohdossa on havaittava vau-
rio,2. putoaminen tai muu vastaava vahinko on saat-
tanut aiheuttaa vaurion,3. laitteessa esiintyy toimintahäiriöitäKaikissa näissä tapauksissa laite tulee huollattaavaltuutetussa huollossa.
� Älä koskaan irrota virtajohtoa pistorasiasta joh-dosta vetämällä.
� Käytä puhdistamiseen pelkästään kuivaa, peh-meää kangasta. Älä käytä kemikaaleja tai vettä.
� Laitteen takuu raukeaa, eikä valmistaja, maahan-tuoja tai myyjä ota vastuuta mahdollisista välittö-mistä tai välillisistä vahingoista, jos laitetta on käy-tetty muuhun kuin alkuperäiseen käyttötarkoituk-seen, laitetta on taitamattomasti käytetty tai kyt-ketty tai jos laitetta on huollettu muussa kuin val-tuutetussa huollossa.
Asennus� Asenna laite aina siten, että riittävä ilmankierto
on varmistettu käytön aikana. Älä koskaan peitätuuletusaukkoja (esim. verhoilla).
� Minimi välimatkan valaistavaan kohteeseen pi-täisi olla 50 cm.
Kun laite poistetaan lopullisesti käytöstä,vie se paikalliseen kierrätyskeskukseenjälkikäsittelyä varten.
VAROITUS Laite toimii hengenvaarallisella jän-nitteellä (230 V~). Jätä huoltotoimetvaltuu tetun huoltoliikkeen tehtäväksi.Älä peitä tuuletusaukkoja. Asiantun-tematon käsittely saattaa aiheuttaasähköiskun vaaran.
25
FIN

Copyright© by MONACOR INTERNATIONAL GmbH & Co. KG, Bremen, Germany. All rights reserved. A-1153.99.01.08.2010®