Dmpi Sap Navigation
15
SAP NAVIGATION SAP NAVIGATION
Transcript of Dmpi Sap Navigation
8/3/2019 Dmpi Sap Navigation
http://slidepdf.com/reader/full/dmpi-sap-navigation 1/15
SAP NAVIGATION
SAP
NAVIGATION
8/3/2019 Dmpi Sap Navigation
http://slidepdf.com/reader/full/dmpi-sap-navigation 2/15
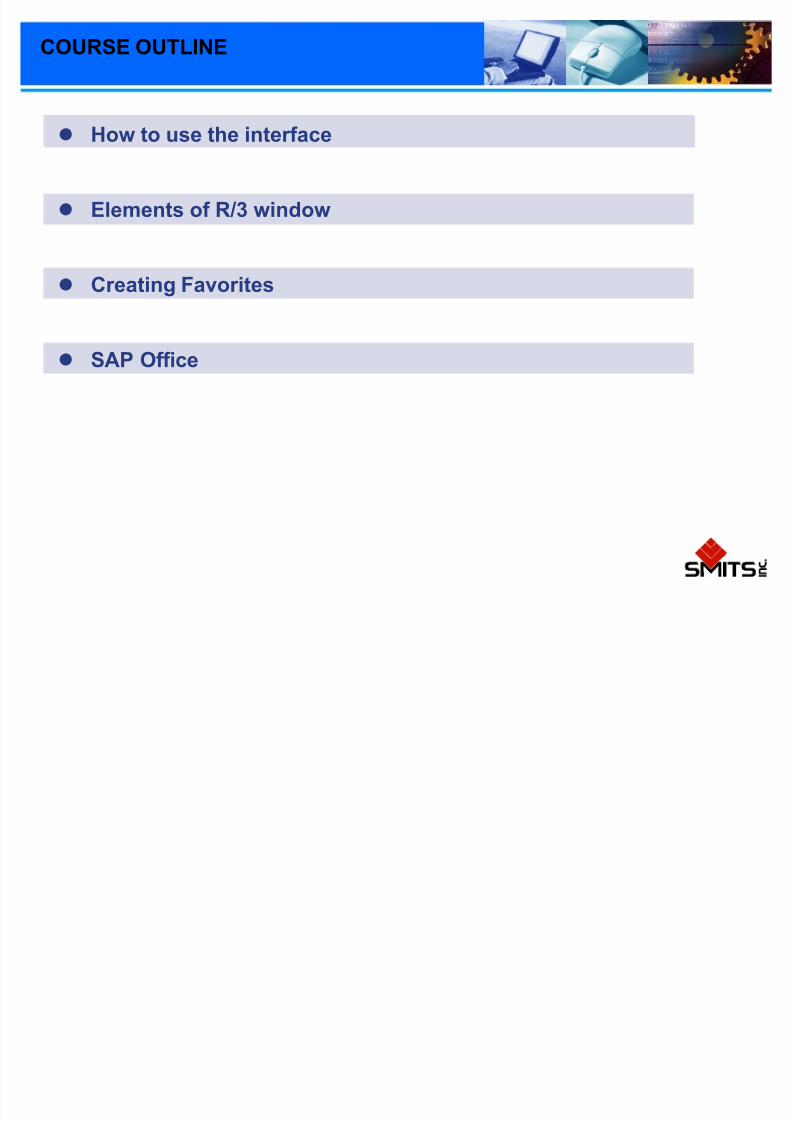
COURSE OUTLINE
How to use the interface
Elements of R/3 window
Creating Favorites
SAP Office
8/3/2019 Dmpi Sap Navigation
http://slidepdf.com/reader/full/dmpi-sap-navigation 3/15
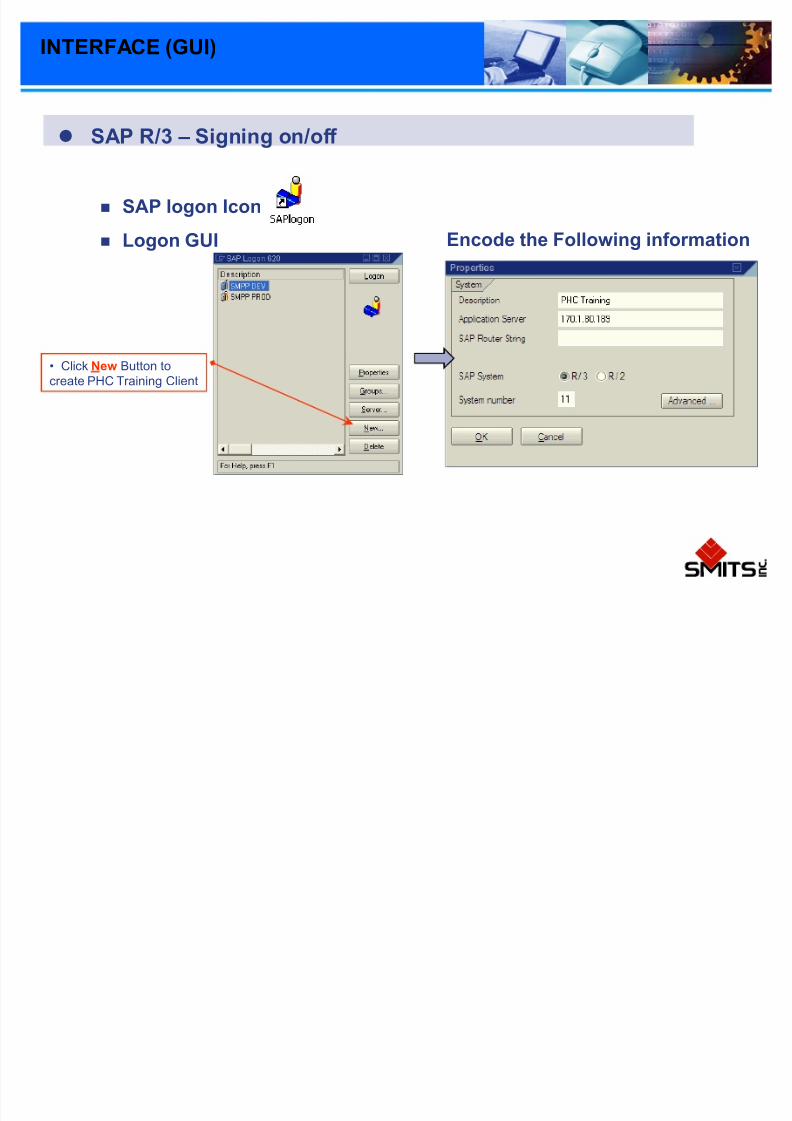
INTERFACE (GUI)
SAP R/3 ± Signing on/off
SAP logon Icon
Logon GUI
Click New Button to
create PHC Training Client
Encode the Following information

8/3/2019 Dmpi Sap Navigation
http://slidepdf.com/reader/full/dmpi-sap-navigation 4/15
After clicking the Enter button the system
will prompt you to change your password.
Then click confirm to activate the new
password
NOTE: User ID are locked after 3
unsuccessful logon attempts.
Client is defaulted to 230
User ID is TRAIN XX , where XX is 01 to 80
For first time users the initial password is
XXXXXXXX
Language is EN (English)
Client
User ID
Password
Language

8/3/2019 Dmpi Sap Navigation
http://slidepdf.com/reader/full/dmpi-sap-navigation 5/15
Signing off from SAP
On the SAP R/3 screen follow the menu path System >> Log off
8/3/2019 Dmpi Sap Navigation
http://slidepdf.com/reader/full/dmpi-sap-navigation 6/15
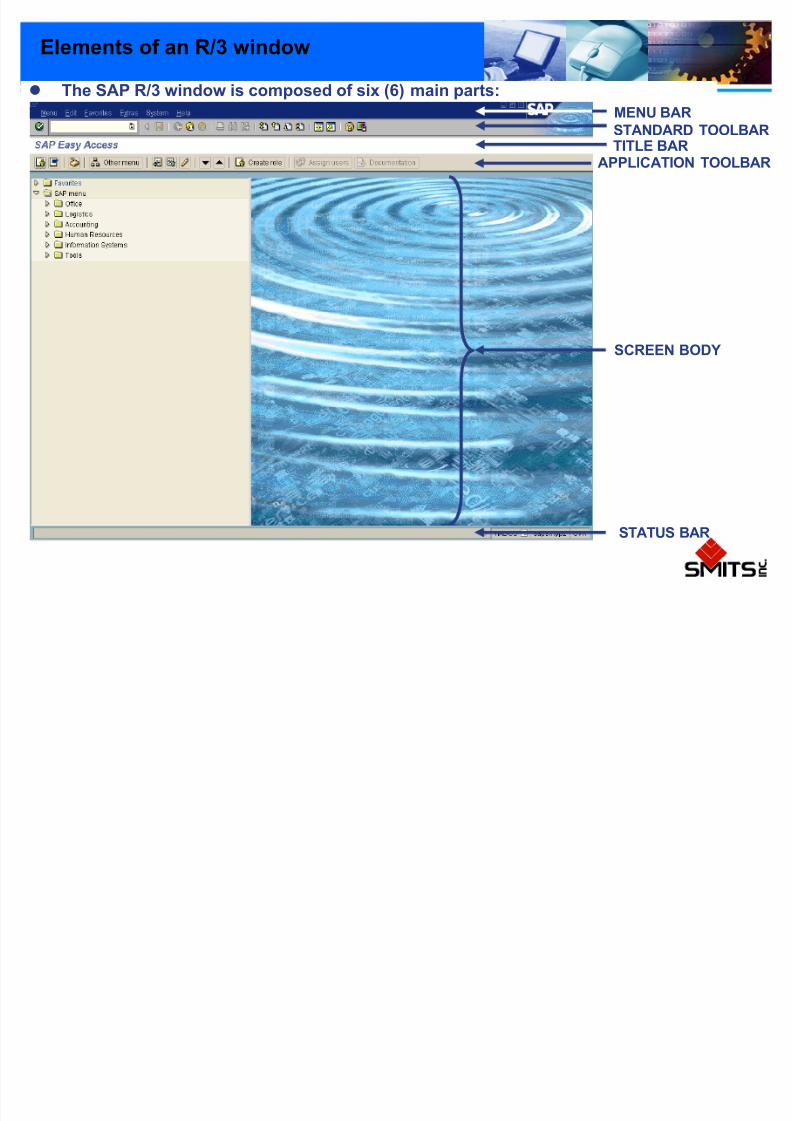
Elements of an R/3 window
The SAP R/3 window is composed of six (6) main parts:
MENU BAR
STANDARD TOOLBARTITLE BAR
APPLICATION TOOLBAR
SCREEN BODY
STATUS BAR
8/3/2019 Dmpi Sap Navigation
http://slidepdf.com/reader/full/dmpi-sap-navigation 7/15
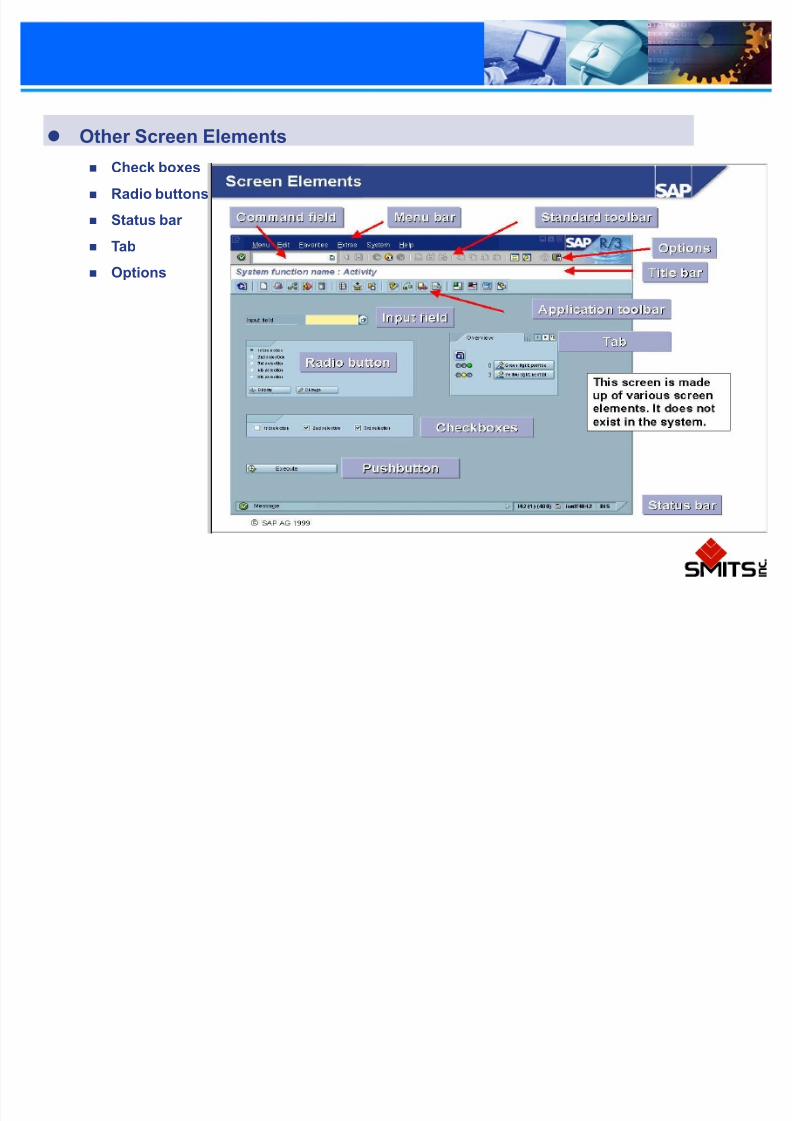
Other Screen Elements Check boxes
Radio buttons
Status bar
Tab
Options
8/3/2019 Dmpi Sap Navigation
http://slidepdf.com/reader/full/dmpi-sap-navigation 8/15
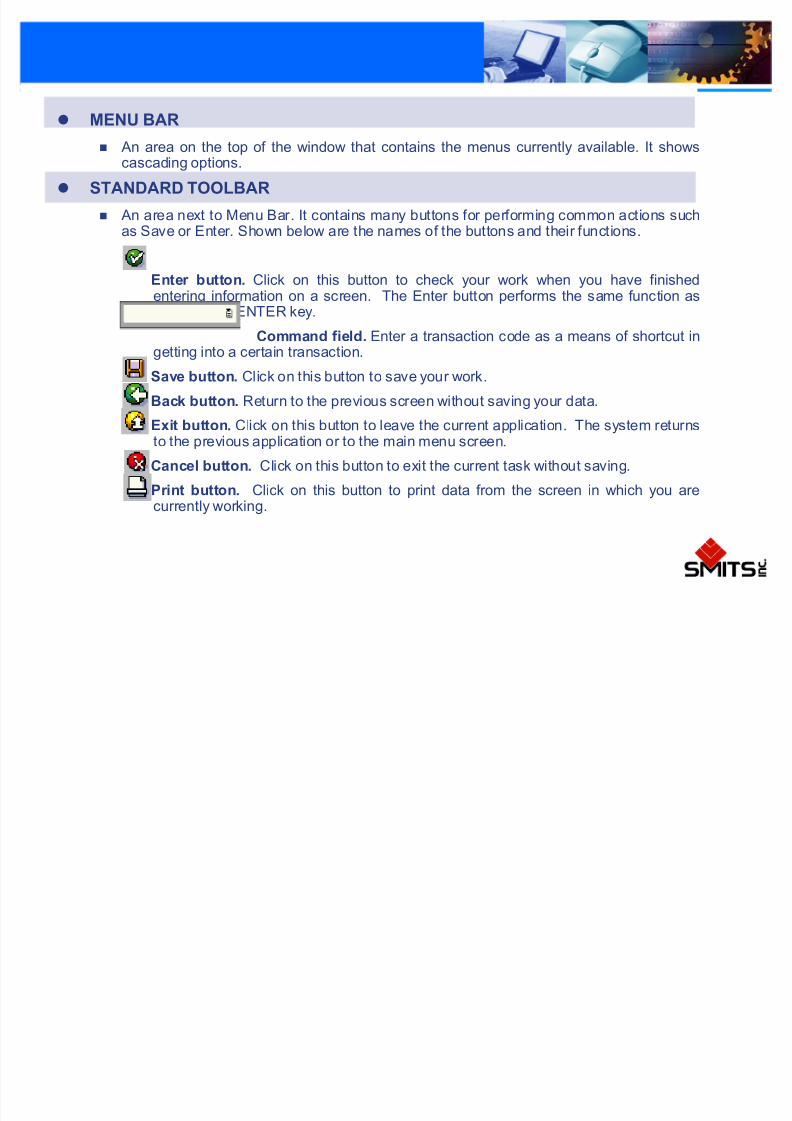
MENU BAR
An area on the top of the window that contains the menus currently available. It showscascading options.
STANDARD TOOLBAR
An area next to Menu Bar. It contains many buttons for performing common actions suchas Save or Enter. Shown below are the names of the buttons and their functions.
Enter button. Click on this button to check your work when you have finishedentering information on a screen. The Enter button performs the same function aspressing the ENTER key.
Command field. Enter a transaction code as a means of shortcut ingetting into a certain transaction.
Save button. Click on this button to save your work.
Back button. Return to the previous screen without saving your data.
Exit button. Click on this button to leave the current application. The system returnsto the previous application or to the main menu screen.
Cancel button. Click on this button to exit the current task without saving.
Print button. Click on this button to print data from the screen in which you arecurrently working.
8/3/2019 Dmpi Sap Navigation
http://slidepdf.com/reader/full/dmpi-sap-navigation 9/15
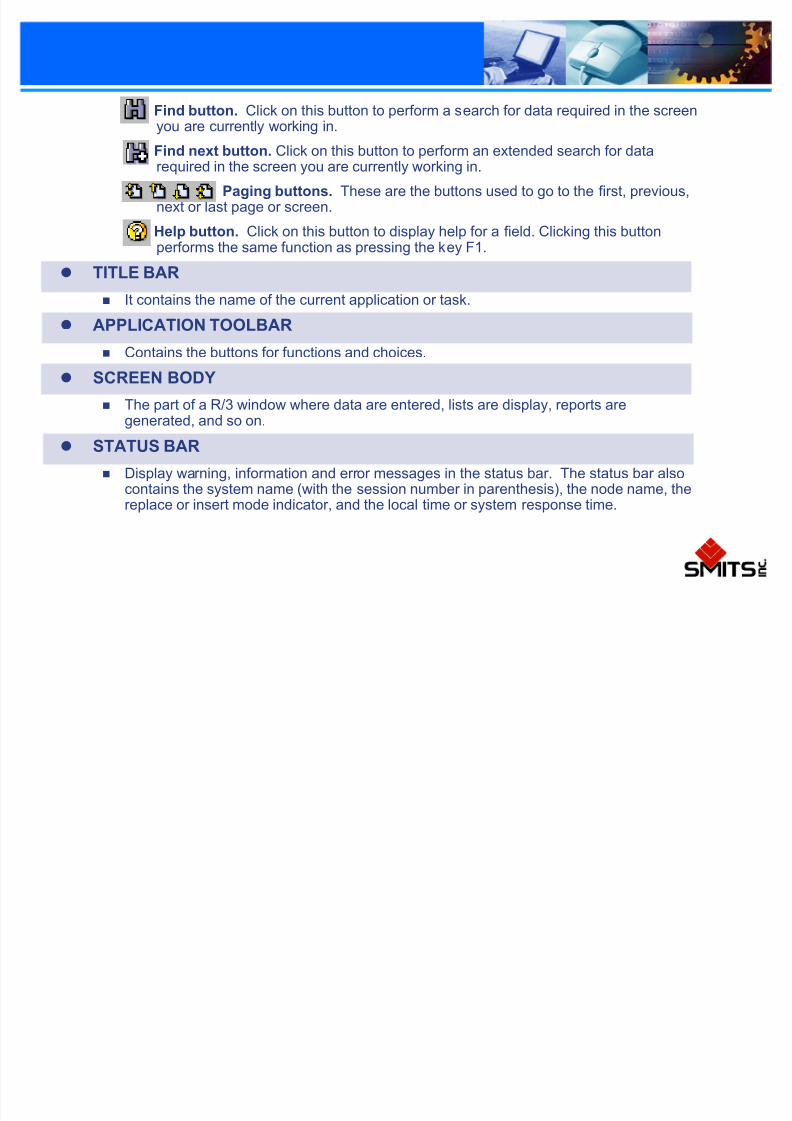
Find button. Click on this button to perform a search for data required in the screenyou are currently working in.
Find next button. Click on this button to perform an extended search for datarequired in the screen you are currently working in.
Paging buttons. These are the buttons used to go to the first, previous,next or last page or screen.
Help button. Click on this button to display help for a field. Clicking this buttonperforms the same function as pressing the key F1.
TITLE BAR It contains the name of the current application or task.
APPLICATION TOOLBAR
Contains the buttons for functions and choices.
SCREEN BODY
The part of a R/3 window where data are entered, lists are display, reports aregenerated, and so on.
STATUS BAR
Display warning, information and error messages in the status bar. The status bar alsocontains the system name (with the session number in parenthesis), the node name, thereplace or insert mode indicator, and the local time or system response time.
8/3/2019 Dmpi Sap Navigation
http://slidepdf.com/reader/full/dmpi-sap-navigation 10/15
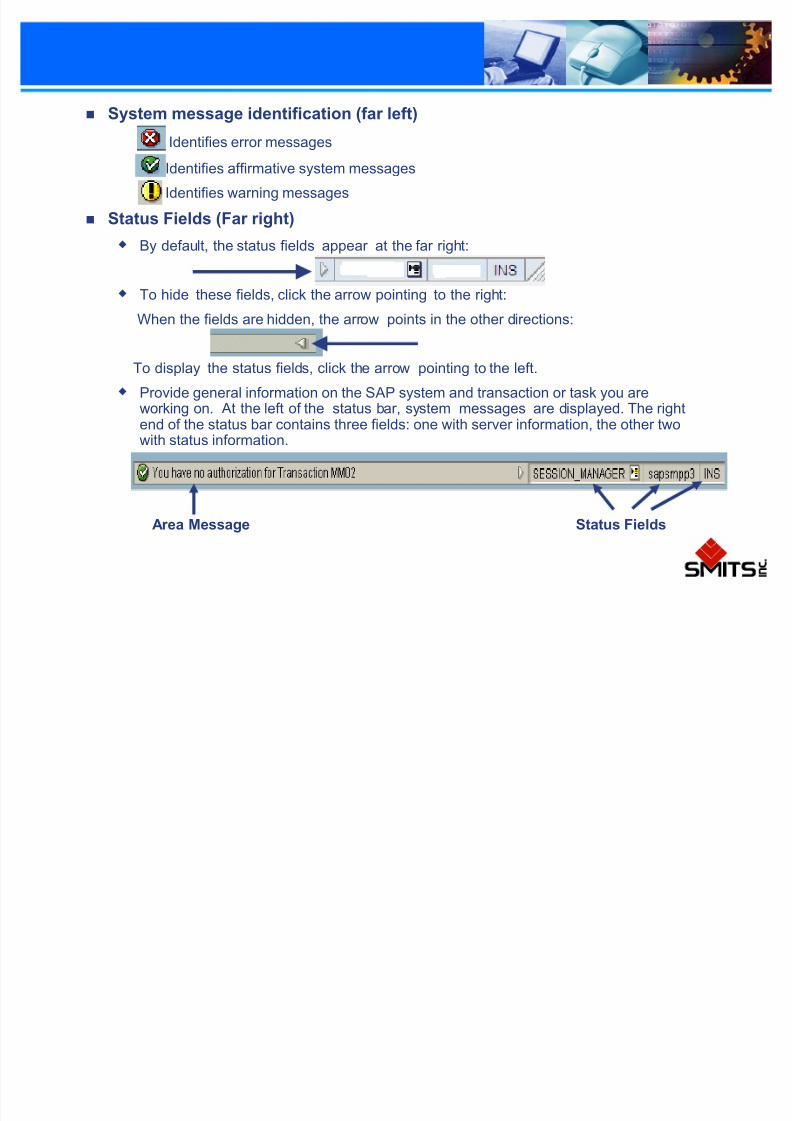
System message identification (far left)
Identifies error messages
Identifies affirmative system messages
Identifies warning messages
Status Fields (Far right)
By default, the status fields appear at the far right:
To hide these fields, click the arrow pointing to the right:
When the fields are hidden, the arrow points in the other directions:
To display the status fields, click the arrow pointing to the left.
Provide general information on the S AP system and transaction or task you are
working on. A
t the left of the status bar, system messages are displayed. The rightend of the status bar contains three fields: one with server information, the other twowith status information.
Area Message Status Fields
8/3/2019 Dmpi Sap Navigation
http://slidepdf.com/reader/full/dmpi-sap-navigation 11/15
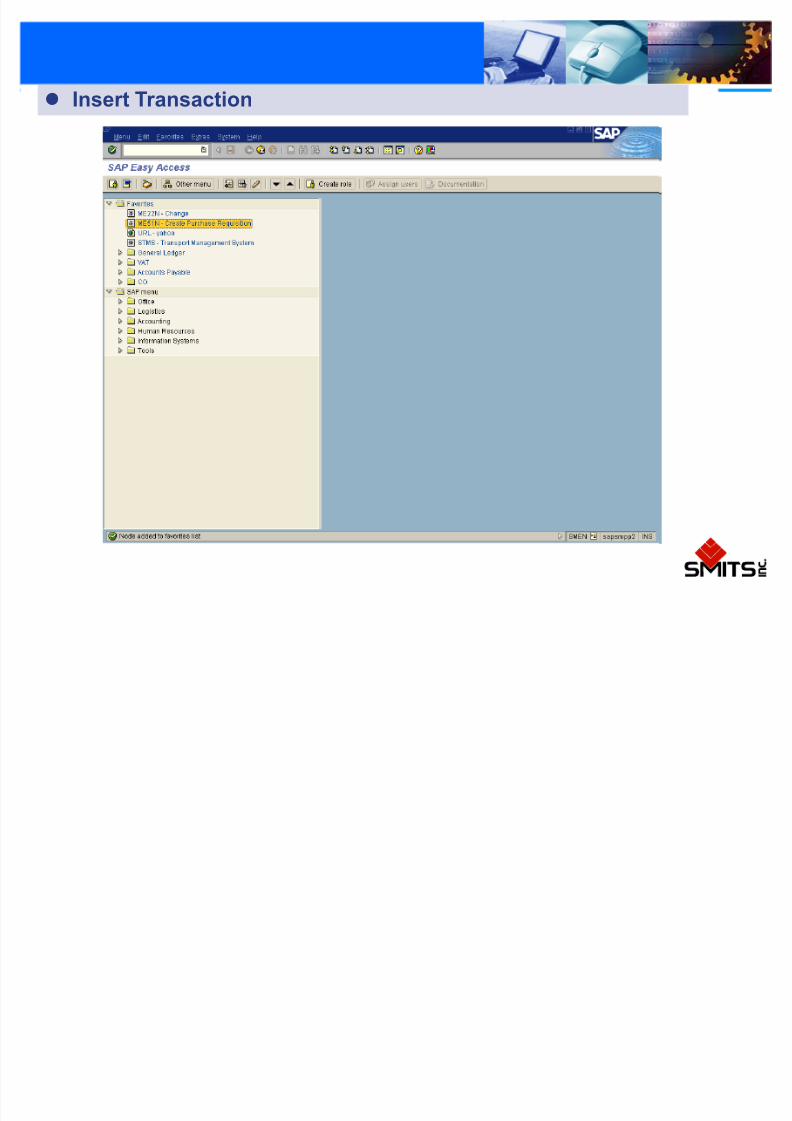
Insert Folders
Insert Transaction
8/3/2019 Dmpi Sap Navigation
http://slidepdf.com/reader/full/dmpi-sap-navigation 12/15
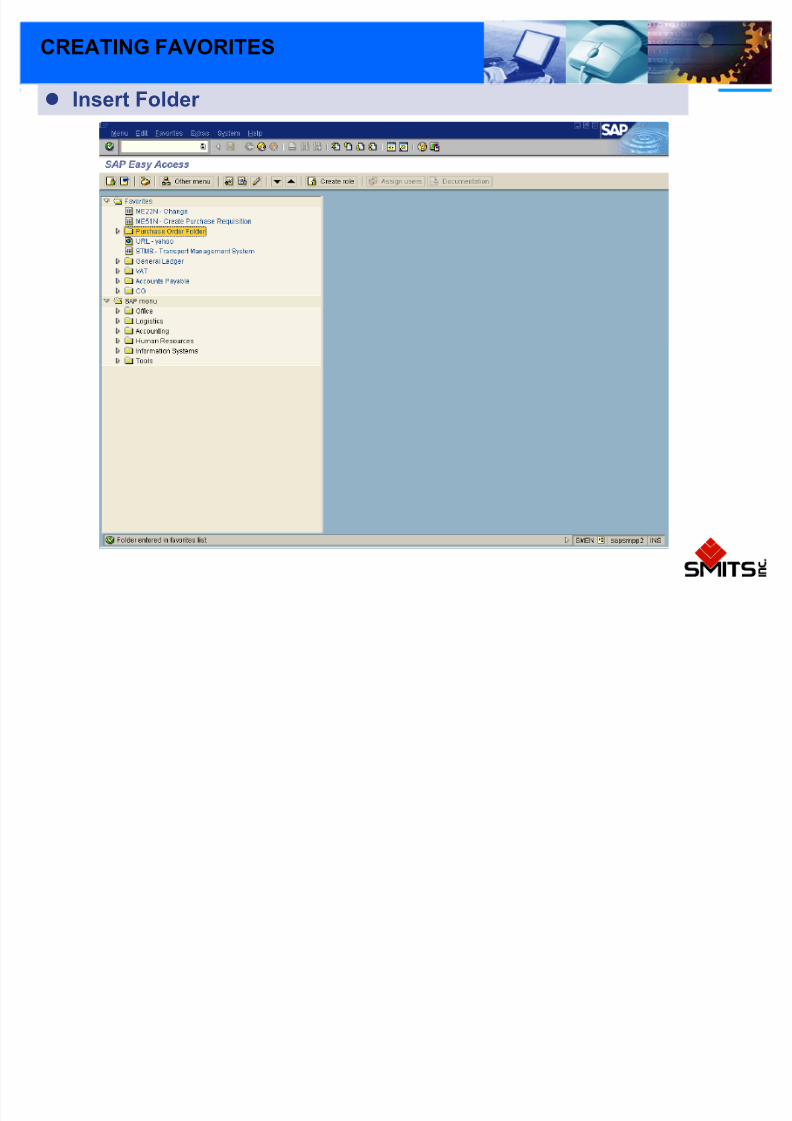
CREATING FAVORITES
Insert Folders
Insert Folder
8/3/2019 Dmpi Sap Navigation
http://slidepdf.com/reader/full/dmpi-sap-navigation 13/15
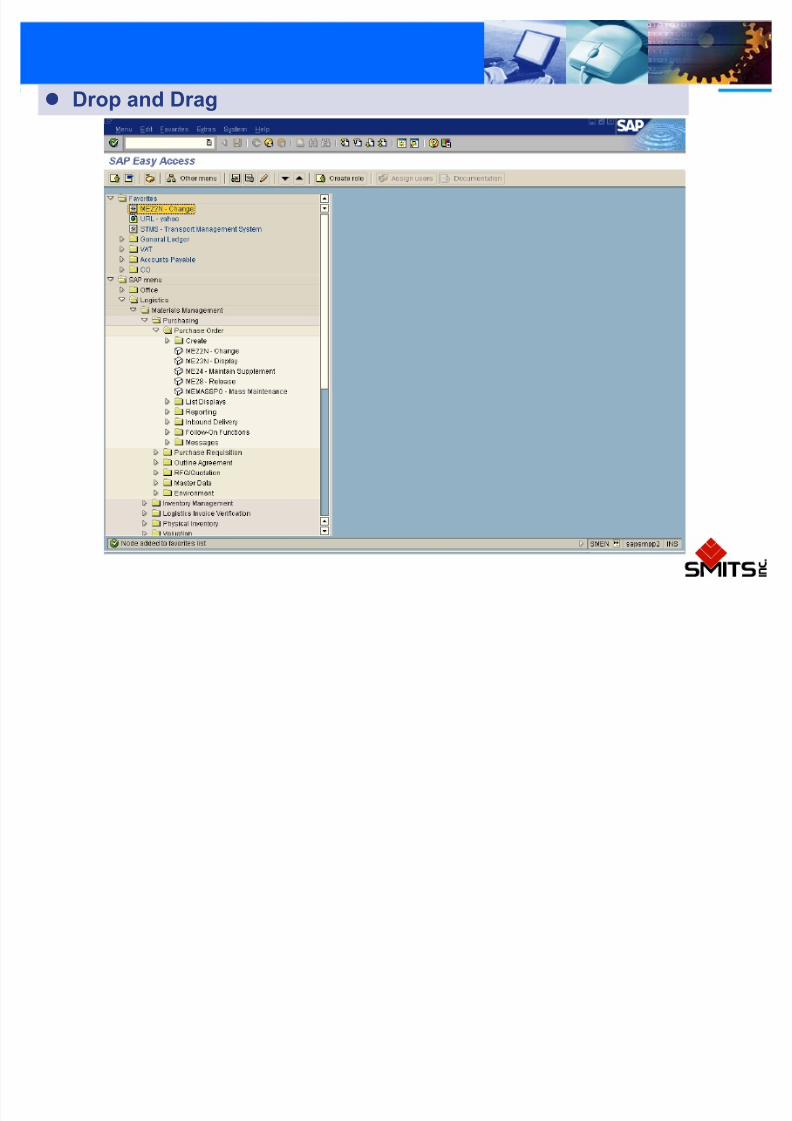
Drop and Drag

8/3/2019 Dmpi Sap Navigation
http://slidepdf.com/reader/full/dmpi-sap-navigation 14/15
- Add to favorites
- Deletes favorites
- Change favorites
- Move favorites down
- Move favorites up
ICONS:
8/3/2019 Dmpi Sap Navigation
http://slidepdf.com/reader/full/dmpi-sap-navigation 15/15
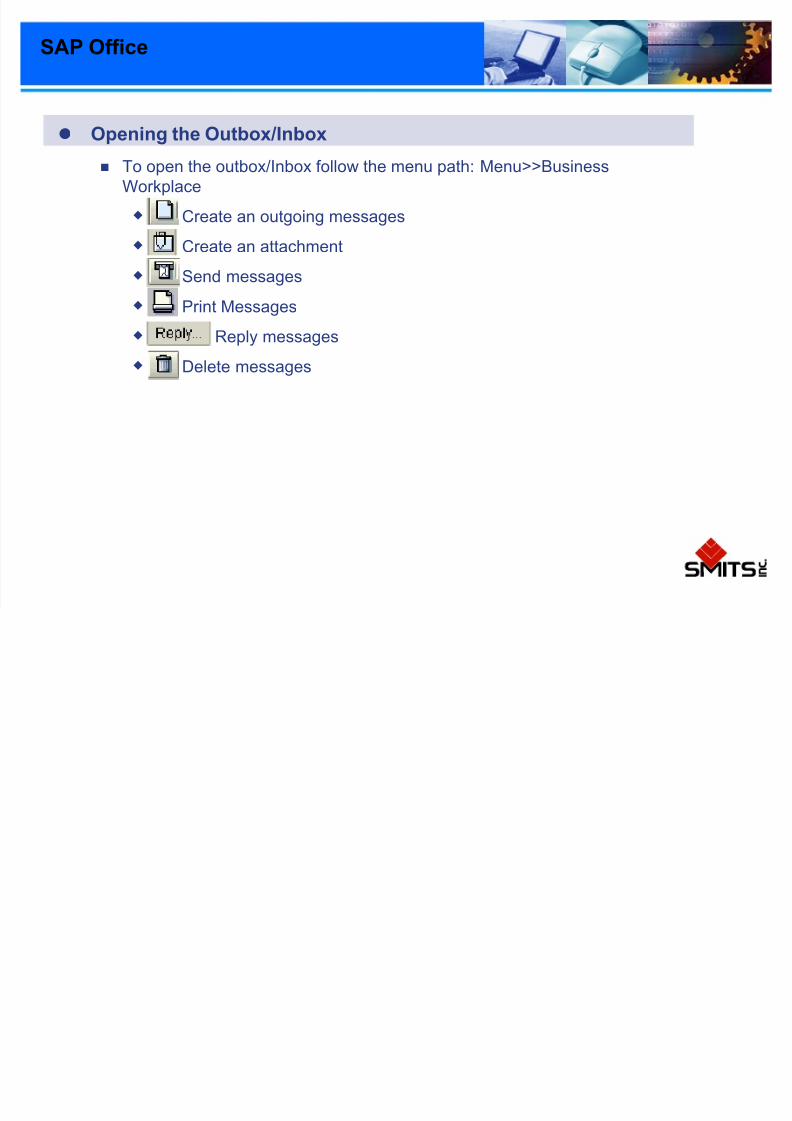
SAP Office
Opening the Outbox/Inbox To open the outbox/Inbox follow the menu path: Menu>>Business
Workplace
Create an outgoing messages
Create an attachment
Send messages
Print Messages
Reply messages
Delete messages


![SAP125 Sap Navigation 2005[1]](https://static.fdocuments.nl/doc/165x107/551503f7497959fd1d8b4ade/sap125-sap-navigation-20051.jpg)