Megaman II
46
By: Jeremy Stone Table of Contents I. Introduction II. The Object of the Game III. Controls (NES, PlayStation 2, and Game Cube) IV. The Basics V. The Robot Masters VI. Walkthrough a. Air Man b. Crash Man c. Flash Man d. Quick Man e. Bubble Man f. Heat Man g. Wood Man
Transcript of Megaman II
8/3/2019 Megaman II
http://slidepdf.com/reader/full/megaman-ii 1/46
By: Jeremy Stone
Table of Contents
I. Introduction
II. The Object of the Game
III. Controls (NES, PlayStation 2, and Game Cube)
IV. The Basics
V. The Robot Masters
VI. Walkthrougha. Air Man
b. Crash Man
c. Flash Man
d. Quick Man
e. Bubble Man
f. Heat Man
g. Wood Man
8/3/2019 Megaman II
http://slidepdf.com/reader/full/megaman-ii 2/46
h. Metal Man
i. Wily Stage 1
j. Wily Stage 2
k. Wily Stage 3
l. Wily Stage 4
m. Wily Stage 5n. Wily Form 1
o. Wily Form 2
p. Wily Stage 6
q. Wily Form 3
INTRODUCTION
Mega Man 2 is the sequel the super smash Mega Man. It originally debuted on the
Nintendo Entertainment System back in 1988 and then released on the Sega Genesis
in 1994 called Mega Man the Wily Wars. Mega Man 2 was also seen on the Game cube
and the PlayStation 2 consoles in the Mega Man Anniversary Collection. The version of
this walkthrough is done on the old tried and true NES version but I will also include
the control scheme for the PlayStation 2 and Game Cube versions as those are the
obvious changes. I didn’t include the Genesis control scheme as of the time of this
writing because I didn’t have access to The Wily Wars. The rest of the game is 100%
true to the original so you can actually use this guide on the Game Cube or the
PlayStation 2 as well. Isn’t that special? Well that’s enough with the blab so we willcontinue. Enjoy the Game!
THE OBJECT OF THE GAME
You play as Mega Man. If you have played the original Mega Man the mechanics are
still the same. Dr. Wily is out for revenge against Mega Man for ruining his plans
previously. This time he created eight different robots to counter Mega Man. Youmust battle each and every one of them and then navigate through Wily’s castle and
defeat him. The good thing about this game is that once you defeat the robot masters
you get their weapons and one robot’s weapon is a weakness against another’s. That
will be explained more at a later time.
Controls (Getting Mega Man to Do What You Want)

8/3/2019 Megaman II
http://slidepdf.com/reader/full/megaman-ii 3/46
Nintendo Entertainment System
Sony PlayStation 2 Computer Entertainment System
Nintendo Game Cube Video Game Console
8/3/2019 Megaman II
http://slidepdf.com/reader/full/megaman-ii 4/46
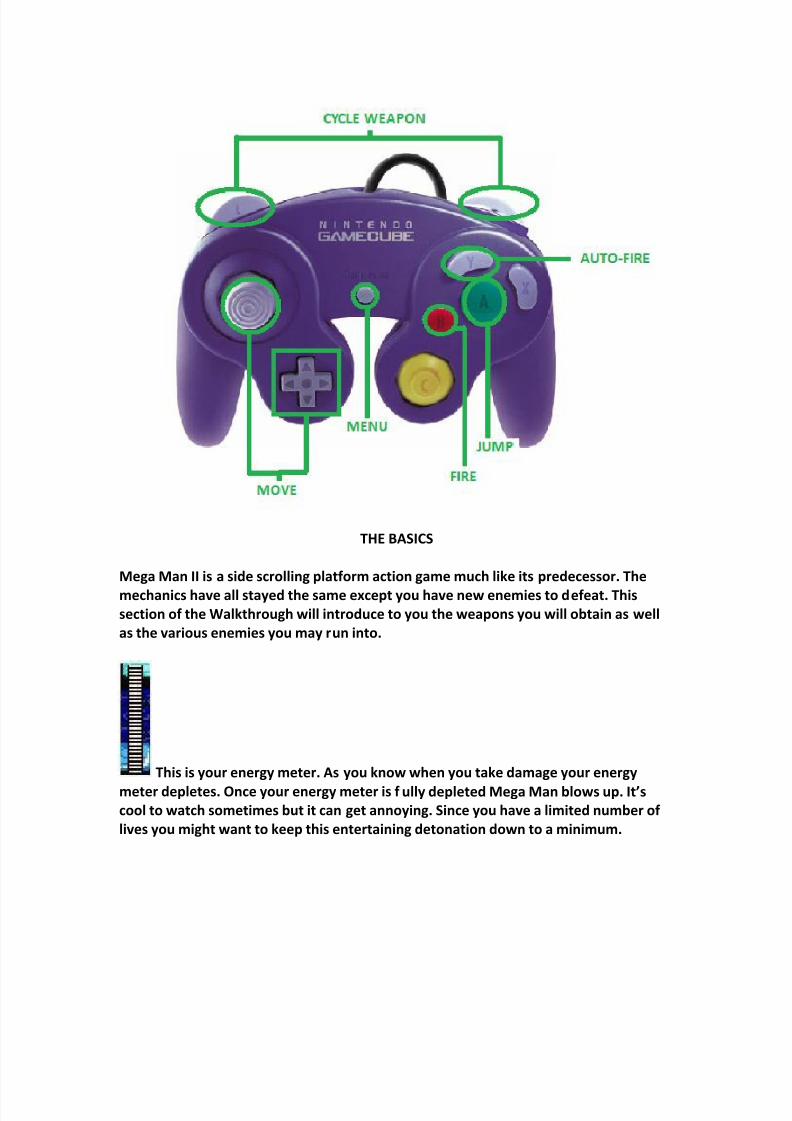
THE BASICS
Mega Man II is a side scrolling platform action game much like its predecessor. The
mechanics have all stayed the same except you have new enemies to defeat. This
section of the Walkthrough will introduce to you the weapons you will obtain as well
as the various enemies you may run into.
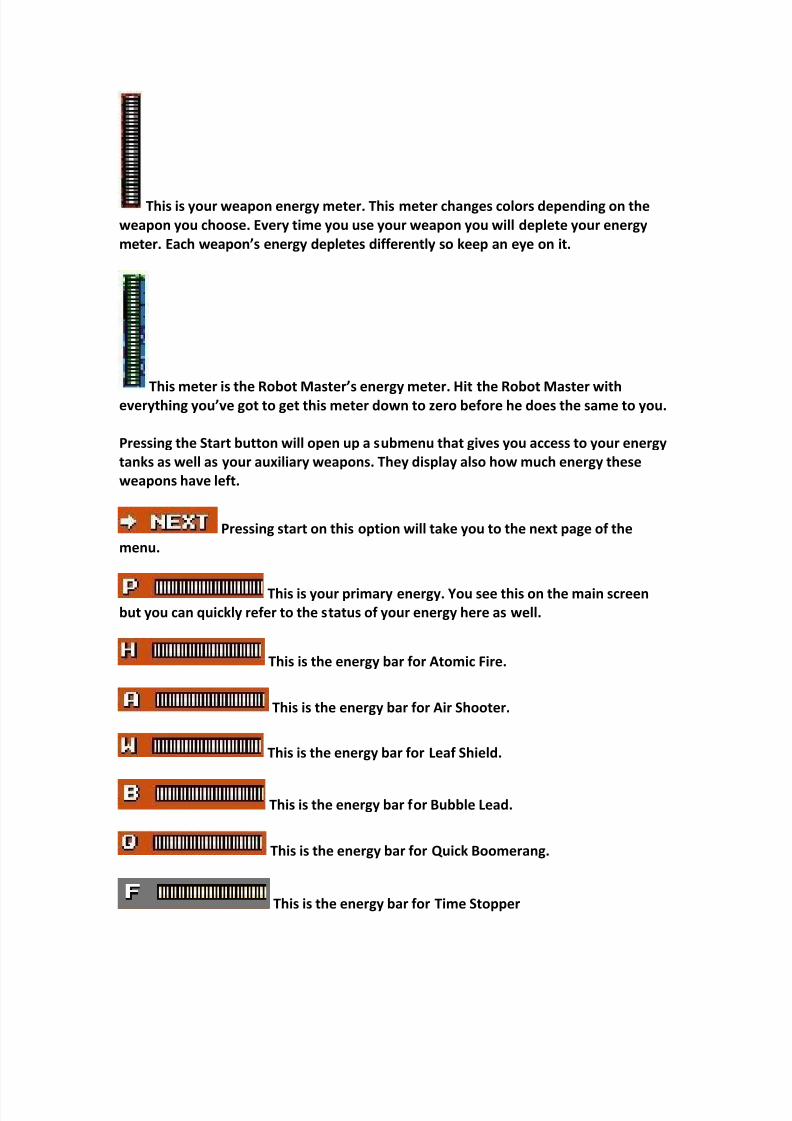
This is your energy meter. As you know when you take damage your energy
meter depletes. Once your energy meter is f ully depleted Mega Man blows up. It’s
cool to watch sometimes but it can get annoying. Since you have a limited number of
lives you might want to keep this entertaining detonation down to a minimum.
8/3/2019 Megaman II
http://slidepdf.com/reader/full/megaman-ii 5/46
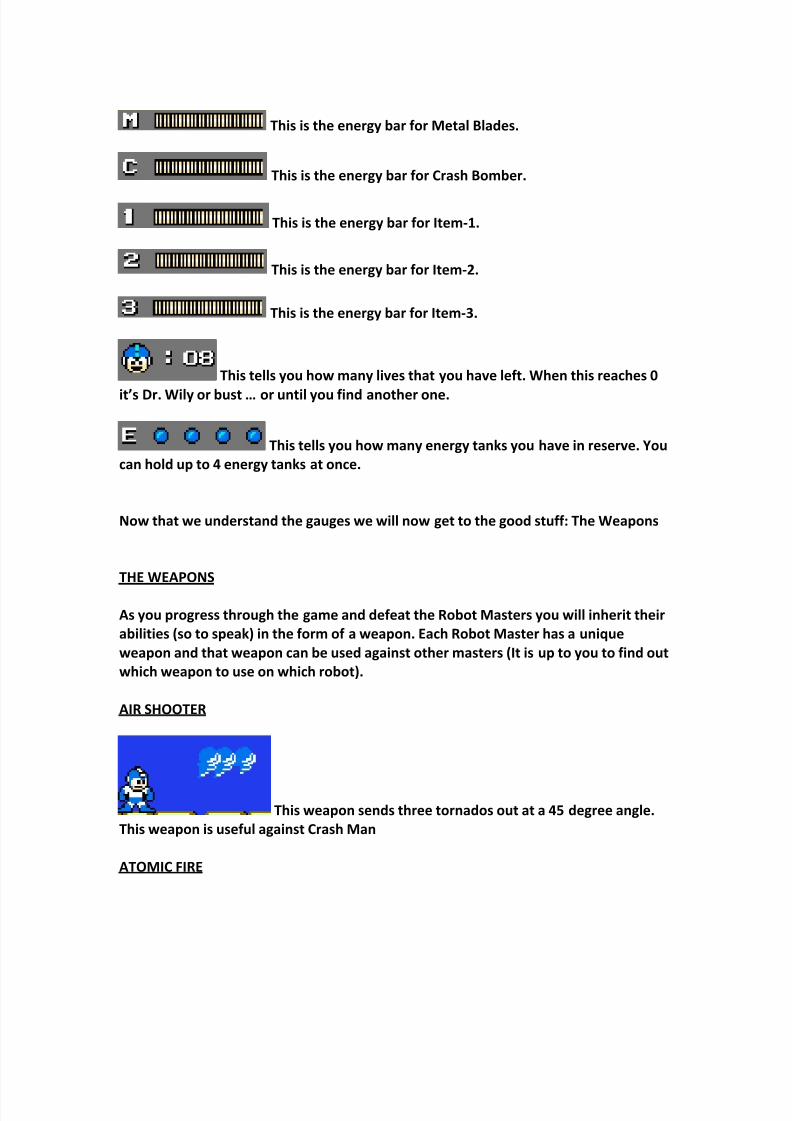
This is your weapon energy meter. This meter changes colors depending on the
weapon you choose. Every time you use your weapon you will deplete your energy
meter. Each weapon’s energy depletes differently so keep an eye on it.
This meter is the Robot Master’s energy meter. Hit the Robot Master witheverything you’ve got to get this meter down to zero before he does the same to you.
Pressing the Start button will open up a submenu that gives you access to your energy
tanks as well as your auxiliary weapons. They display also how much energy these
weapons have left.
Pressing start on this option will take you to the next page of the
menu.
This is your primary energy. You see this on the main screenbut you can quickly refer to the status of your energy here as well.
This is the energy bar for Atomic Fire.
This is the energy bar for Air Shooter.
This is the energy bar for Leaf Shield.
This is the energy bar for Bubble Lead.
This is the energy bar for Quick Boomerang.
This is the energy bar for Time Stopper
8/3/2019 Megaman II
http://slidepdf.com/reader/full/megaman-ii 6/46
This is the energy bar for Metal Blades.
This is the energy bar for Crash Bomber.
This is the energy bar for Item-1.
This is the energy bar for Item-2.
This is the energy bar for Item-3.
This tells you how many lives that you have left. When this reaches 0
it’s Dr. Wily or bust … or until you find another one.
This tells you how many energy tanks you have in reserve. You
can hold up to 4 energy tanks at once.
Now that we understand the gauges we will now get to the good stuff: The Weapons
THE WEAPONS
As you progress through the game and defeat the Robot Masters you will inherit their
abilities (so to speak) in the form of a weapon. Each Robot Master has a unique
weapon and that weapon can be used against other masters (It is up to you to find out
which weapon to use on which robot).
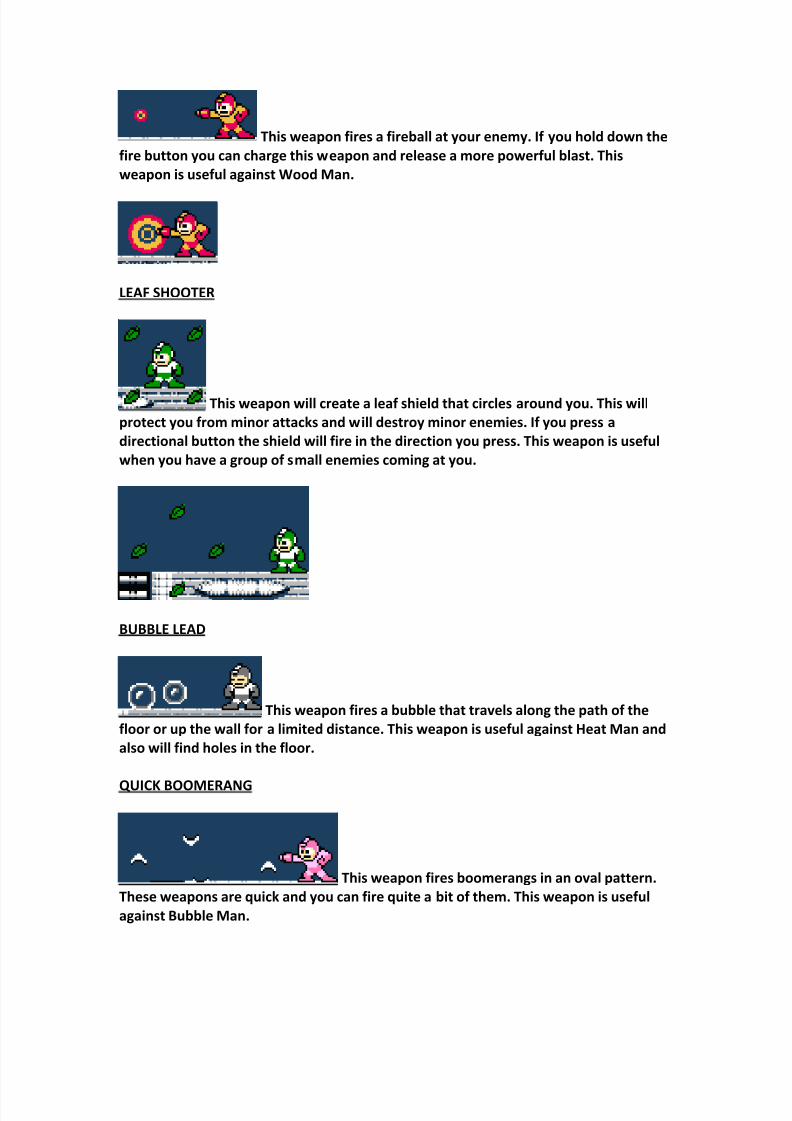
AIR SHOOTER
This weapon sends three tornados out at a 45 degree angle.
This weapon is useful against Crash Man
ATOMIC FIRE
8/3/2019 Megaman II
http://slidepdf.com/reader/full/megaman-ii 7/46
This weapon fires a fireball at your enemy. If you hold down the
fire button you can charge this weapon and release a more powerful blast. This
weapon is useful against Wood Man.
LEAF SHOOTER
This weapon will create a leaf shield that circles around you. This will
protect you from minor attacks and will destroy minor enemies. If you press a
directional button the shield will fire in the direction you press. This weapon is useful
when you have a group of small enemies coming at you.
BUBBLE LEAD
This weapon fires a bubble that travels along the path of the
floor or up the wall for a limited distance. This weapon is useful against Heat Man and
also will find holes in the floor.
QUICK BOOMERANG
This weapon fires boomerangs in an oval pattern.
These weapons are quick and you can fire quite a bit of them. This weapon is useful
against Bubble Man.
8/3/2019 Megaman II
http://slidepdf.com/reader/full/megaman-ii 8/46
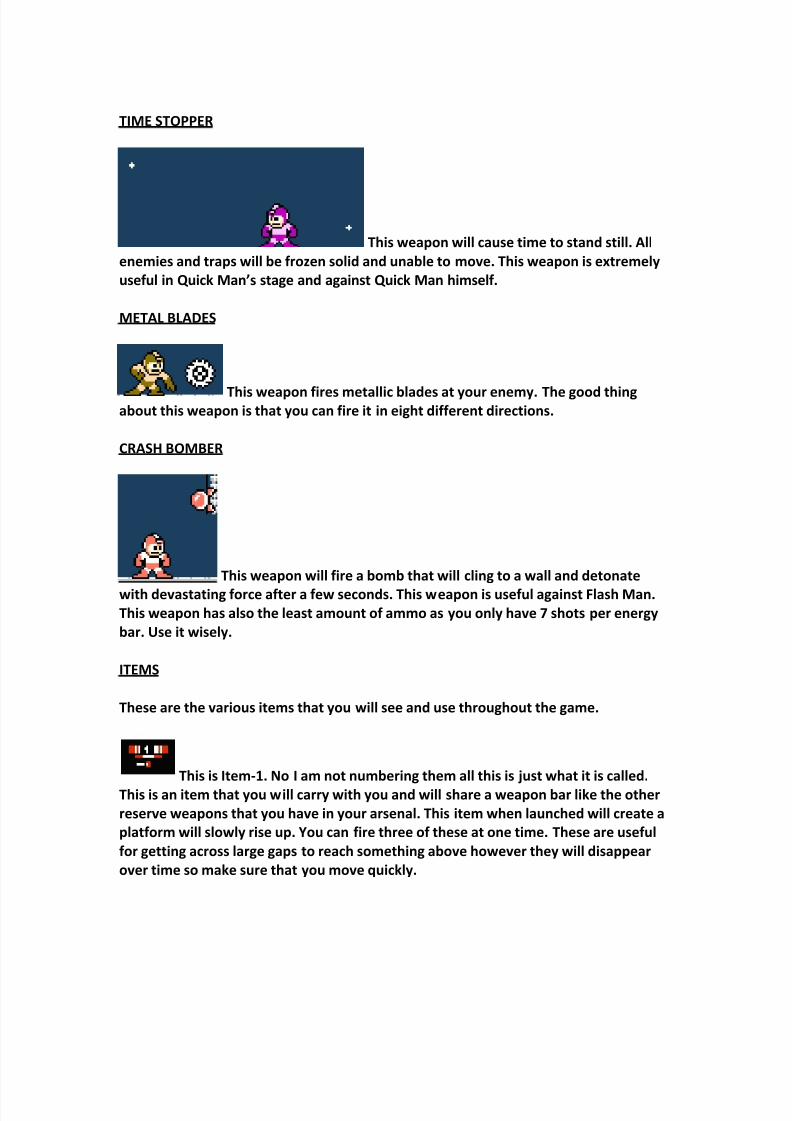
TIME STOPPER
This weapon will cause time to stand still. All
enemies and traps will be frozen solid and unable to move. This weapon is extremely
useful in Quick Man’s stage and against Quick Man himself.
METAL BLADES
This weapon fires metallic blades at your enemy. The good thingabout this weapon is that you can fire it in eight different directions.
CRASH BOMBER
This weapon will fire a bomb that will cling to a wall and detonate
with devastating force after a few seconds. This weapon is useful against Flash Man.
This weapon has also the least amount of ammo as you only have 7 shots per energy
bar. Use it wisely.
ITEMS
These are the various items that you will see and use throughout the game.
This is Item-1. No I am not numbering them all this is just what it is called.
This is an item that you will carry with you and will share a weapon bar like the other
reserve weapons that you have in your arsenal. This item when launched will create a
platform will slowly rise up. You can fire three of these at one time. These are useful
for getting across large gaps to reach something above however they will disappear
over time so make sure that you move quickly.

8/3/2019 Megaman II
http://slidepdf.com/reader/full/megaman-ii 9/46
This is Item-2. This is another item that you carry with you once you
acquire it. You can only call on one of these platforms at a time. This item creates a
platform that will jet across a vast area. However the energy in this item is limited and
it will continue to go until it hits a wall. This item is useful when you want to cross an
extremely huge gap or when you want to get across an annoying area with little to nofoot holds (cough Heat Man cough).
This is Item-3. Yet another item that you can carry with you once you
acquired it. This item creates another platform that will bounce along the ground until
it reaches a wall then it will start to levitate upward. You can only fire one of these at
a time and like Item-1 this will disappear over time so you need to move quickly.
This is a small energy module. This will fill a little bit of your health meter.
This is a large energy module. This will fill up roughly ¼ of your health meter.
This is a small weapon module. This will fill a small portion of your weapon energy.
This is a large weapon module. This will fill roughly ¼ of your weapon energy.
This is an extra life. These are scattered throughout the various stages and
sometimes enemies will drop these. Get these bad boys whenever you can.
This is an energy tank. This can be used to refresh your energy when you are
running low. It won’t automatically fill your energy when you are low so you still have
to keep an eye on your energy gauge and use it ONLY when you need it. Remember
you can only carry 4 at a time so don’t be greedy with the energy tanks.
ENEMIES
These are the various enemies that you will encounter throughout the stages. I don’t
know their official names so I will just explain their behavior.
8/3/2019 Megaman II
http://slidepdf.com/reader/full/megaman-ii 10/46
This guy populates a lot of stages. He has the habit of hiding under his hat.
When he does he is invincible to attack. You have to wait till he comes out of his hat
which he will do once you get close enough to him. He will shoot three shots out at
you in three different directions. You can kill him with one shot.
This is a robotic drill that will come at you from both the ceiling and the ground. If
you encounter into these guys you will run into a whole lot of them at once and they
keep coming however this could work to your advantage because these guys drop a
lot of items.
This little guy slowly runs across the floor until you get near him. Once you are
near him he picks up the pace and then springs up at you like a slinky. A specialtyweapon will dispatch them. All you have to do is find the right one.
This guy waits for you in the halls of various stages and continuously shoots
at you. He takes a moment to change trajectory of his shots. It’s during this time that
you can shoot him and take him out.
This is an electrical current that kind of represents a wiggling worm.
Nevertheless these things pop out of their metal base at three to four at a time. You
can blast these till you are (ahem) blue in the face but unless you take out the base.
This annoying thing populates a few of the stages and drops eggs. These eggs
explode when they hit the ground and release baby birds that will come at you.
This is the annoying little bird that drops out of the egg. There are about eight to
ten of these that come at you with every swarm.
8/3/2019 Megaman II
http://slidepdf.com/reader/full/megaman-ii 11/46
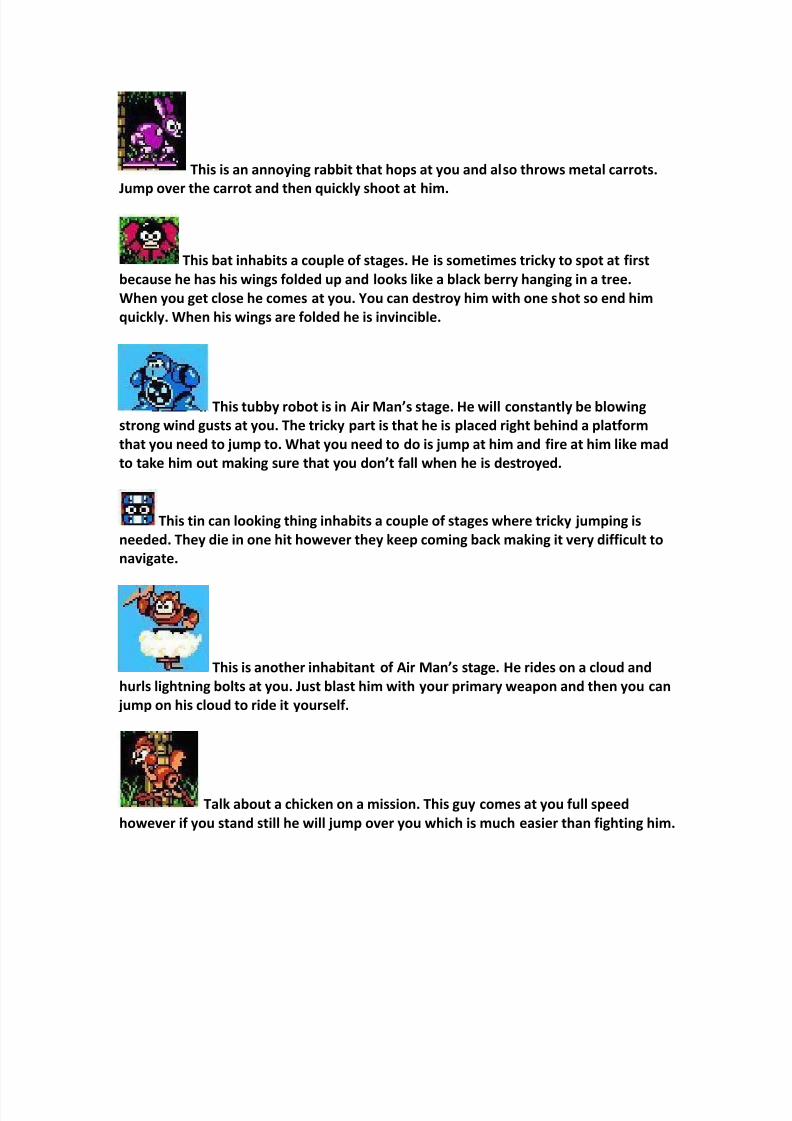
This is an annoying rabbit that hops at you and also throws metal carrots.
Jump over the carrot and then quickly shoot at him.
This bat inhabits a couple of stages. He is sometimes tricky to spot at first
because he has his wings folded up and looks like a black berry hanging in a tree.
When you get close he comes at you. You can destroy him with one shot so end him
quickly. When his wings are folded he is invincible.
This tubby robot is in Air Man’s stage. He will constantly be blowing
strong wind gusts at you. The tricky part is that he is placed right behind a platform
that you need to jump to. What you need to do is jump at him and fire at him like mad
to take him out making sure that you don’t fall when he is destroyed.
This tin can looking thing inhabits a couple of stages where tricky jumping is
needed. They die in one hit however they keep coming back making it very difficult to
navigate.
This is another inhabitant of Air Man’s stage. He rides on a cloud and
hurls lightning bolts at you. Just blast him with your primary weapon and then you can
jump on his cloud to ride it yourself.
Talk about a chicken on a mission. This guy comes at you full speed
however if you stand still he will jump over you which is much easier than fighting him.
8/3/2019 Megaman II
http://slidepdf.com/reader/full/megaman-ii 12/46
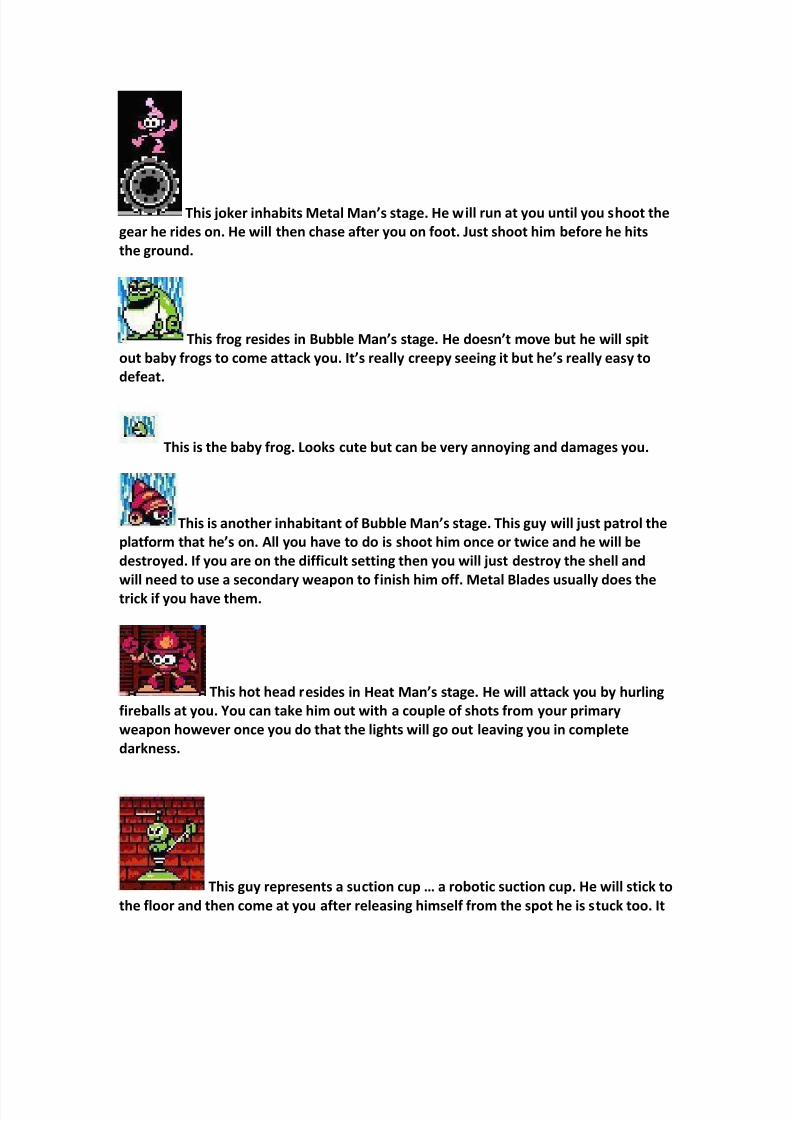
This joker inhabits Metal Man’s stage. He will run at you until you shoot the
gear he rides on. He will then chase after you on foot. Just shoot him before he hits
the ground.
This frog resides in Bubble Man’s stage. He doesn’t move but he will spit
out baby frogs to come attack you. It’s really creepy seeing it but he’s really easy to
defeat.
This is the baby frog. Looks cute but can be very annoying and damages you.
This is another inhabitant of Bubble Man’s stage. This guy will just patrol the
platform that he’s on. All you have to do is shoot him once or twice and he will be
destroyed. If you are on the difficult setting then you will just destroy the shell and
will need to use a secondary weapon to finish him off. Metal Blades usually does the
trick if you have them.
This hot head resides in Heat Man’s stage. He will attack you by hurling
fireballs at you. You can take him out with a couple of shots from your primary
weapon however once you do that the lights will go out leaving you in complete
darkness.
This guy represents a suction cup … a robotic suction cup. He will stick to
the floor and then come at you after releasing himself from the spot he is stuck too. It
8/3/2019 Megaman II
http://slidepdf.com/reader/full/megaman-ii 13/46
takes him awhile to do this so make sure that you are out of his way. A good way to
confuse him is that he will fall in the location that you were last in. So if you stay still
until he lunges at you and then move forward he will land behind you making it easier
to avoid him or just blast him a few times to get rid of him once and for all.
Sniper Joe’s Mech. This is the Mech that Sniper Joe rides on to come at
you. He will jump at you three or four times and then unleash a barrage of fire on you.
Use Quick Boomerang to get rid of this mech and then take on Sniper Joe without his
additional fire power.
This is Sniper Joe. He will either come at you with his Mech or just be waitingto ambush you. He has a shield that he uses which makes him impervious to your
attacks. In order to attack you he needs to move his shield. Quickly dodge his fire and
then fire with some of your own. Quick Boomerang is also pretty effective against him.
These kind of remind me of Metroids. Ah those were the days. Anyway these
inhabit Bubble Man’s stage. They float at you and that is pretty much it however they
usually appear in an area predominant with spikes. Use caution when dealing with
these baddies.
These crabs also patrol the areas of Bubble Man’s stage. They typically
patrol back and forth but will speed up once you are near them. Take them out with a
blast or two from your primary weapon.
This robotic seahorse swims at you and tries to hit you. Just take him out
with a few shots from your primary weapon.

8/3/2019 Megaman II
http://slidepdf.com/reader/full/megaman-ii 14/46
Meet Magilla Gorilla’s cousin. This swinging ape will wait until you areclose and then he will lunge at you. Time your shots to nail him before he reaches you.
This junkyard dog is anything but cute. He spews flames in a “u”
shape at you. He means business and it takes quite a few shots to put him away early.
This big fish is in Bubble Man’s stage. He lies in wait
for you and spews out seahorses. The little bulb on top of his head is his weak point.
Take it out with Quick Boomerang or your primary weapon if you want a challenge.
This massive robotic piranha resides in stage 3 of Dr. Wily’s fortress.
There are no ways to kill it as far as I know of. I just go passed it as soon as it goes back
down the hole.
8/3/2019 Megaman II
http://slidepdf.com/reader/full/megaman-ii 15/46
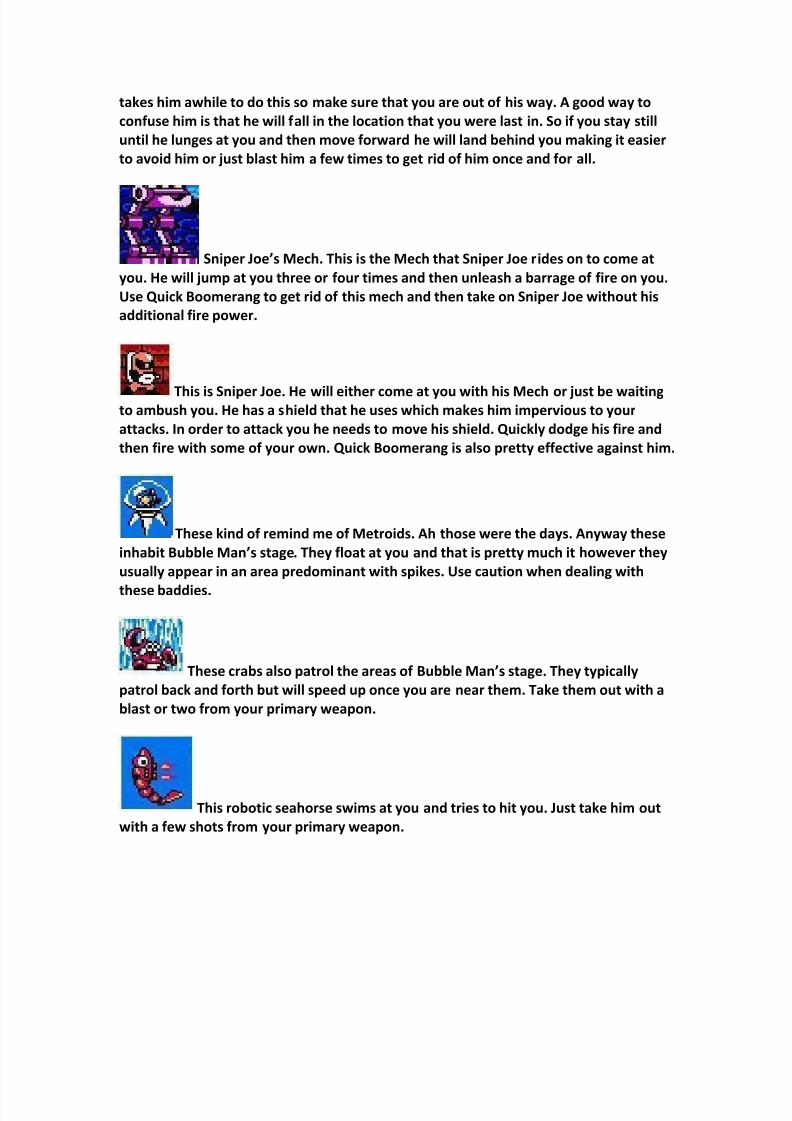
I wouldn’t really classify this as an enemy as it is more of a
giant platform however it will spit out miniature versions of itself in order to prevent
you from reaching to the next platform. These appear out of nowhere in Air Man’s
stage so be careful. Also the drills that come out of the top of its head will damage you
and knock you back potentially causing you to drop in a hole.
This is the miniature version of the giant platform.
This beastie is the dragon that you will encounter
at the end of Wily Fortress Stage 1. I have included instructions on how to defeat himfurther in this walkthrough. What I will tell you at this point is that this boss is more
annoying than anything due to the lack of adequate footing.
8/3/2019 Megaman II
http://slidepdf.com/reader/full/megaman-ii 16/46
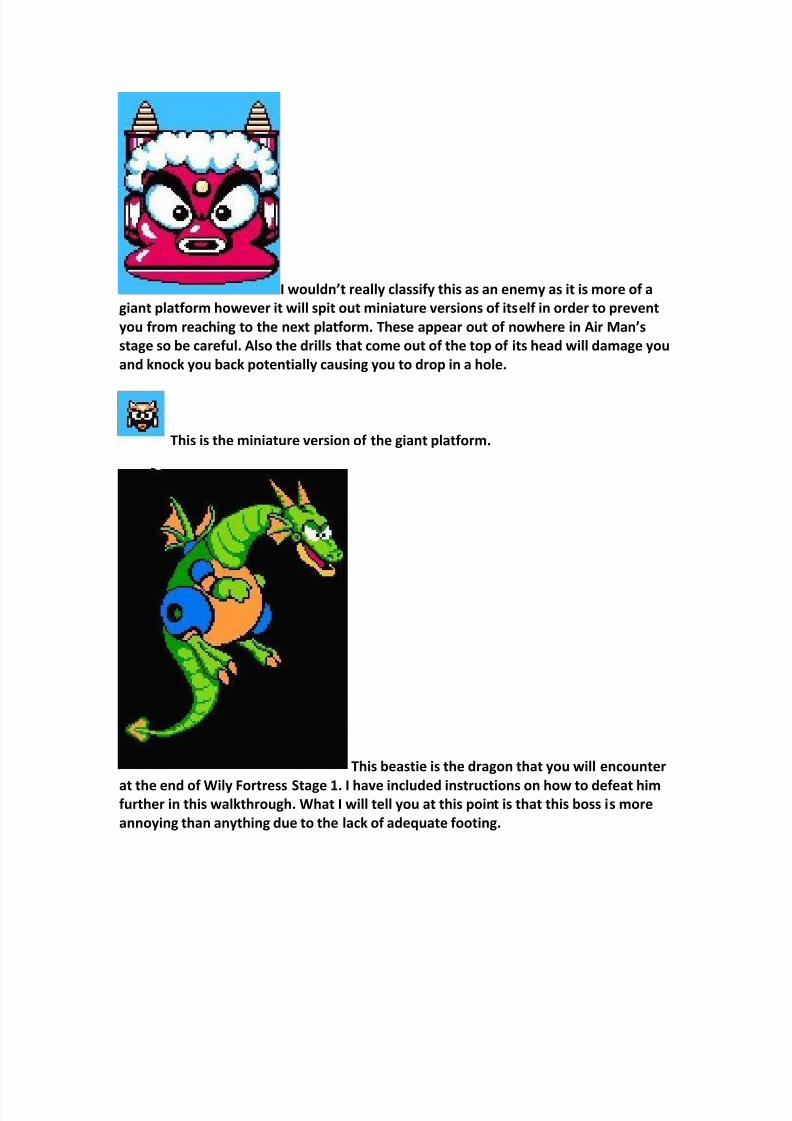
This boss waits for you at
the end of Wily Fortress Stage 2. Again the instructions on dispatching this enemy are
explained below.
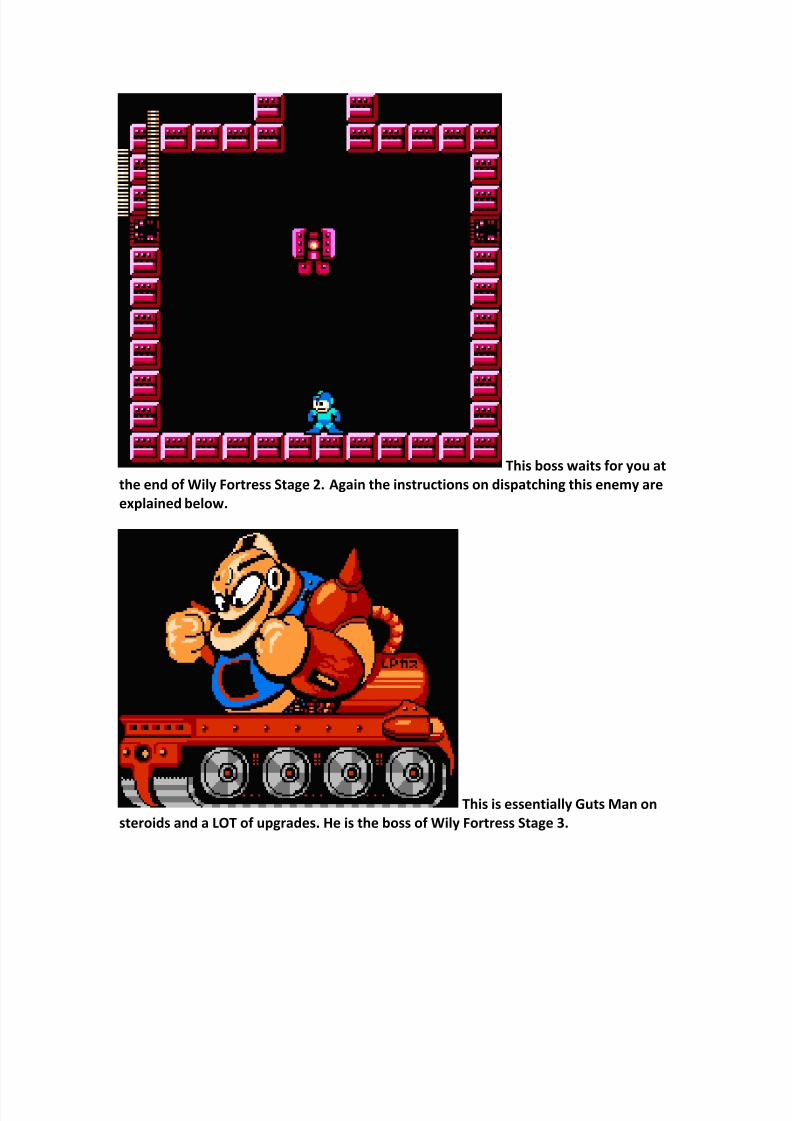
This is essentially Guts Man on
steroids and a LOT of upgrades. He is the boss of Wily Fortress Stage 3.
8/3/2019 Megaman II
http://slidepdf.com/reader/full/megaman-ii 17/46
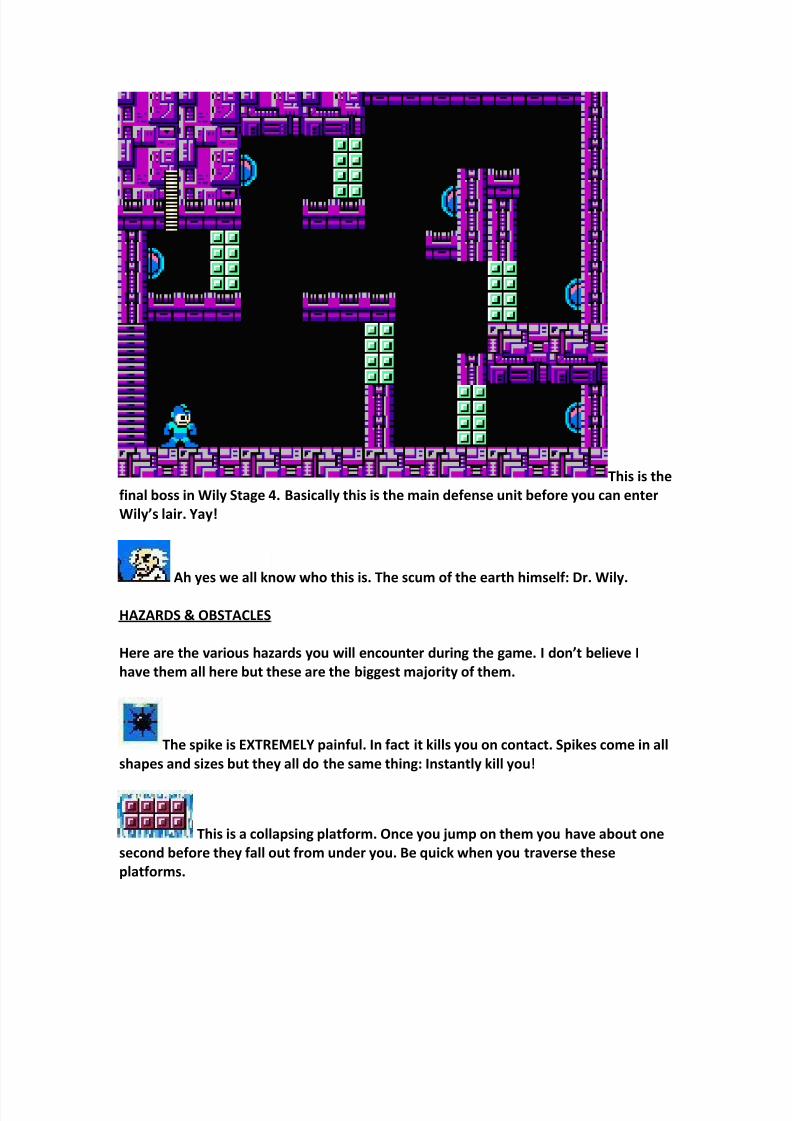
This is the
final boss in Wily Stage 4. Basically this is the main defense unit before you can enter
Wily’s lair. Yay!
Ah yes we all know who this is. The scum of the earth himself: Dr. Wily.
HAZARDS & OBSTACLES
Here are the various hazards you will encounter during the game. I don’t believe I
have them all here but these are the biggest majority of them.
The spike is EXTREMELY painful. In fact it kills you on contact. Spikes come in all
shapes and sizes but they all do the same thing: Instantly kill you!
This is a collapsing platform. Once you jump on them you have about one
second before they fall out from under you. Be quick when you traverse these
platforms.
8/3/2019 Megaman II
http://slidepdf.com/reader/full/megaman-ii 18/46
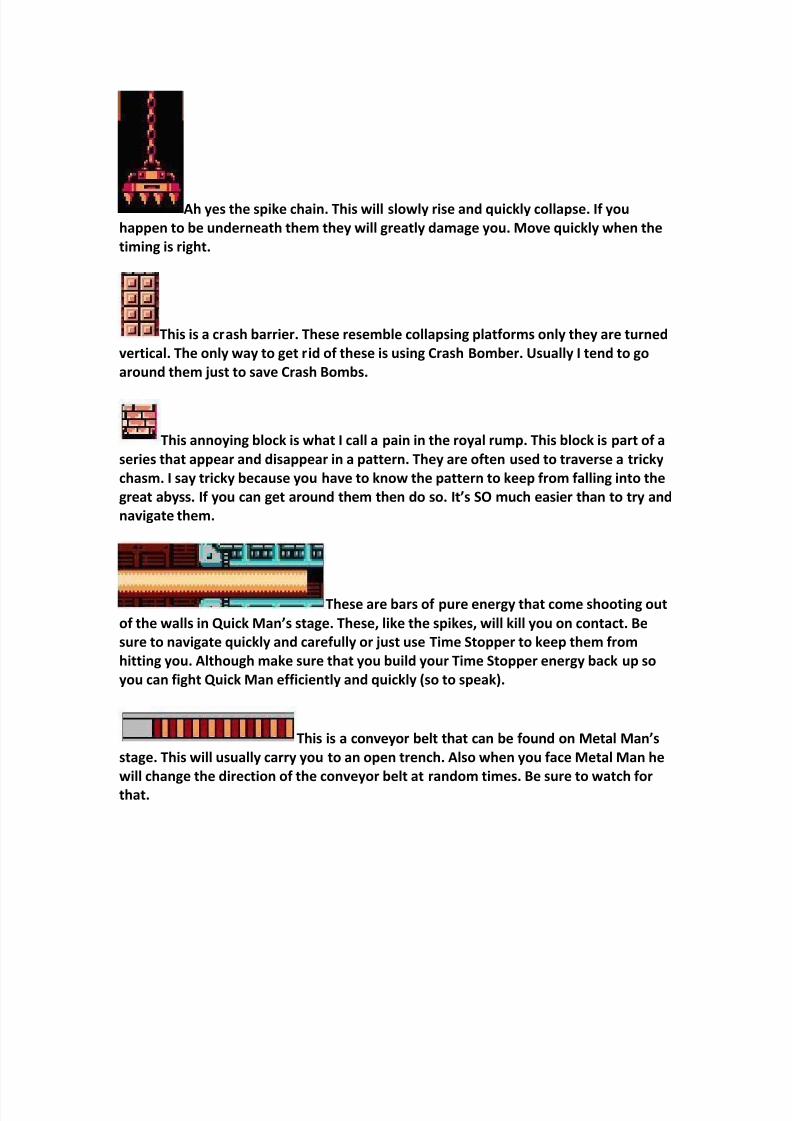
Ah yes the spike chain. This will slowly rise and quickly collapse. If you
happen to be underneath them they will greatly damage you. Move quickly when the
timing is right.
This is a crash barrier. These resemble collapsing platforms only they are turned
vertical. The only way to get rid of these is using Crash Bomber. Usually I tend to go
around them just to save Crash Bombs.
This annoying block is what I call a pain in the royal rump. This block is part of a
series that appear and disappear in a pattern. They are often used to traverse a tricky
chasm. I say tricky because you have to know the pattern to keep from falling into the
great abyss. If you can get around them then do so. It’s SO much easier than to try and
navigate them.
These are bars of pure energy that come shooting out
of the walls in Quick Man’s stage. These, like the spikes, will kill you on contact. Be
sure to navigate quickly and carefully or just use Time Stopper to keep them from
hitting you. Although make sure that you build your Time Stopper energy back up so
you can fight Quick Man efficiently and quickly (so to speak).
This is a conveyor belt that can be found on Metal Man’s
stage. This will usually carry you to an open trench. Also when you face Metal Man he
will change the direction of the conveyor belt at random times. Be sure to watch for
that.
8/3/2019 Megaman II
http://slidepdf.com/reader/full/megaman-ii 19/46
This is a platform that will glide on a guide
track . Usually when you ride these there are tin man
guys trying to knock you off of the platform and also there are spikes waiting to catch
you if you do fall. Be sure you are using Leaf Shield while riding the platform will
protect you from the enemies that come at you.
This is a false floor. You only run into these in Wily’s Fortress butthey are a nuisance and can lead you to … yes more spiky deaths . The trick to these
however is to use Bubble Lead to find them and then either jump around them or fly
over them using Item-2. By the way don’t look for subtleties in the floor to distinguish
false floors like you find in most games … they aren’t in this game.
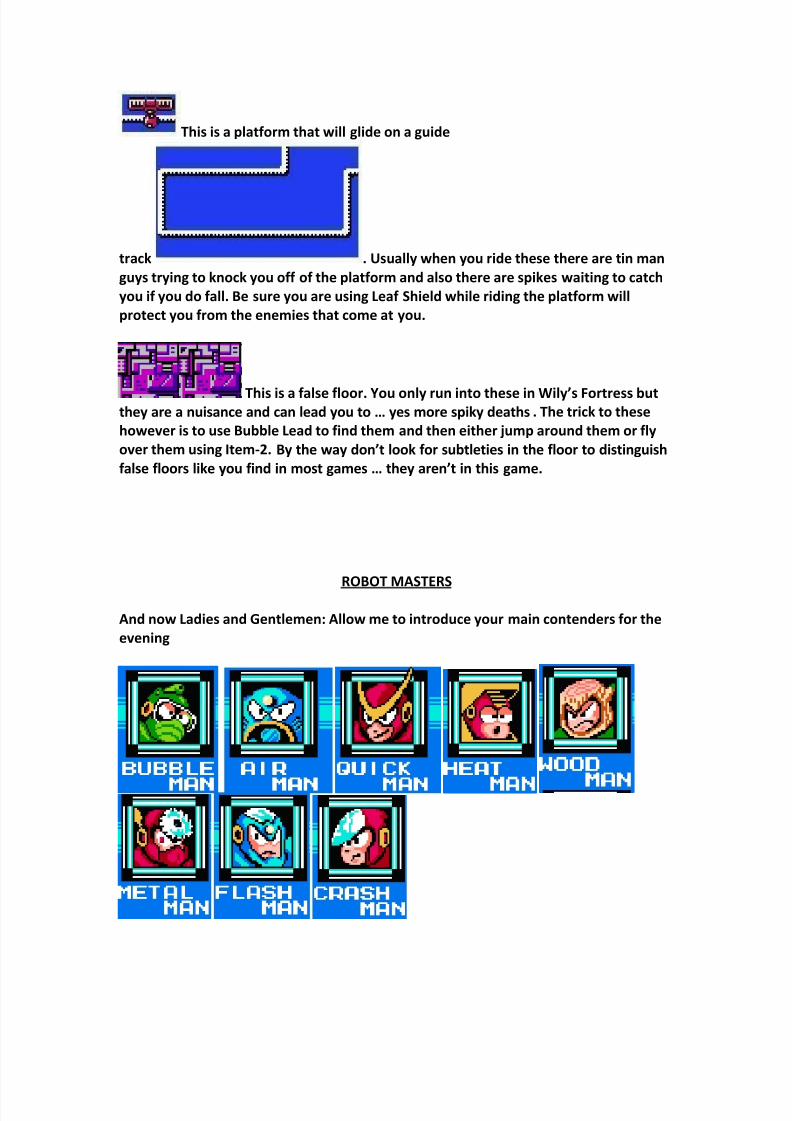
ROBOT MASTERS
And now Ladies and Gentlemen: Allow me to introduce your main contenders for the
evening
8/3/2019 Megaman II
http://slidepdf.com/reader/full/megaman-ii 20/46
All these guys have a short fuse and one objective: To terminate Mega Man with
extreme prejudice. Each one of these guys is in charge of an individual area. You have
to navigate their terrain with their own baddies at their command. Once you get
through their stage you have a one on one with each one of these guys.
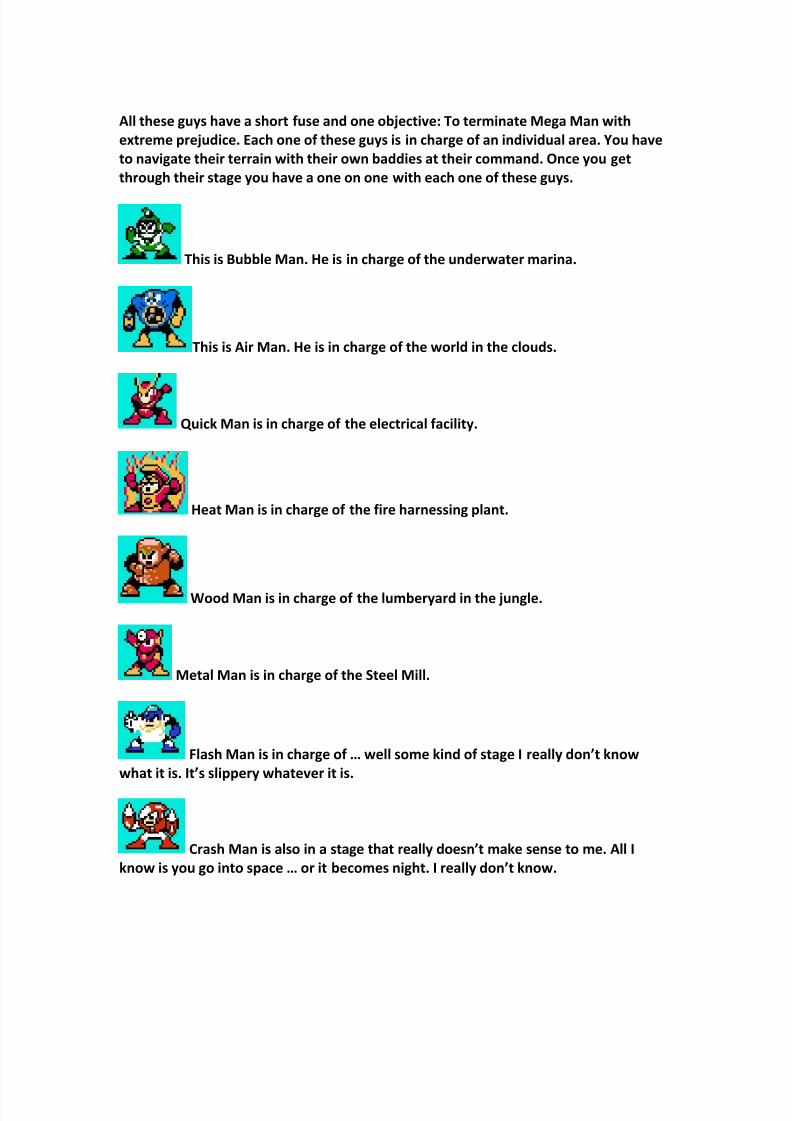
This is Bubble Man. He is in charge of the underwater marina.
This is Air Man. He is in charge of the world in the clouds.
Quick Man is in charge of the electrical facility.
Heat Man is in charge of the fire harnessing plant.
Wood Man is in charge of the lumberyard in the jungle.
Metal Man is in charge of the Steel Mill.
Flash Man is in charge of … well some kind of stage I really don’t know
what it is. It’s slippery whatever it is.
Crash Man is also in a stage that really doesn’t make sense to me. All I
know is you go into space … or it becomes night. I really don’t know.
8/3/2019 Megaman II
http://slidepdf.com/reader/full/megaman-ii 21/46
Now that we know the key players in this sci-fi party lets get to the meat of this
walkthrough; the walkthrough itself.
WALKTHROUGH
AIRMAN
Airman is the first one that we should fight. He is the easiest and his world is a great
way to get the feel for the mechanics of the game. When you start the stage you head
from left to right. The first obstacle you come to is a giant head that appears out of
nowhere with little creatures flying out of it and drills that come out of both sides of
the head. The trick is to land on this thing when the drills sink back down into the
head. You will encounter about five of these. As if that wasn’t bad enough now you
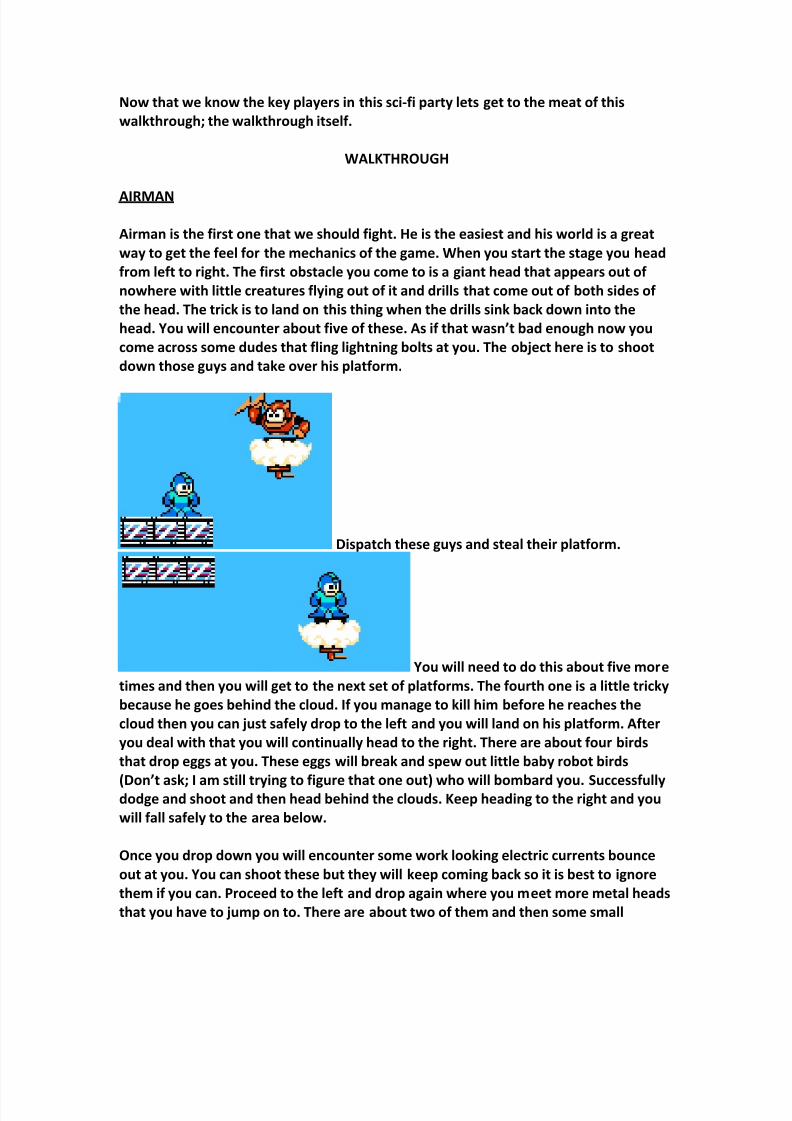
come across some dudes that fling lightning bolts at you. The object here is to shoot
down those guys and take over his platform.
Dispatch these guys and steal their platform.
You will need to do this about five more
times and then you will get to the next set of platforms. The fourth one is a little tricky
because he goes behind the cloud. If you manage to kill him before he reaches the
cloud then you can just safely drop to the left and you will land on his platform. After
you deal with that you will continually head to the right. There are about four birds
that drop eggs at you. These eggs will break and spew out little baby robot birds
(Don’t ask; I am still trying to figure that one out) who will bombard you. Successfullydodge and shoot and then head behind the clouds. Keep heading to the right and you
will fall safely to the area below.
Once you drop down you will encounter some work looking electric currents bounce
out at you. You can shoot these but they will keep coming back so it is best to ignore
them if you can. Proceed to the left and drop again where you meet more metal heads
that you have to jump on to. There are about two of them and then some small
8/3/2019 Megaman II
http://slidepdf.com/reader/full/megaman-ii 22/46
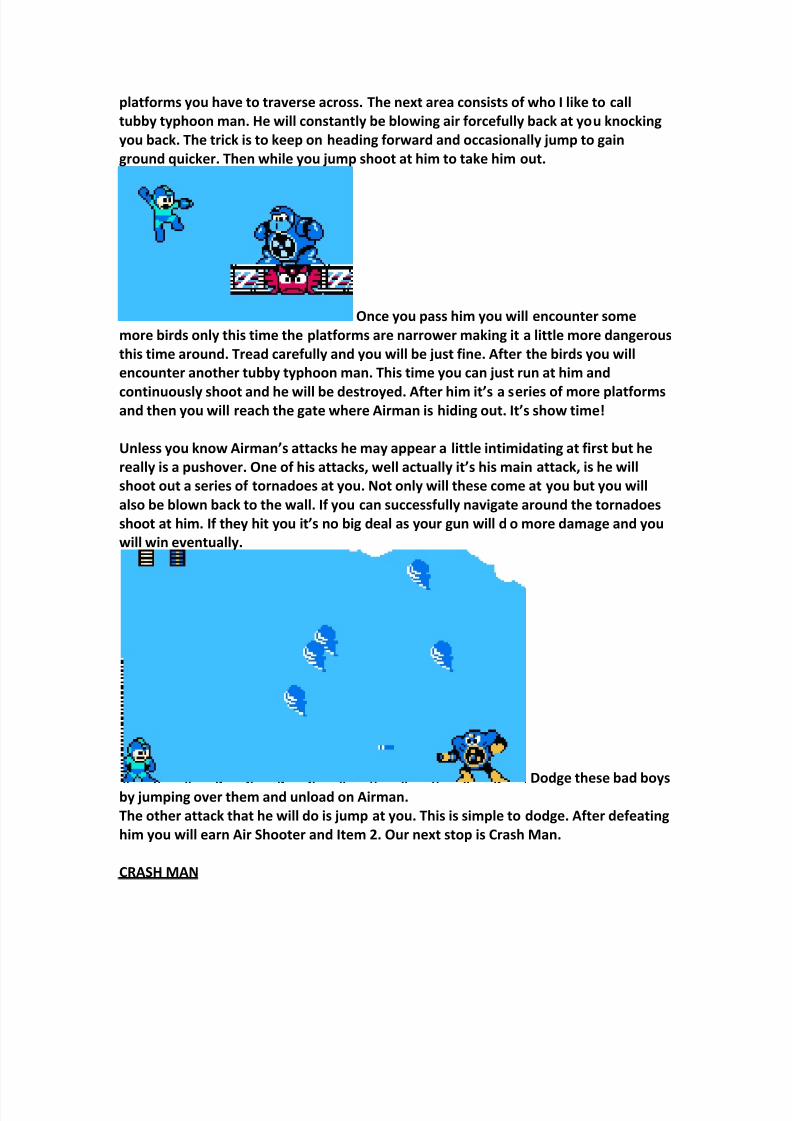
platforms you have to traverse across. The next area consists of who I like to call
tubby typhoon man. He will constantly be blowing air forcefully back at you knocking
you back. The trick is to keep on heading forward and occasionally jump to gain
ground quicker. Then while you jump shoot at him to take him out.
Once you pass him you will encounter some
more birds only this time the platforms are narrower making it a little more dangerous
this time around. Tread carefully and you will be just fine. After the birds you will
encounter another tubby typhoon man. This time you can just run at him and
continuously shoot and he will be destroyed. After him it’s a series of more platformsand then you will reach the gate where Airman is hiding out. It’s show time!
Unless you know Airman’s attacks he may appear a little intimidating at first but he
really is a pushover. One of his attacks, well actually it’s his main attack, is he will
shoot out a series of tornadoes at you. Not only will these come at you but you will
also be blown back to the wall. If you can successfully navigate around the tornadoes
shoot at him. If they hit you it’s no big deal as your gun will d o more damage and you
will win eventually.
Dodge these bad boys
by jumping over them and unload on Airman.
The other attack that he will do is jump at you. This is simple to dodge. After defeating
him you will earn Air Shooter and Item 2. Our next stop is Crash Man.
CRASH MAN
8/3/2019 Megaman II
http://slidepdf.com/reader/full/megaman-ii 23/46
This is the little guy that mostly appears in this stage … that and those annoying
birds that drop the eggs. Anyway back to the guy to the left. I call him a tin can with
eyes. Anyway they come out of holes on the side of the screen and they come out in
droves. They go down with one hit but there is a lot of tricky platform jumping that
you need to accomplish and these guys seem to get in the way. Climb a set of ladders
avoiding the tin can guys and you will be able to finally start heading to the right but
not before encountering this guy. He may seem like a little dome but once you
start to get close he will lift his hat fire at you. The only way you can shoot him is
when he lifts his helmet. Once you defeat him then it’s of f to the right. You will face
three of these guys while proceeding to the right and … oh look another ladder. Climb
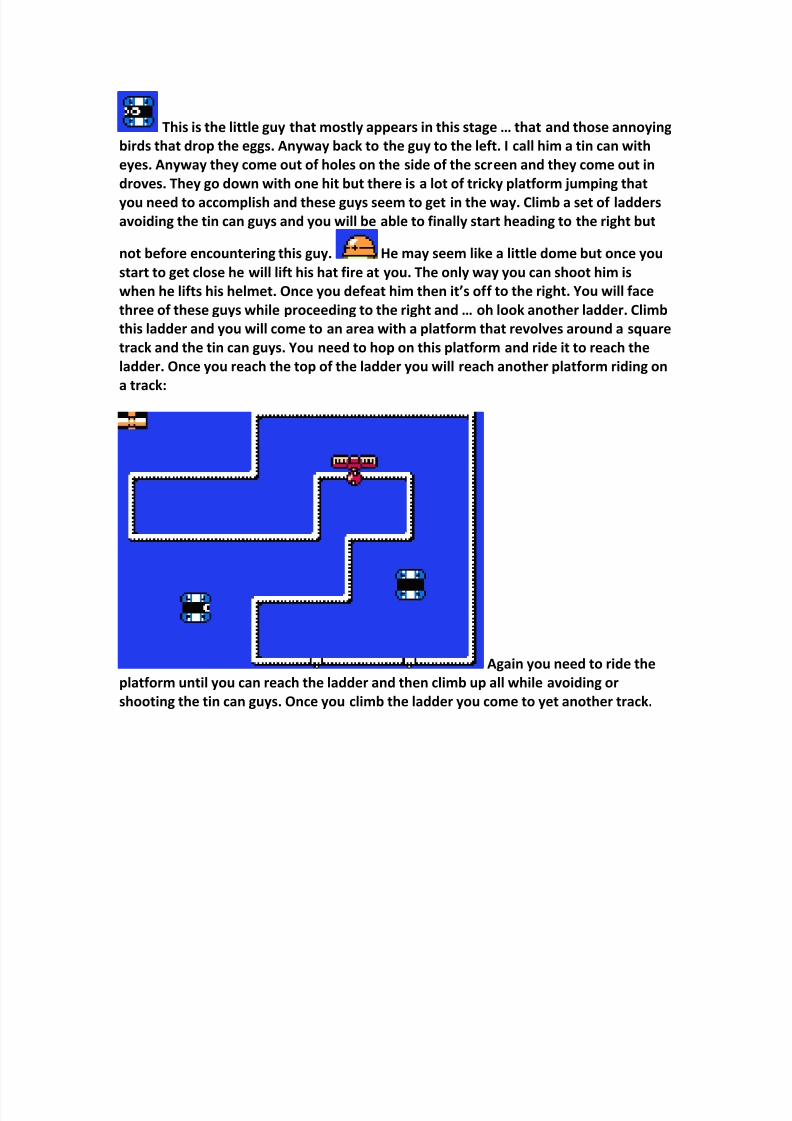
this ladder and you will come to an area with a platform that revolves around a square
track and the tin can guys. You need to hop on this platform and ride it to reach the
ladder. Once you reach the top of the ladder you will reach another platform riding on
a track:
Again you need to ride the
platform until you can reach the ladder and then climb up all while avoiding or
shooting the tin can guys. Once you climb the ladder you come to yet another track.
8/3/2019 Megaman II
http://slidepdf.com/reader/full/megaman-ii 24/46
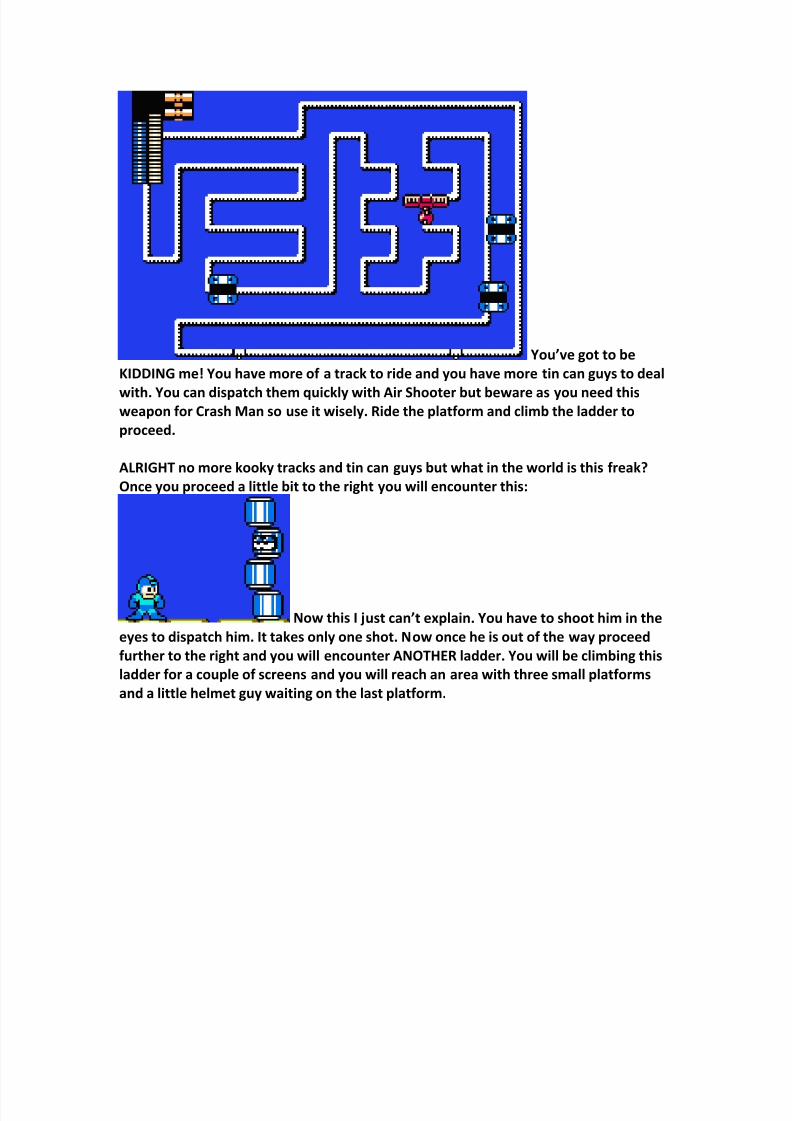
You’ve got to be
KIDDING me! You have more of a track to ride and you have more tin can guys to deal
with. You can dispatch them quickly with Air Shooter but beware as you need thisweapon for Crash Man so use it wisely. Ride the platform and climb the ladder to
proceed.
ALRIGHT no more kooky tracks and tin can guys but what in the world is this freak?
Once you proceed a little bit to the right you will encounter this:
Now this I just can’t explain. You have to shoot him in the
eyes to dispatch him. It takes only one shot. Now once he is out of the way proceed
further to the right and you will encounter ANOTHER ladder. You will be climbing this
ladder for a couple of screens and you will reach an area with three small platforms
and a little helmet guy waiting on the last platform.
8/3/2019 Megaman II
http://slidepdf.com/reader/full/megaman-ii 25/46
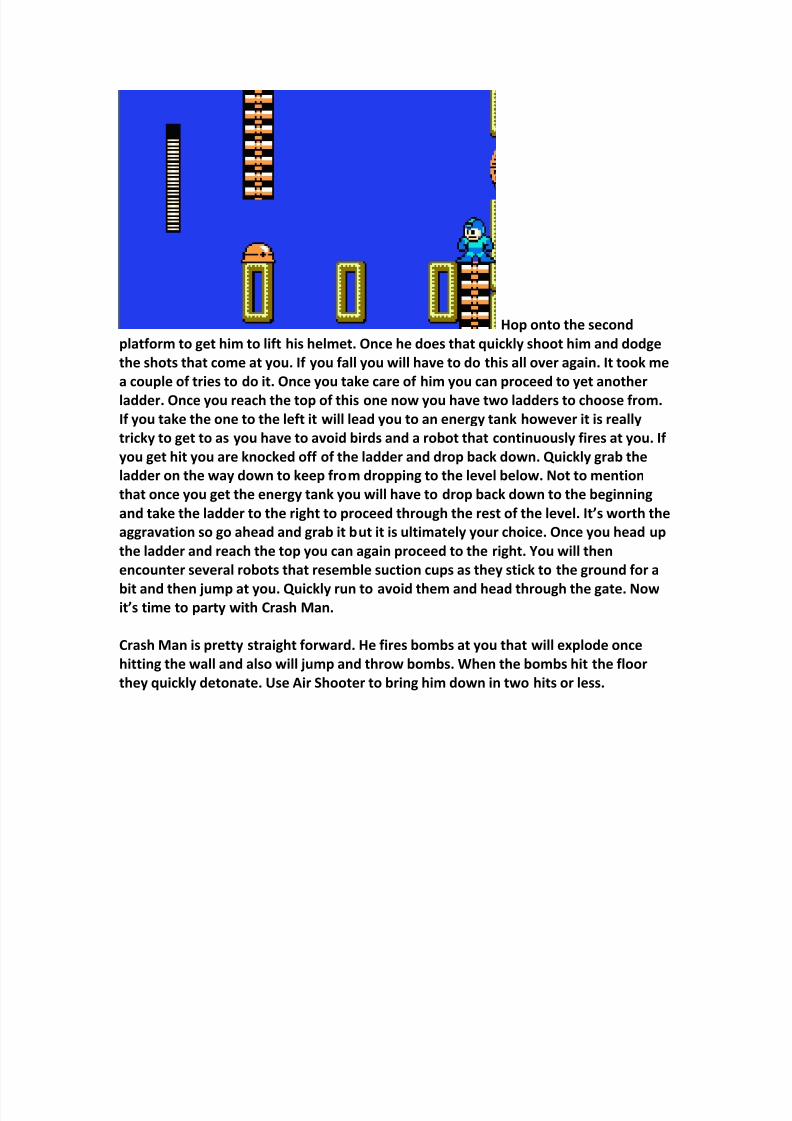
Hop onto the second
platform to get him to lift his helmet. Once he does that quickly shoot him and dodge
the shots that come at you. If you fall you will have to do this all over again. It took me
a couple of tries to do it. Once you take care of him you can proceed to yet another
ladder. Once you reach the top of this one now you have two ladders to choose from.
If you take the one to the left it will lead you to an energy tank however it is really
tricky to get to as you have to avoid birds and a robot that continuously fires at you. If
you get hit you are knocked off of the ladder and drop back down. Quickly grab the
ladder on the way down to keep from dropping to the level below. Not to mention
that once you get the energy tank you will have to drop back down to the beginning
and take the ladder to the right to proceed through the rest of the level. It’s worth the
aggravation so go ahead and grab it but it is ultimately your choice. Once you head up
the ladder and reach the top you can again proceed to the right. You will then
encounter several robots that resemble suction cups as they stick to the ground for a
bit and then jump at you. Quickly run to avoid them and head through the gate. Nowit’s time to party with Crash Man.
Crash Man is pretty straight forward. He fires bombs at you that will explode once
hitting the wall and also will jump and throw bombs. When the bombs hit the floor
they quickly detonate. Use Air Shooter to bring him down in two hits or less.
8/3/2019 Megaman II
http://slidepdf.com/reader/full/megaman-ii 26/46
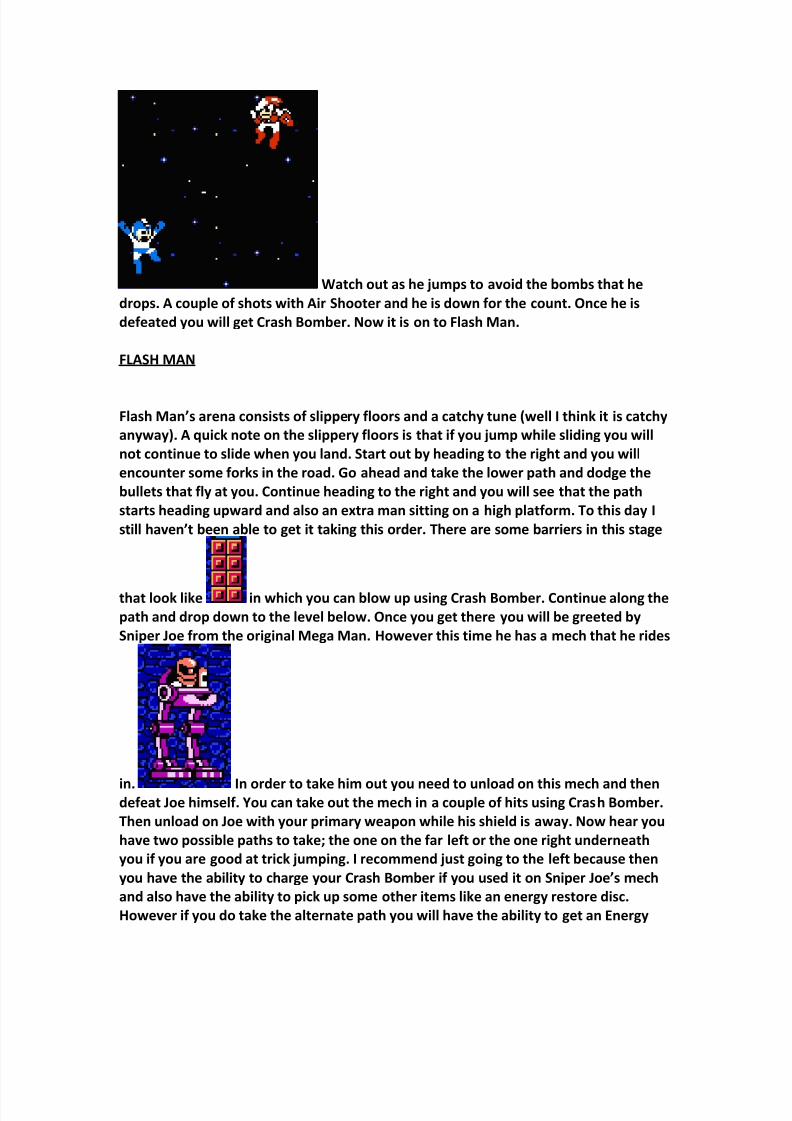
Watch out as he jumps to avoid the bombs that he
drops. A couple of shots with Air Shooter and he is down for the count. Once he is
defeated you will get Crash Bomber. Now it is on to Flash Man.
FLASH MAN
Flash Man’s arena consists of slippery floors and a catchy tune (well I think it is catchy
anyway). A quick note on the slippery floors is that if you jump while sliding you will
not continue to slide when you land. Start out by heading to the right and you will
encounter some forks in the road. Go ahead and take the lower path and dodge the
bullets that fly at you. Continue heading to the right and you will see that the path
starts heading upward and also an extra man sitting on a high platform. To this day I
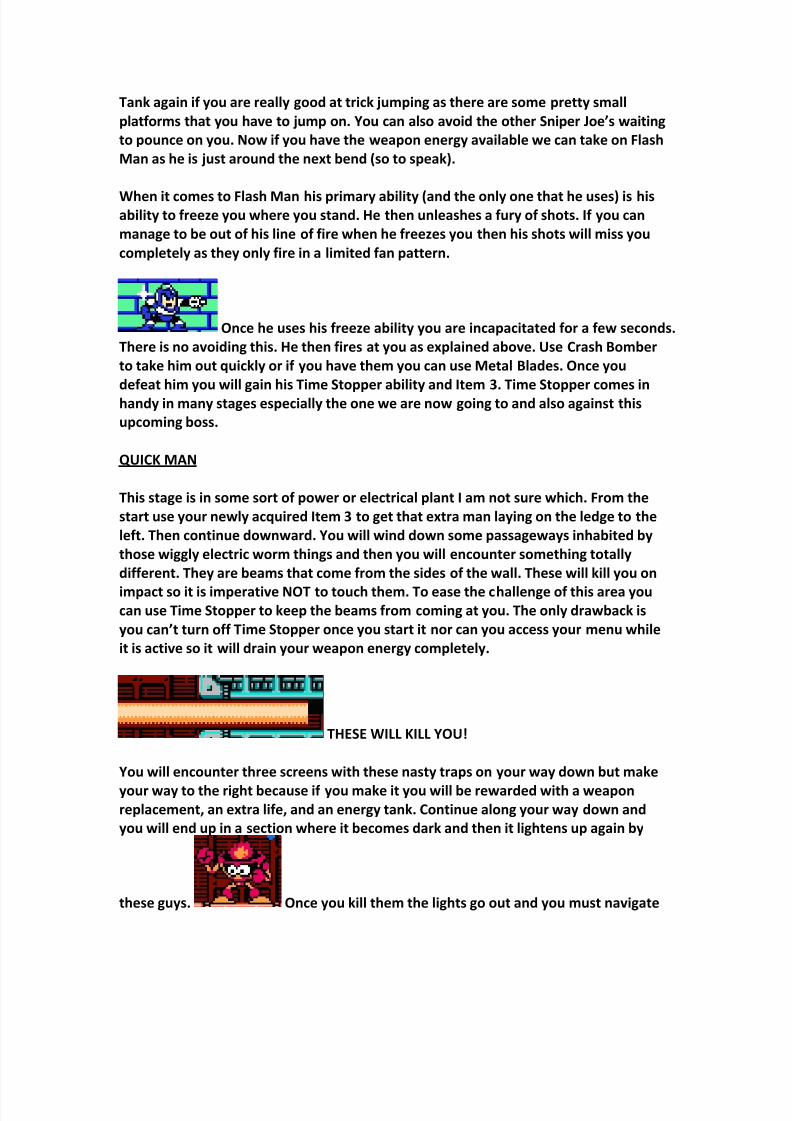
still haven’t been able to get it taking this order. There are some barriers in this stage
that look like in which you can blow up using Crash Bomber. Continue along the
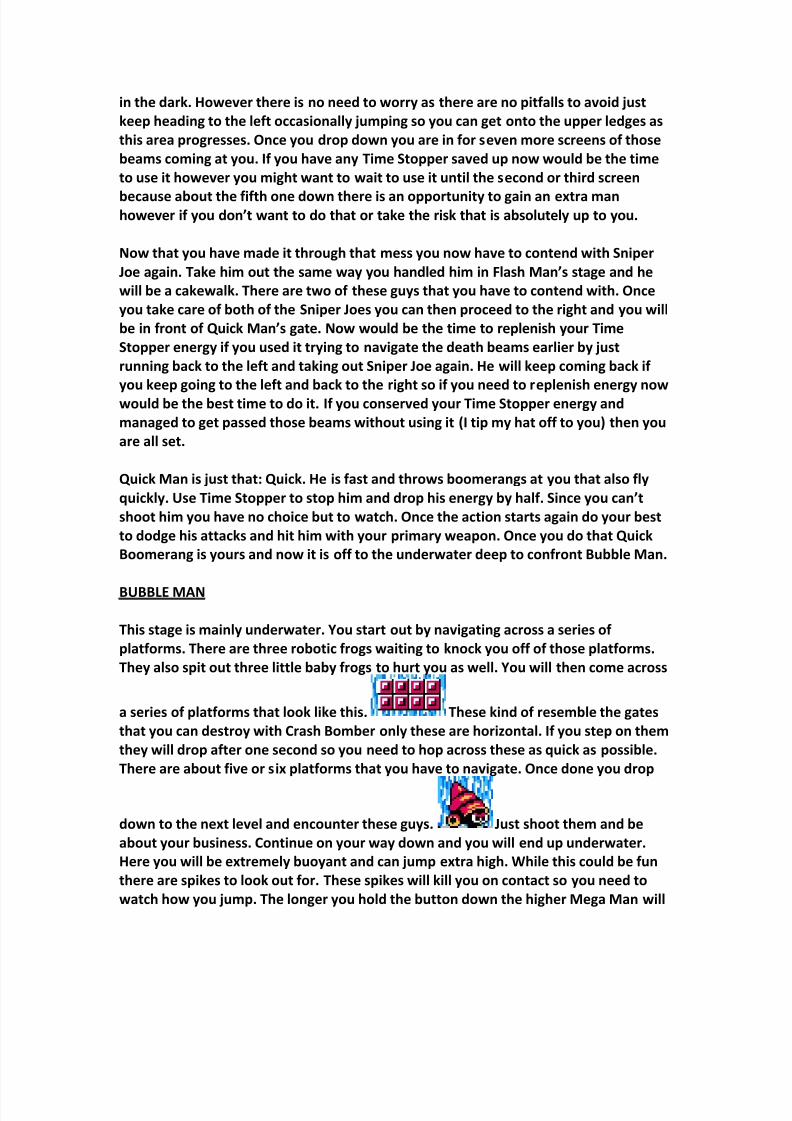
path and drop down to the level below. Once you get there you will be greeted by
Sniper Joe from the original Mega Man. However this time he has a mech that he rides
in. In order to take him out you need to unload on this mech and thendefeat Joe himself. You can take out the mech in a couple of hits using Crash Bomber.
Then unload on Joe with your primary weapon while his shield is away. Now hear you
have two possible paths to take; the one on the far left or the one right underneath
you if you are good at trick jumping. I recommend just going to the left because then
you have the ability to charge your Crash Bomber if you used it on Sniper Joe’s mech
and also have the ability to pick up some other items like an energy restore disc.
However if you do take the alternate path you will have the ability to get an Energy
8/3/2019 Megaman II
http://slidepdf.com/reader/full/megaman-ii 27/46
Tank again if you are really good at trick jumping as there are some pretty small
platforms that you have to jump on. You can also avoid the other Sniper Joe’s waiting
to pounce on you. Now if you have the weapon energy available we can take on Flash
Man as he is just around the next bend (so to speak).
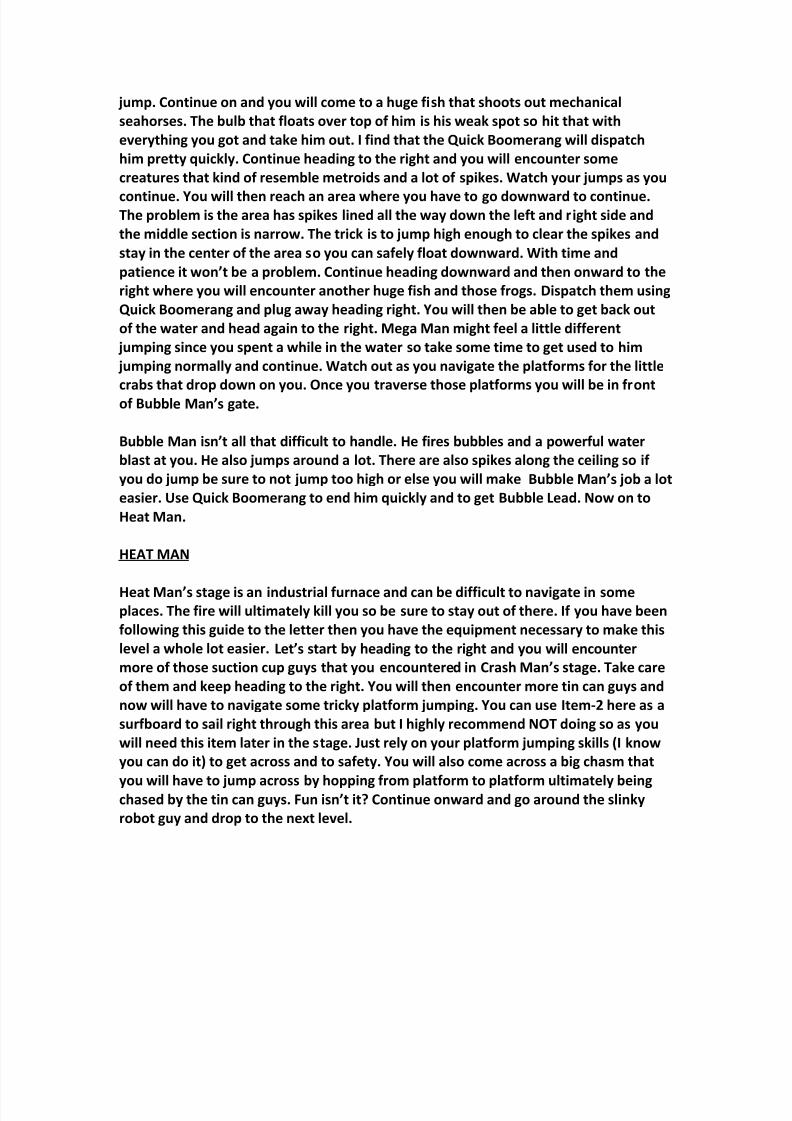
When it comes to Flash Man his primary ability (and the only one that he uses) is hisability to freeze you where you stand. He then unleashes a fury of shots. If you can
manage to be out of his line of fire when he freezes you then his shots will miss you
completely as they only fire in a limited fan pattern.
Once he uses his freeze ability you are incapacitated for a few seconds.
There is no avoiding this. He then fires at you as explained above. Use Crash Bomber
to take him out quickly or if you have them you can use Metal Blades. Once you
defeat him you will gain his Time Stopper ability and Item 3. Time Stopper comes in
handy in many stages especially the one we are now going to and also against this
upcoming boss.
QUICK MAN
This stage is in some sort of power or electrical plant I am not sure which. From the
start use your newly acquired Item 3 to get that extra man laying on the ledge to the
left. Then continue downward. You will wind down some passageways inhabited by
those wiggly electric worm things and then you will encounter something totally
different. They are beams that come from the sides of the wall. These will kill you on
impact so it is imperative NOT to touch them. To ease the challenge of this area youcan use Time Stopper to keep the beams from coming at you. The only drawback is
you can’t turn off Time Stopper once you start it nor can you access your menu while
it is active so it will drain your weapon energy completely.
THESE WILL KILL YOU!
You will encounter three screens with these nasty traps on your way down but make
your way to the right because if you make it you will be rewarded with a weaponreplacement, an extra life, and an energy tank. Continue along your way down and
you will end up in a section where it becomes dark and then it lightens up again by
these guys. Once you kill them the lights go out and you must navigate
8/3/2019 Megaman II
http://slidepdf.com/reader/full/megaman-ii 28/46
in the dark. However there is no need to worry as there are no pitfalls to avoid just
keep heading to the left occasionally jumping so you can get onto the upper ledges as
this area progresses. Once you drop down you are in for seven more screens of those
beams coming at you. If you have any Time Stopper saved up now would be the time
to use it however you might want to wait to use it until the second or third screen
because about the fifth one down there is an opportunity to gain an extra manhowever if you don’t want to do that or take the risk that is absolutely up to you.
Now that you have made it through that mess you now have to contend with Sniper
Joe again. Take him out the same way you handled him in Flash Man’s stage and he
will be a cakewalk. There are two of these guys that you have to contend with. Once
you take care of both of the Sniper Joes you can then proceed to the right and you will
be in front of Quick Man’s gate. Now would be the time to replenish your Time
Stopper energy if you used it trying to navigate the death beams earlier by just
running back to the left and taking out Sniper Joe again. He will keep coming back if
you keep going to the left and back to the right so if you need to replenish energy now
would be the best time to do it. If you conserved your Time Stopper energy and
managed to get passed those beams without using it (I tip my hat off to you) then you
are all set.
Quick Man is just that: Quick. He is fast and throws boomerangs at you that also fly
quickly. Use Time Stopper to stop him and drop his energy by half. Since you can’t
shoot him you have no choice but to watch. Once the action starts again do your best
to dodge his attacks and hit him with your primary weapon. Once you do that Quick
Boomerang is yours and now it is off to the underwater deep to confront Bubble Man.
BUBBLE MAN
This stage is mainly underwater. You start out by navigating across a series of
platforms. There are three robotic frogs waiting to knock you off of those platforms.
They also spit out three little baby frogs to hurt you as well. You will then come across
a series of platforms that look like this. These kind of resemble the gates
that you can destroy with Crash Bomber only these are horizontal. If you step on them
they will drop after one second so you need to hop across these as quick as possible.
There are about five or six platforms that you have to navigate. Once done you drop
down to the next level and encounter these guys. Just shoot them and be
about your business. Continue on your way down and you will end up underwater.
Here you will be extremely buoyant and can jump extra high. While this could be fun
there are spikes to look out for. These spikes will kill you on contact so you need to
watch how you jump. The longer you hold the button down the higher Mega Man will
8/3/2019 Megaman II
http://slidepdf.com/reader/full/megaman-ii 29/46
jump. Continue on and you will come to a huge fish that shoots out mechanical
seahorses. The bulb that floats over top of him is his weak spot so hit that with
everything you got and take him out. I find that the Quick Boomerang will dispatch
him pretty quickly. Continue heading to the right and you will encounter some
creatures that kind of resemble metroids and a lot of spikes. Watch your jumps as you
continue. You will then reach an area where you have to go downward to continue.The problem is the area has spikes lined all the way down the left and right side and
the middle section is narrow. The trick is to jump high enough to clear the spikes and
stay in the center of the area so you can safely float downward. With time and
patience it won’t be a problem. Continue heading downward and then onward to the
right where you will encounter another huge fish and those frogs. Dispatch them using
Quick Boomerang and plug away heading right. You will then be able to get back out
of the water and head again to the right. Mega Man might feel a little different
jumping since you spent a while in the water so take some time to get used to him
jumping normally and continue. Watch out as you navigate the platforms for the little
crabs that drop down on you. Once you traverse those platforms you will be in front
of Bubble Man’s gate.
Bubble Man isn’t all that difficult to handle. He fires bubbles and a powerful water
blast at you. He also jumps around a lot. There are also spikes along the ceiling so if
you do jump be sure to not jump too high or else you will make Bubble Man’s job a lot
easier. Use Quick Boomerang to end him quickly and to get Bubble Lead. Now on to
Heat Man.
HEAT MAN
Heat Man’s stage is an industrial furnace and can be difficult to navigate in someplaces. The fire will ultimately kill you so be sure to stay out of there. If you have been
following this guide to the letter then you have the equipment necessary to make this
level a whole lot easier. Let’s start by heading to the right and you will encounter
more of those suction cup guys that you encountered in Crash Man’s stage. Take care
of them and keep heading to the right. You will then encounter more tin can guys and
now will have to navigate some tricky platform jumping. You can use Item-2 here as a
surfboard to sail right through this area but I highly recommend NOT doing so as you
will need this item later in the stage. Just rely on your platform jumping skills (I know
you can do it) to get across and to safety. You will also come across a big chasm that
you will have to jump across by hopping from platform to platform ultimately beingchased by the tin can guys. Fun isn’t it? Continue onward and go around the slinky
robot guy and drop to the next level.
8/3/2019 Megaman II
http://slidepdf.com/reader/full/megaman-ii 30/46
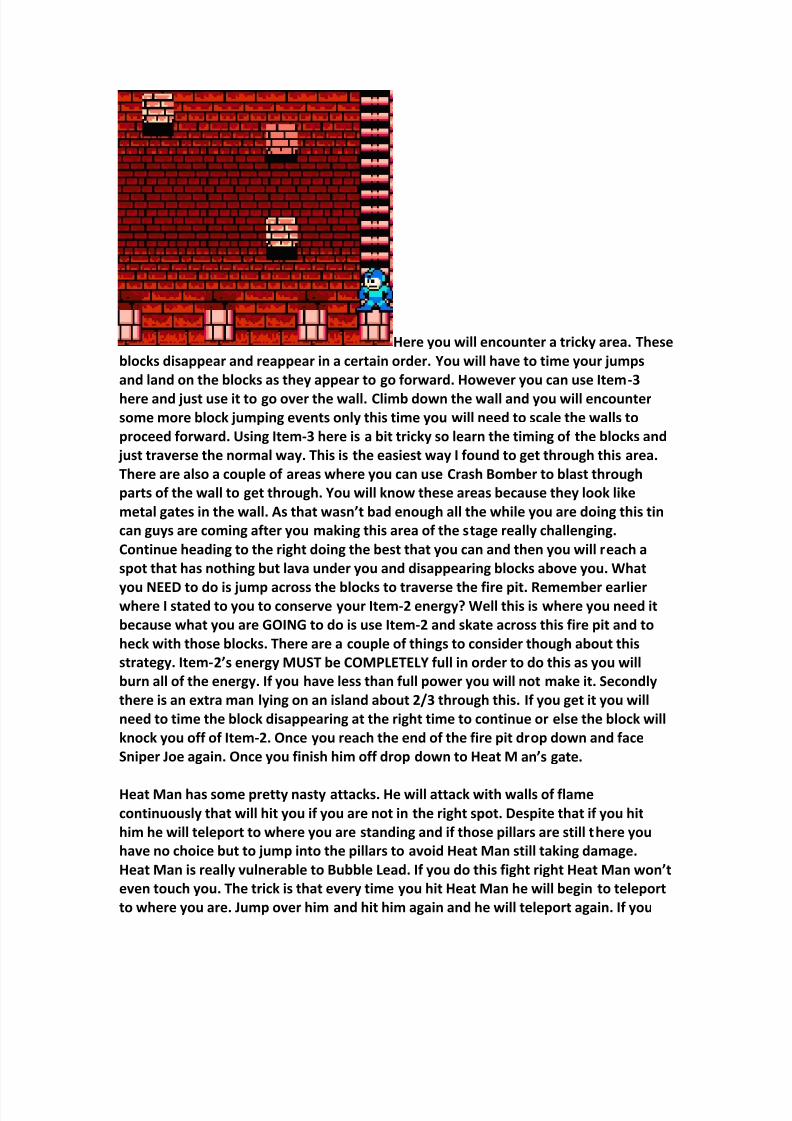
Here you will encounter a tricky area. These
blocks disappear and reappear in a certain order. You will have to time your jumps
and land on the blocks as they appear to go forward. However you can use Item-3
here and just use it to go over the wall. Climb down the wall and you will encounter
some more block jumping events only this time you will need to scale the walls to
proceed forward. Using Item-3 here is a bit tricky so learn the timing of the blocks and
just traverse the normal way. This is the easiest way I found to get through this area.
There are also a couple of areas where you can use Crash Bomber to blast through
parts of the wall to get through. You will know these areas because they look like
metal gates in the wall. As that wasn’t bad enough all the while you are doing this tin
can guys are coming after you making this area of the stage really challenging.
Continue heading to the right doing the best that you can and then you will reach a
spot that has nothing but lava under you and disappearing blocks above you. What
you NEED to do is jump across the blocks to traverse the fire pit. Remember earlierwhere I stated to you to conserve your Item-2 energy? Well this is where you need it
because what you are GOING to do is use Item-2 and skate across this fire pit and to
heck with those blocks. There are a couple of things to consider though about this
strategy. Item-2’s energy MUST be COMPLETELY full in order to do this as you will
burn all of the energy. If you have less than full power you will not make it. Secondly
there is an extra man lying on an island about 2/3 through this. If you get it you will
need to time the block disappearing at the right time to continue or else the block will
knock you off of Item-2. Once you reach the end of the fire pit drop down and face
Sniper Joe again. Once you finish him off drop down to Heat Man’s gate.
Heat Man has some pretty nasty attacks. He will attack with walls of flame
continuously that will hit you if you are not in the right spot. Despite that if you hit
him he will teleport to where you are standing and if those pillars are still there you
have no choice but to jump into the pillars to avoid Heat Man still taking damage.
Heat Man is really vulnerable to Bubble Lead. If you do this fight right Heat Man won’t
even touch you. The trick is that every time you hit Heat Man he will begin to teleport
to where you are. Jump over him and hit him again and he will teleport again. If you
8/3/2019 Megaman II
http://slidepdf.com/reader/full/megaman-ii 31/46
can keep that up you won’t even take a single point of damage and Heat Man won’t
even be able to get a single attack off. Once you are done toying with Heat Man you
will earn Atomic Fire which is quite a nice weapon. You will also get the Item-1
upgrade. Now we are ready to take on Wood Man. (*giggles* … wood).
WOOD MAN
Wood Man’s stage is the forest. The first thing that you will encounter in this stage is
some annoying metal bats. They look like black berries until you come close. They will
them come at you. If they hit you they will retreat back up to the trees waiting to do it
again. Take them out with one shot and then proceed to the right where you will
encounter an evil counterpart of Bugs Bunny. This bunny tosses carrots and jumps at
you. Take him out and then quickly head right again. You will encounter yet some
more bats and rabbits and then a ladder heading downward. Descending down you
will encounter three more bats and then another ladder heading downward. When
you come to the next area you will encounter a big dog with a real bad attitude. He
will continuously shoot a chain of fireballs at you in a wide “U” pattern. Avoid the
fireballs and unload on him with your primary weapon. Once he is out head (you
guessed it) to the right. You will encounter two more of these doggies in the next two
areas however the areas are narrower than the previous one. So in order to avoid the
fire balls you will have to get a little closer to this snarling beast. After knocking these
other two out you will then see a ladder heading upward. Once you head up and to
the right you will encounter a gorilla who wants to talk to you. He will swing on the
branch and then lunge at you. When he lunges unload on him with your primary
weapon and proceed to the right. You will take out two more magilla gorillas and also
the birds that hatch more baby robot birds. Descend the ladder and take out the
lonely bunny and then head downward again. You will encounter some more bunniesonly you will be fighting them at an angle making it a little bit tougher hitting them
while dodging the carrots they throw. You will then descend another ladder and are
able to proceed through the rest of the stage. You will then encounter runaway
chickens. The thing about these is you can just stop moving and they will jump over
you. So have them jump over you and then keep heading to the right. You are now in
front of Wood Man’s gate. Bust out Atomic Fire and let’s go to work.
Wood Man is annoying at best. He starts off creating a shield of leaves around him in
which he is invincible at this point. That shield will then launch into the air and leaves
will float down in a zigzag pattern toward you. He will also jump toward you while youare dodging the falling leaves. Since you have Atomic Fire you can destroy him in one
or two hits. Atomic Fire can be charged up to release a HUGE fireball but it takes quite
a bit more energy then firing normally. If you charge up the weapon fully it will deal
devastating damage to Wood Man you just have to make sure that his leaf shield is
away from him. Once you have taken him out you obtain the Leaf Shield and are now
ready to face Metal Man.
8/3/2019 Megaman II
http://slidepdf.com/reader/full/megaman-ii 32/46
METAL MAN
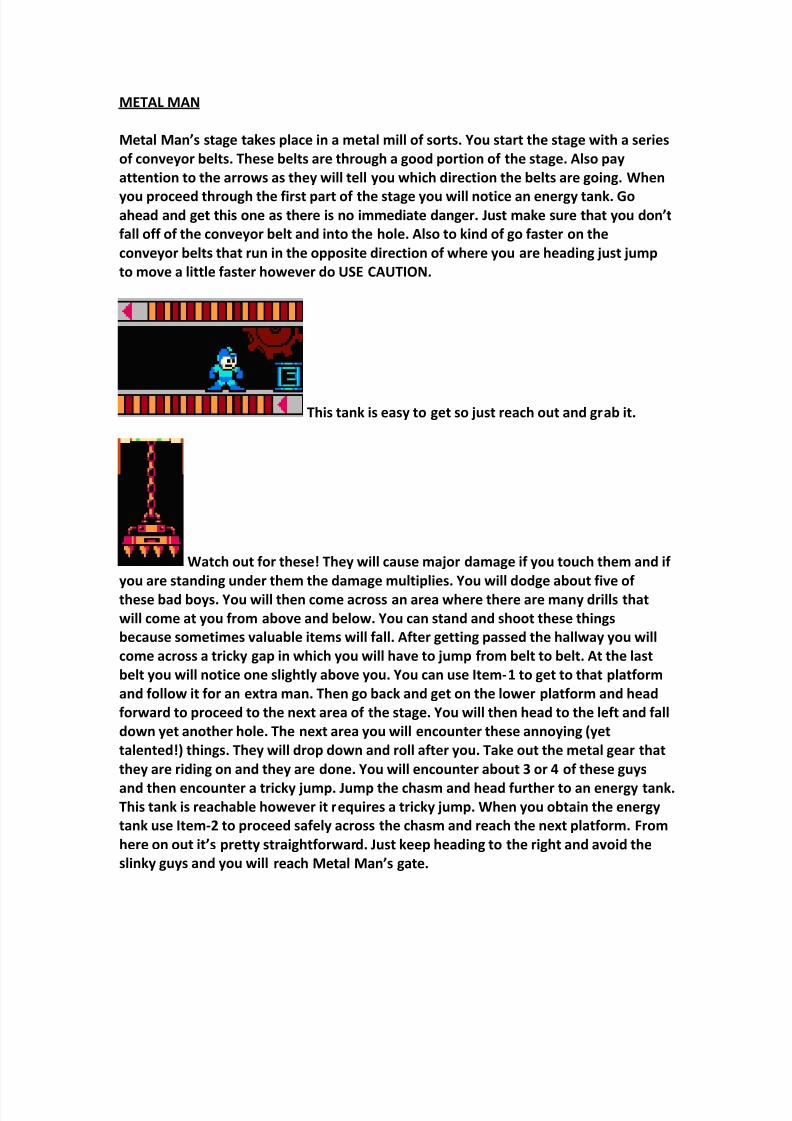
Metal Man’s stage takes place in a metal mill of sorts. You start the stage with a series
of conveyor belts. These belts are through a good portion of the stage. Also pay
attention to the arrows as they will tell you which direction the belts are going. When
you proceed through the first part of the stage you will notice an energy tank. Goahead and get this one as there is no immediate danger. Just make sure that you don’t
fall off of the conveyor belt and into the hole. Also to kind of go faster on the
conveyor belts that run in the opposite direction of where you are heading just jump
to move a little faster however do USE CAUTION.
This tank is easy to get so just reach out and grab it.
Watch out for these! They will cause major damage if you touch them and if
you are standing under them the damage multiplies. You will dodge about five of
these bad boys. You will then come across an area where there are many drills that
will come at you from above and below. You can stand and shoot these things
because sometimes valuable items will fall. After getting passed the hallway you will
come across a tricky gap in which you will have to jump from belt to belt. At the last
belt you will notice one slightly above you. You can use Item-1 to get to that platform
and follow it for an extra man. Then go back and get on the lower platform and head
forward to proceed to the next area of the stage. You will then head to the left and fall
down yet another hole. The next area you will encounter these annoying (yet
talented!) things. They will drop down and roll after you. Take out the metal gear that
they are riding on and they are done. You will encounter about 3 or 4 of these guys
and then encounter a tricky jump. Jump the chasm and head further to an energy tank.This tank is reachable however it requires a tricky jump. When you obtain the energy
tank use Item-2 to proceed safely across the chasm and reach the next platform. From
here on out it’s pretty straightforward. Just keep heading to the right and avoid the
slinky guys and you will reach Metal Man’s gate.
8/3/2019 Megaman II
http://slidepdf.com/reader/full/megaman-ii 33/46
Metal Man’s attacks consist of him throwing blades and jumping at you. Not to
mention the conveyor belt that you are on changes directions. You will notice a quick
flash before the belt changes directions. Now you would think that you can use Leaf
Shield to quickly dispatch Metal Man; well you’d be incorrect. To quickly get rid of
Metal Man use Quick Boomerang. Once he is defeated you have successfully
vanquished the Robot Masters. Now it’s time to hunt the big tamale.
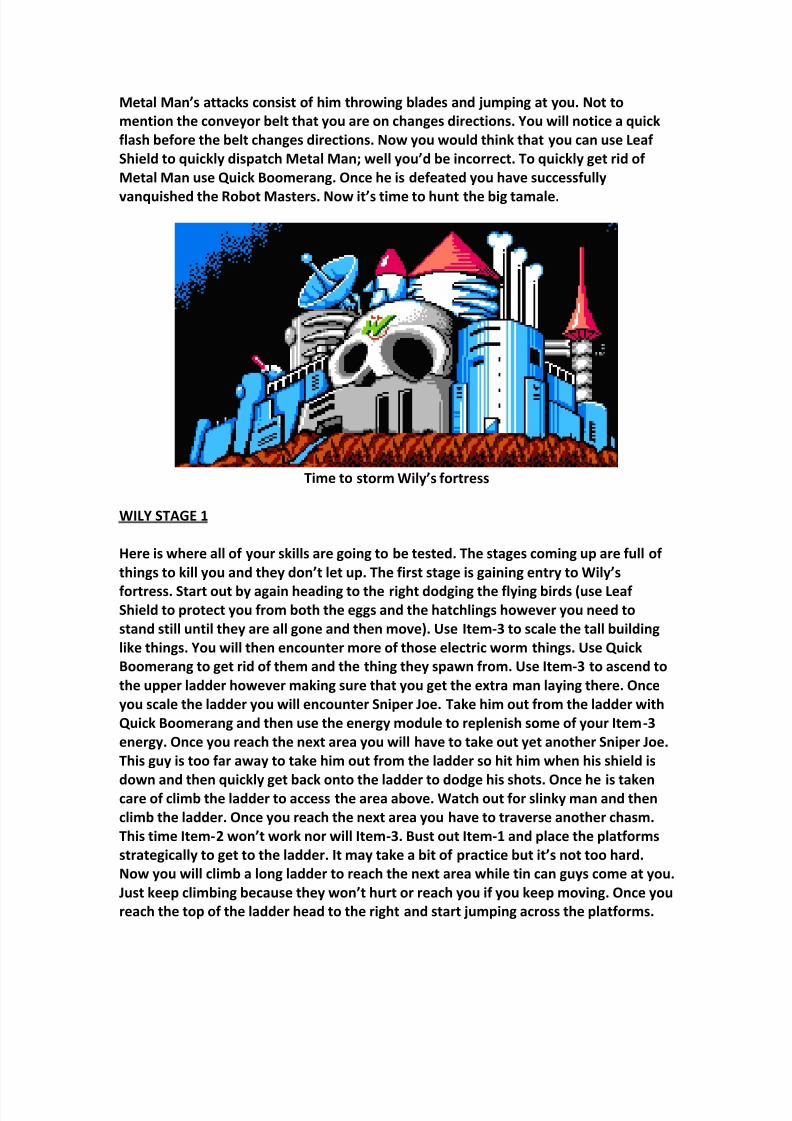
Time to storm Wily’s fortress
WILY STAGE 1
Here is where all of your skills are going to be tested. The stages coming up are full of
things to kill you and they don’t let up. The first stage is gaining entry to Wily’s
fortress. Start out by again heading to the right dodging the flying birds (use Leaf Shield to protect you from both the eggs and the hatchlings however you need to
stand still until they are all gone and then move). Use Item-3 to scale the tall building
like things. You will then encounter more of those electric worm things. Use Quick
Boomerang to get rid of them and the thing they spawn from. Use Item-3 to ascend to
the upper ladder however making sure that you get the extra man laying there. Once
you scale the ladder you will encounter Sniper Joe. Take him out from the ladder with
Quick Boomerang and then use the energy module to replenish some of your Item-3
energy. Once you reach the next area you will have to take out yet another Sniper Joe.
This guy is too far away to take him out from the ladder so hit him when his shield is
down and then quickly get back onto the ladder to dodge his shots. Once he is takencare of climb the ladder to access the area above. Watch out for slinky man and then
climb the ladder. Once you reach the next area you have to traverse another chasm.
This time Item-2 won’t work nor will Item-3. Bust out Item-1 and place the platforms
strategically to get to the ladder. It may take a bit of practice but it’s not too hard.
Now you will climb a long ladder to reach the next area while tin can guys come at you.
Just keep climbing because they won’t hurt or reach you if you keep moving. Once you
reach the top of the ladder head to the right and start jumping across the platforms.

8/3/2019 Megaman II
http://slidepdf.com/reader/full/megaman-ii 34/46
After a while a giant dragon (the boss of this stage) will pop up and begin chasing you.
Keep jumping as hitting him won’t do any good and touching him will instantly kill you
at this point. Eventually you will come to the end of the path and are able to attack
him. I just use the primary weapon on this guy as it deals some pretty crucial damage
to him. Keep in mind that he has a fire attack that has a pretty wide area. You can try
to jump over it and land on another platform or you can take the hit just make surethat you don’t get knocked off of the platform you are standing on.
WILY STAGE 2
This stage kind of reminds me of Metal Man’s stage only without the conveyor belts.
Anyhoo head to the right and you will encounter more suction cup guys and then a big
area of spikes. Take out the suction cup guys and quickly use Item-2 to get across the
spikes. If you wait till the last possible second you will be rewarded with an energy
tank. Once you grab the tank head down the ladder. You will then be rewarded by an
extra man and a lot of small weapon modules. Use these on the weapon that you have
the least amount of energy of. Then head down the ladder here you can get another
extra life and another energy tank (sometimes it pays to be gutsy). Head down the
ladder after you get your goodies however when the screen moves to the next area
DO NOT DROP from the ladder. You will notice that there are spikes directly below
you. Instead hold down right on the control pad and press the jump button. Keep
holding the right button down as you will drop to the right and avoiding the spikes.
Drop down in the area between the spikes and you will land safely below. Continue
heading to the right (like you have another choice?) and take out the drillers that
spring out of the ceiling and floor and then you will encounter a spike chain. However
if you need to replenish your weapon energy taking out some drillers will be a good
thing to do. Use Item-3 to lift you up to the next platform and be careful as there is aspike chain up on top as well. Navigate passed it and you encounter yet MORE of
those spike chains. Get passed all of them and you come to another ladder so we need
to head downward. It’s time to do some more trick jumping because there are spikes
everywhere. If you can manage to land on the small platforms you can then judge the
best way to go. If you need to you can grab the Power Module to replenish your
energy you can get to it by using Item-2.
8/3/2019 Megaman II
http://slidepdf.com/reader/full/megaman-ii 35/46
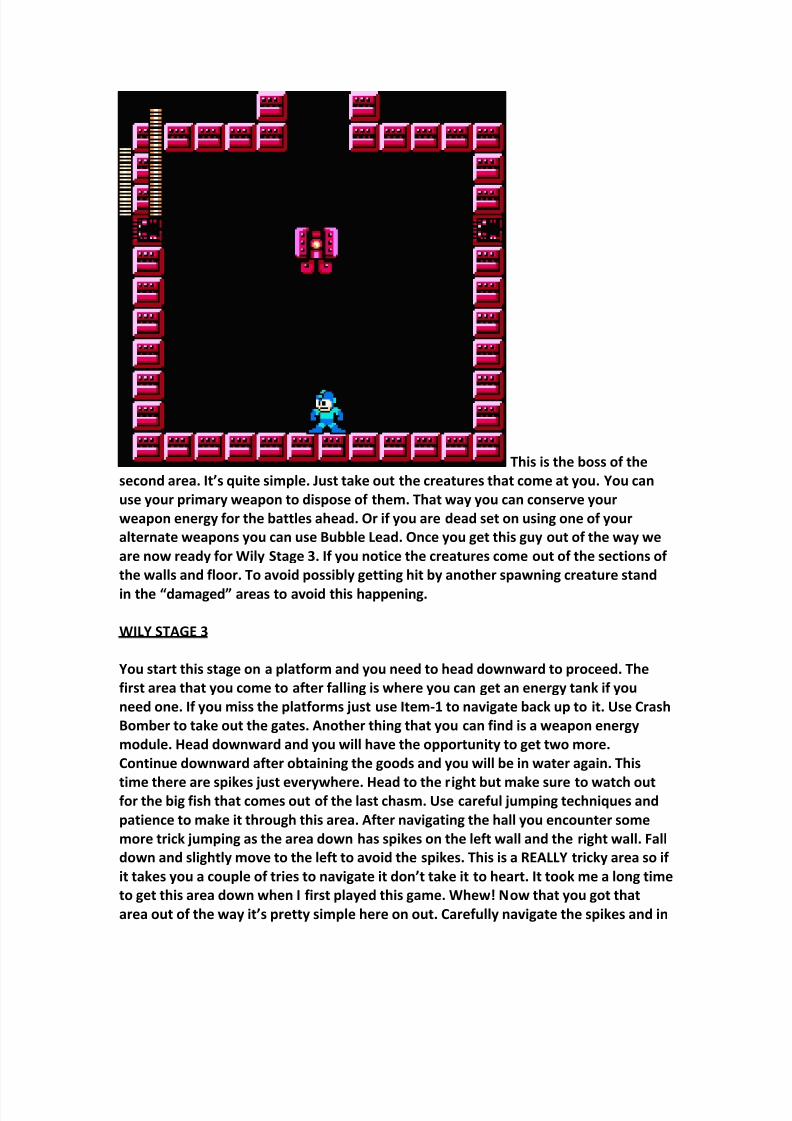
This is the boss of the
second area. It’s quite simple. Just take out the creatures that come at you. You can
use your primary weapon to dispose of them. That way you can conserve your
weapon energy for the battles ahead. Or if you are dead set on using one of your
alternate weapons you can use Bubble Lead. Once you get this guy out of the way we
are now ready for Wily Stage 3. If you notice the creatures come out of the sections of
the walls and floor. To avoid possibly getting hit by another spawning creature stand
in the “damaged” areas to avoid this happening.
WILY STAGE 3
You start this stage on a platform and you need to head downward to proceed. The
first area that you come to after falling is where you can get an energy tank if you
need one. If you miss the platforms just use Item-1 to navigate back up to it. Use Crash
Bomber to take out the gates. Another thing that you can find is a weapon energy
module. Head downward and you will have the opportunity to get two more.
Continue downward after obtaining the goods and you will be in water again. This
time there are spikes just everywhere. Head to the right but make sure to watch outfor the big fish that comes out of the last chasm. Use careful jumping techniques and
patience to make it through this area. After navigating the hall you encounter some
more trick jumping as the area down has spikes on the left wall and the right wall. Fall
down and slightly move to the left to avoid the spikes. This is a REALLY tricky area so if
it takes you a couple of tries to navigate it don’t take it to heart. It took me a long time
to get this area down when I first played this game. Whew! Now that you got that
area out of the way it’s pretty simple here on out. Carefully navigate the spikes and in
8/3/2019 Megaman II
http://slidepdf.com/reader/full/megaman-ii 36/46
the next area you can finally get out of the water and the spikes. Proceed to the right
and you are ready for the boss of this level.
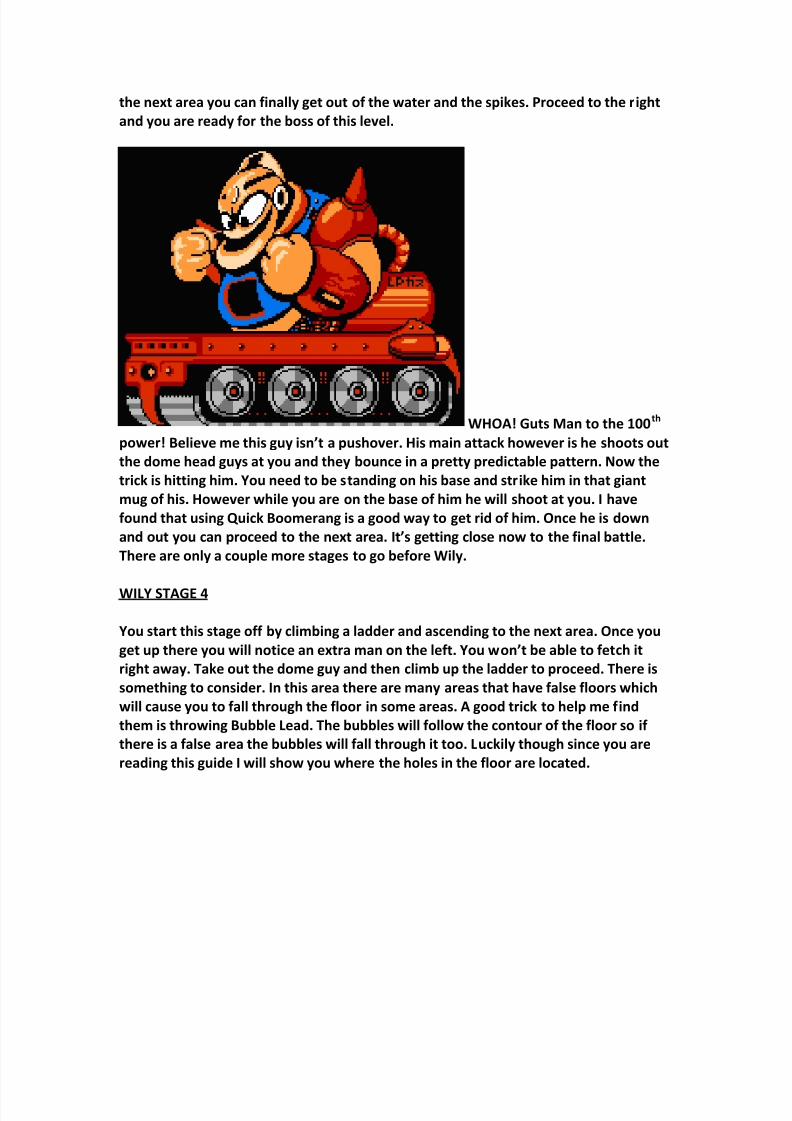
WHOA! Guts Man to the 100th
power! Believe me this guy isn’t a pushover. His main attack however is he shoots out
the dome head guys at you and they bounce in a pretty predictable pattern. Now the
trick is hitting him. You need to be standing on his base and strike him in that giant
mug of his. However while you are on the base of him he will shoot at you. I have
found that using Quick Boomerang is a good way to get rid of him. Once he is down
and out you can proceed to the next area. It’s getting close now to the final battle.
There are only a couple more stages to go before Wily.
WILY STAGE 4
You start this stage off by climbing a ladder and ascending to the next area. Once you
get up there you will notice an extra man on the left. You won’t be able to fetch it
right away. Take out the dome guy and then climb up the ladder to proceed. There is
something to consider. In this area there are many areas that have false floors which
will cause you to fall through the floor in some areas. A good trick to help me find
them is throwing Bubble Lead. The bubbles will follow the contour of the floor so if
there is a false area the bubbles will fall through it too. Luckily though since you are
reading this guide I will show you where the holes in the floor are located.

8/3/2019 Megaman II
http://slidepdf.com/reader/full/megaman-ii 37/46
You can’t always trust the floors in this stage. Many areas
have spikes and that spells instant death for you. To reach that extra man we saw
before you can just fall through the floor and then use Item-1 to lift back up and head
to the left. Fall back down to the area and retrieve it. Then climb back up the ladder
and continue heading upward.
The red
circles indicate the false floors (duh). In this area reach the ladder and then climb upto proceed.
8/3/2019 Megaman II
http://slidepdf.com/reader/full/megaman-ii 38/46
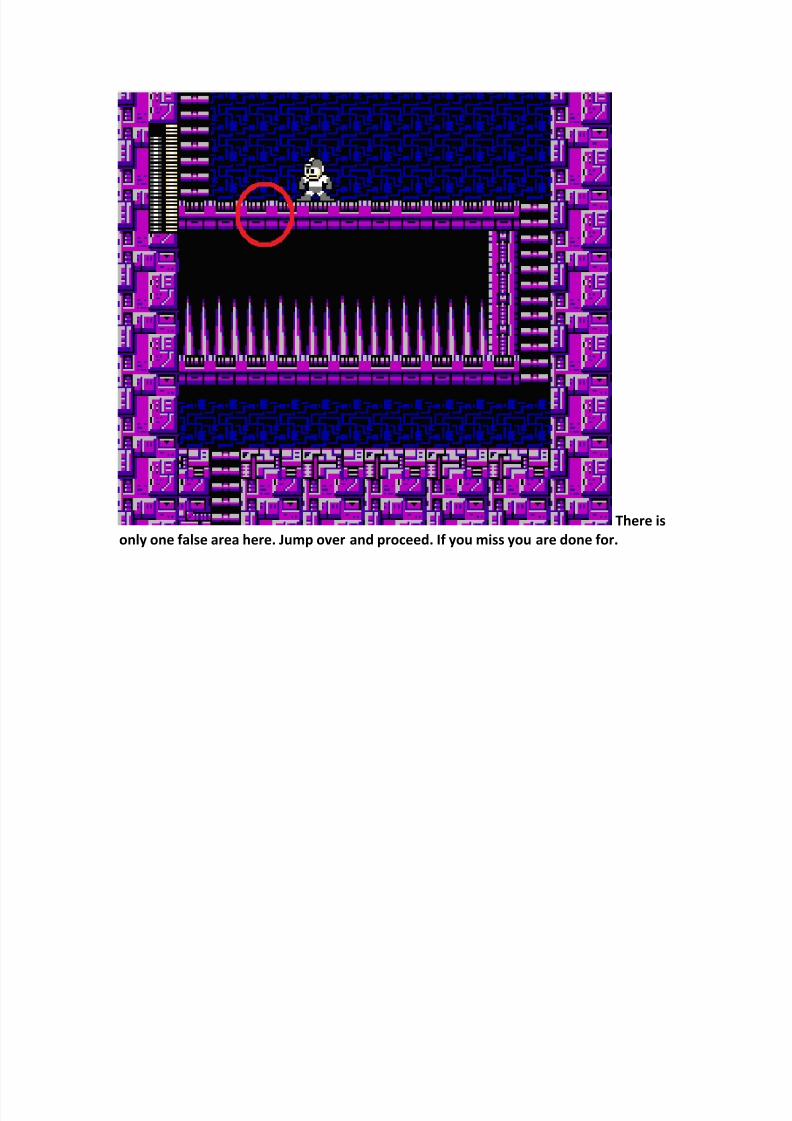
There is
only one false area here. Jump over and proceed. If you miss you are done for.
8/3/2019 Megaman II
http://slidepdf.com/reader/full/megaman-ii 39/46
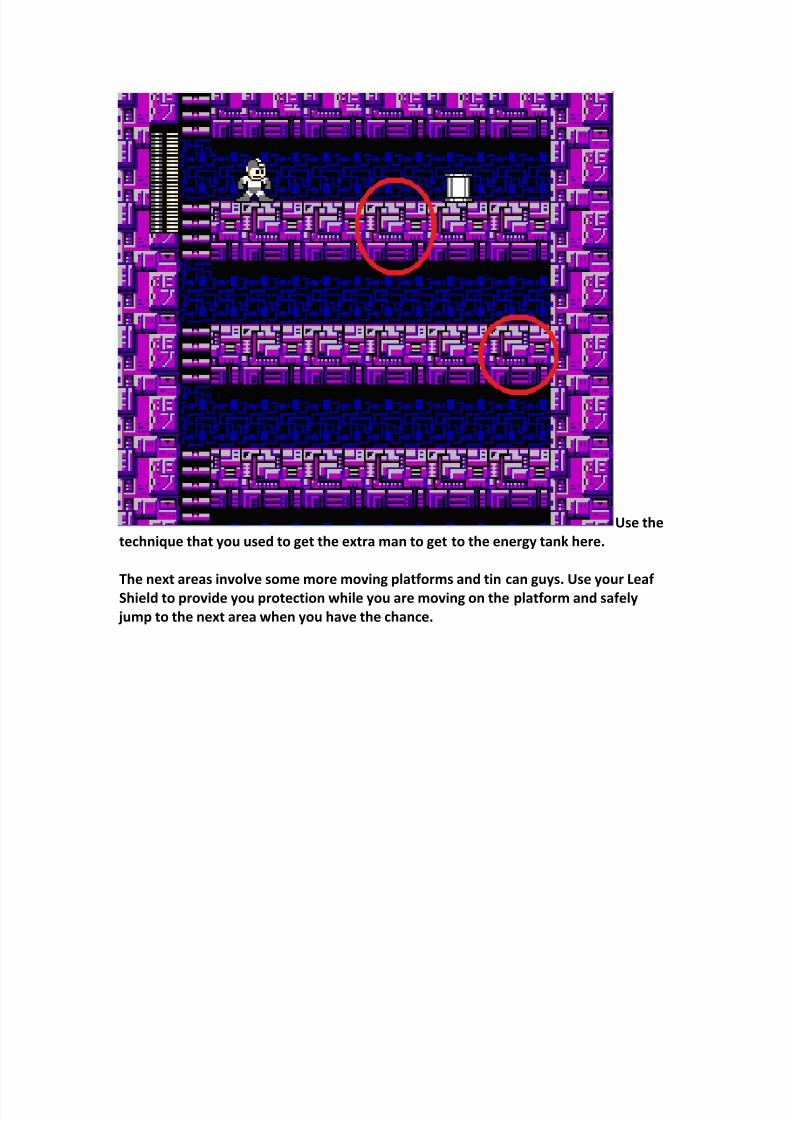
Use the
technique that you used to get the extra man to get to the energy tank here.
The next areas involve some more moving platforms and tin can guys. Use your Leaf
Shield to provide you protection while you are moving on the platform and safely
jump to the next area when you have the chance.
8/3/2019 Megaman II
http://slidepdf.com/reader/full/megaman-ii 40/46
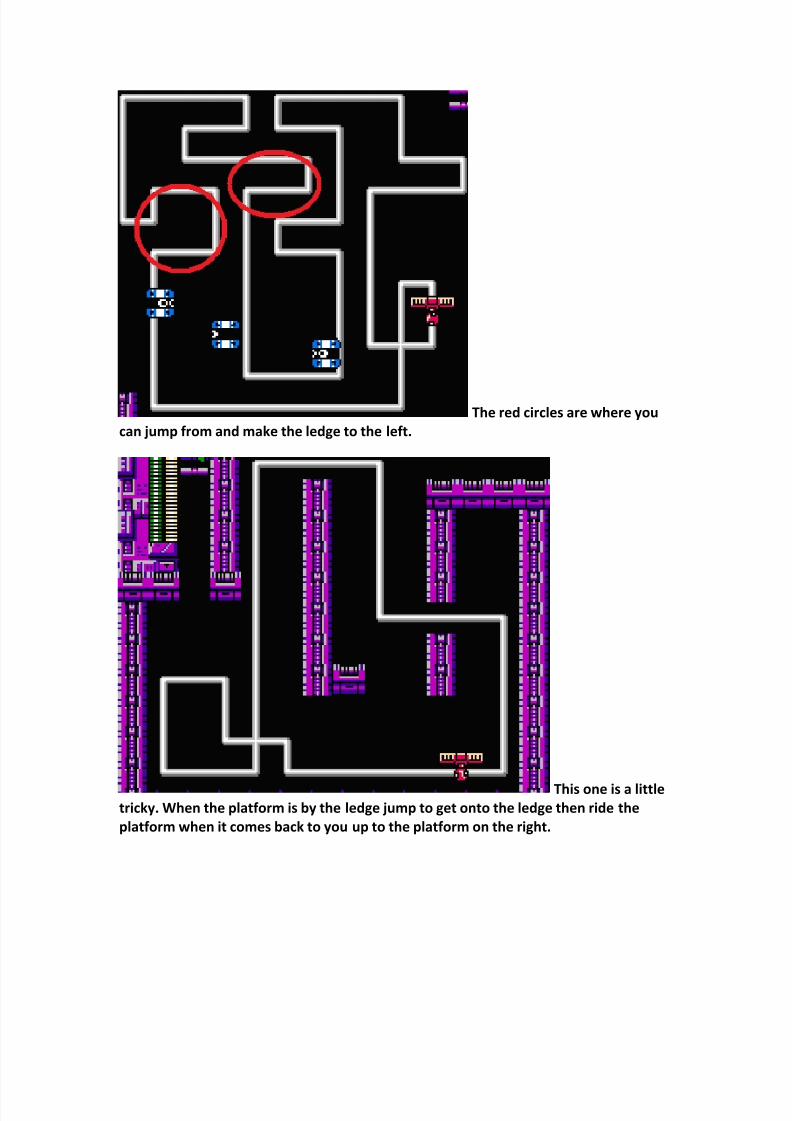
The red circles are where you
can jump from and make the ledge to the left.
This one is a littletricky. When the platform is by the ledge jump to get onto the ledge then ride the
platform when it comes back to you up to the platform on the right.
8/3/2019 Megaman II
http://slidepdf.com/reader/full/megaman-ii 41/46
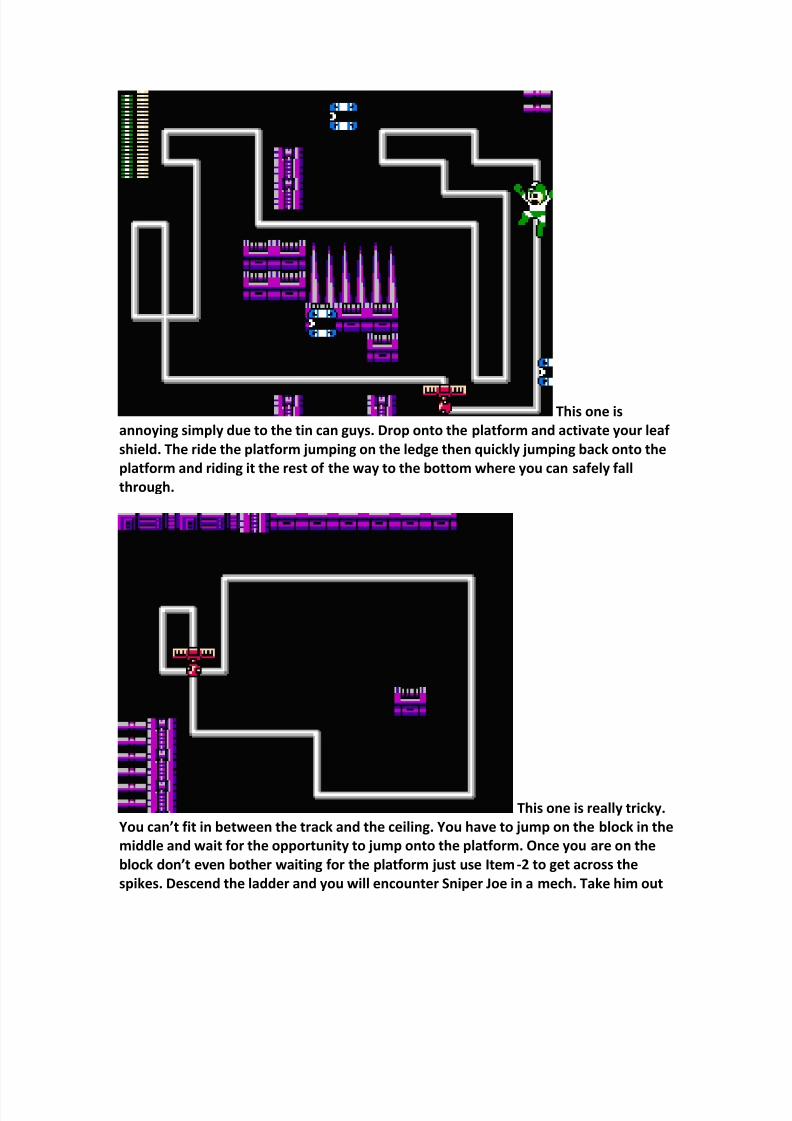
This one is
annoying simply due to the tin can guys. Drop onto the platform and activate your leaf
shield. The ride the platform jumping on the ledge then quickly jumping back onto the
platform and riding it the rest of the way to the bottom where you can safely fall
through.
This one is really tricky.
You can’t fit in between the track and the ceiling. You have to jump on the block in the
middle and wait for the opportunity to jump onto the platform. Once you are on the
block don’t even bother waiting for the platform just use Item -2 to get across the
spikes. Descend the ladder and you will encounter Sniper Joe in a mech. Take him out
8/3/2019 Megaman II
http://slidepdf.com/reader/full/megaman-ii 42/46
and then proceed down the hall. You will encounter two more Sniper Joes for you to
take out. Then you are at the gate for the boss fight.
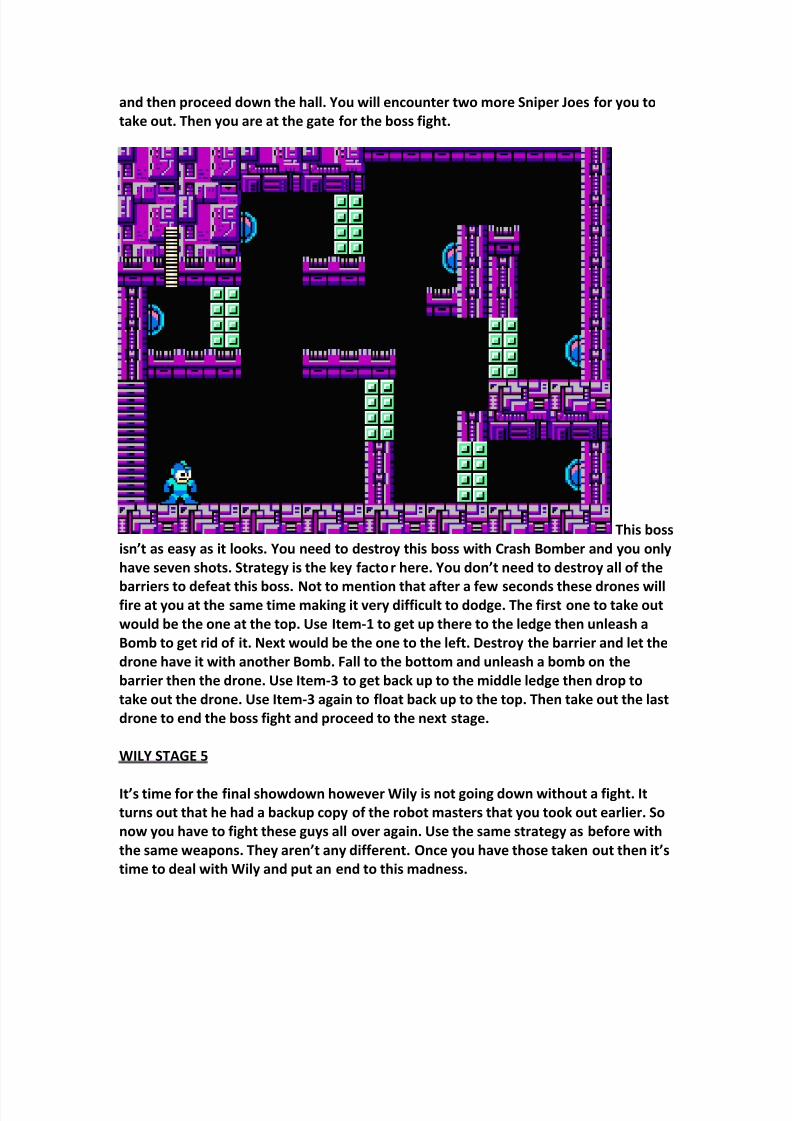
This boss
isn’t as easy as it looks. You need to destroy this boss with Crash Bomber and you only
have seven shots. Strategy is the key factor here. You don’t need to destroy all of the
barriers to defeat this boss. Not to mention that after a few seconds these drones willfire at you at the same time making it very difficult to dodge. The first one to take out
would be the one at the top. Use Item-1 to get up there to the ledge then unleash a
Bomb to get rid of it. Next would be the one to the left. Destroy the barrier and let the
drone have it with another Bomb. Fall to the bottom and unleash a bomb on the
barrier then the drone. Use Item-3 to get back up to the middle ledge then drop to
take out the drone. Use Item-3 again to float back up to the top. Then take out the last
drone to end the boss fight and proceed to the next stage.
WILY STAGE 5
It’s time for the final showdown however Wily is not going down without a fight. It
turns out that he had a backup copy of the robot masters that you took out earlier. So
now you have to fight these guys all over again. Use the same strategy as before with
the same weapons. They aren’t any different. Once you have those taken out then it’s
time to deal with Wily and put an end to this madness.
8/3/2019 Megaman II
http://slidepdf.com/reader/full/megaman-ii 43/46
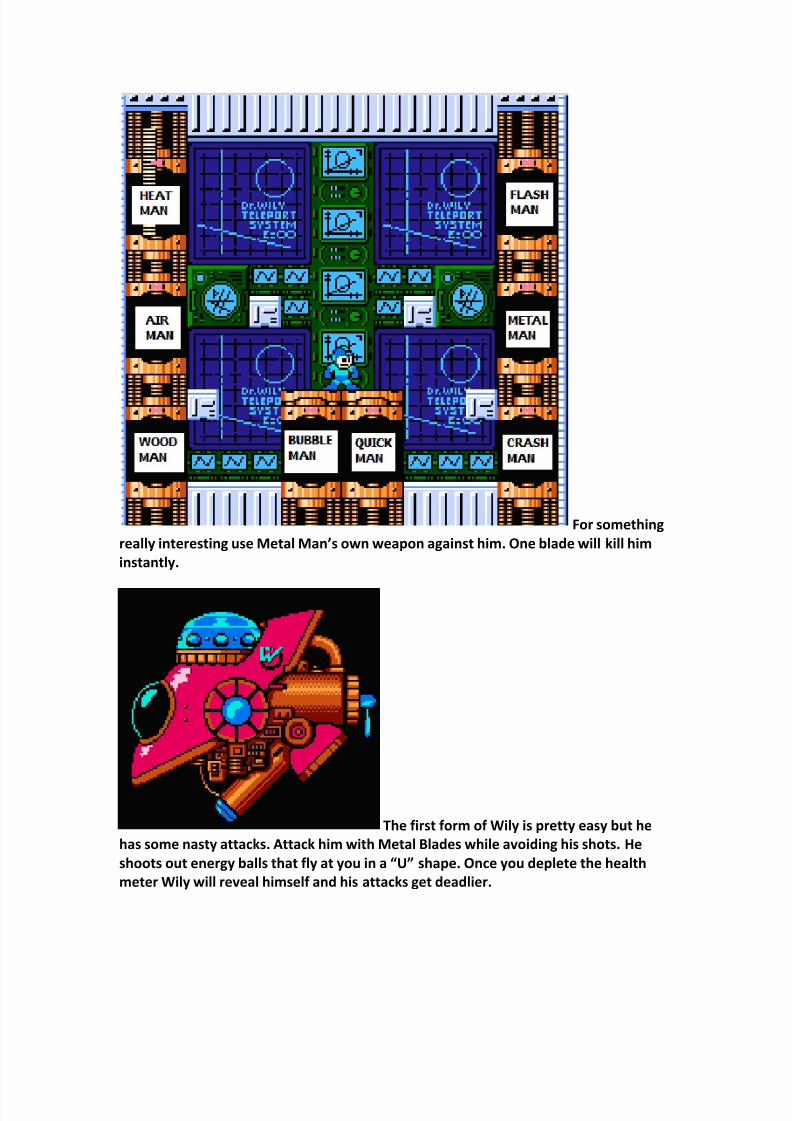
For something
really interesting use Metal Man’s own weapon against him. One blade will kill him
instantly.
The first form of Wily is pretty easy but he
has some nasty attacks. Attack him with Metal Blades while avoiding his shots. He
shoots out energy balls that fly at you in a “U” shape. Once you deplete the health
meter Wily will reveal himself and his attacks get deadlier.
8/3/2019 Megaman II
http://slidepdf.com/reader/full/megaman-ii 44/46
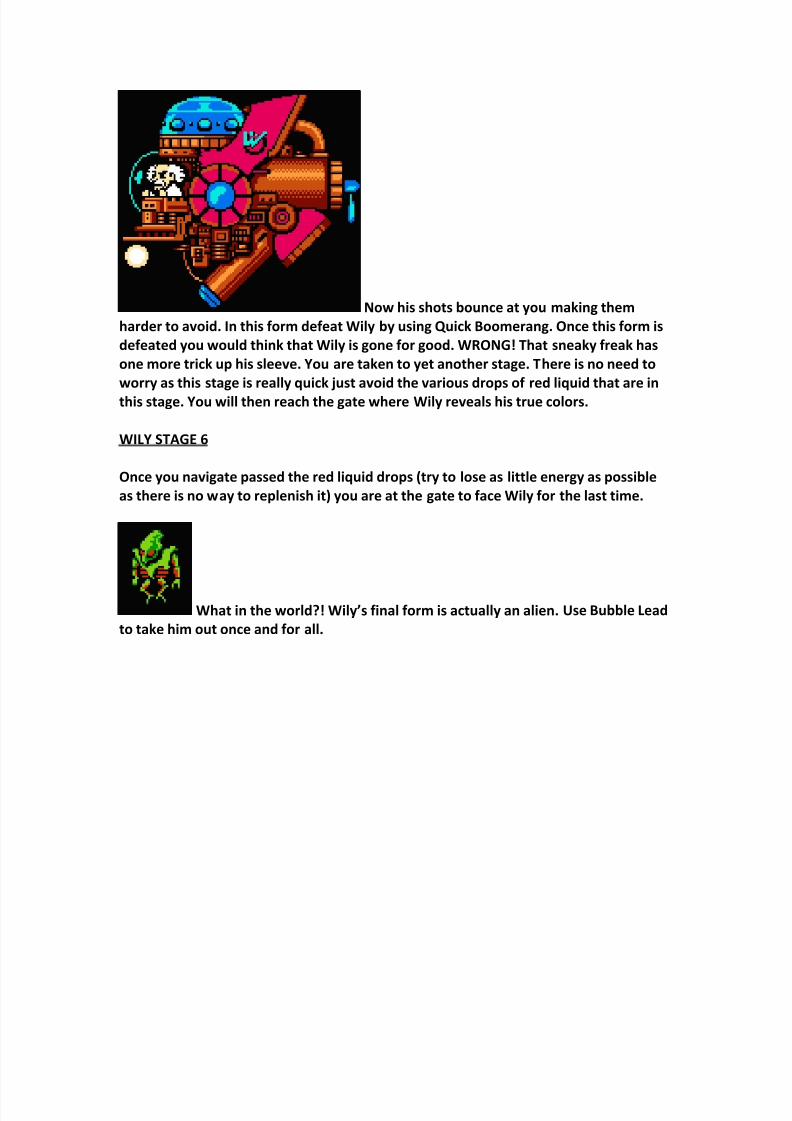
Now his shots bounce at you making them
harder to avoid. In this form defeat Wily by using Quick Boomerang. Once this form is
defeated you would think that Wily is gone for good. WRONG! That sneaky freak has
one more trick up his sleeve. You are taken to yet another stage. There is no need to
worry as this stage is really quick just avoid the various drops of red liquid that are in
this stage. You will then reach the gate where Wily reveals his true colors.
WILY STAGE 6
Once you navigate passed the red liquid drops (try to lose as little energy as possible
as there is no way to replenish it) you are at the gate to face Wily for the last time.
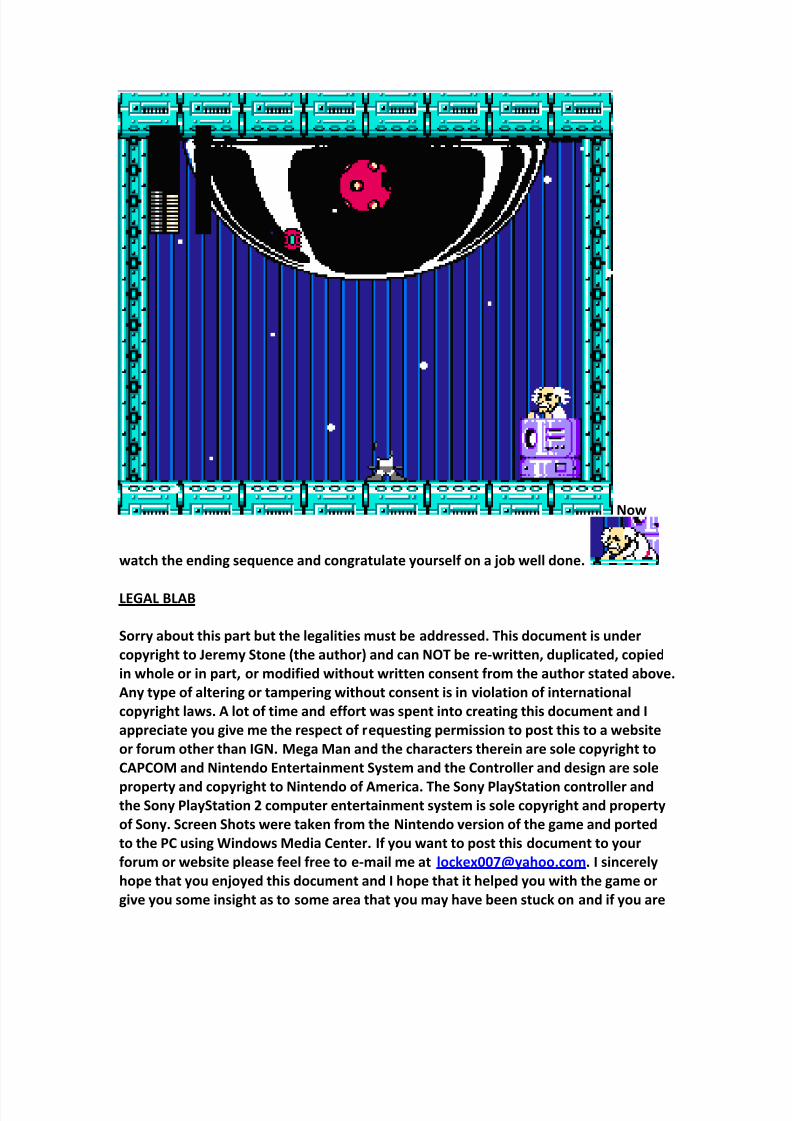
What in the world?! Wily’s final form is actually an alien. Use Bubble Lead
to take him out once and for all.
8/3/2019 Megaman II
http://slidepdf.com/reader/full/megaman-ii 45/46
Now
watch the ending sequence and congratulate yourself on a job well done.
LEGAL BLAB
Sorry about this part but the legalities must be addressed. This document is under
copyright to Jeremy Stone (the author) and can NOT be re-written, duplicated, copied
in whole or in part, or modified without written consent from the author stated above.
Any type of altering or tampering without consent is in violation of international
copyright laws. A lot of time and effort was spent into creating this document and I
appreciate you give me the respect of requesting permission to post this to a website
or forum other than IGN. Mega Man and the characters therein are sole copyright to
CAPCOM and Nintendo Entertainment System and the Controller and design are sole
property and copyright to Nintendo of America. The Sony PlayStation controller andthe Sony PlayStation 2 computer entertainment system is sole copyright and property
of Sony. Screen Shots were taken from the Nintendo version of the game and ported
to the PC using Windows Media Center. If you want to post this document to your
forum or website please feel free to e-mail me at [email protected]. I sincerely
hope that you enjoyed this document and I hope that it helped you with the game or
give you some insight as to some area that you may have been stuck on and if you are

8/3/2019 Megaman II
http://slidepdf.com/reader/full/megaman-ii 46/46
new to the game again I hope this helped enhance your experience. God bless and
keep on gaming.