Acrylic pouring technique.pdf
33
Acrylic pouring technique (GB) Kunststof giettechniek (NL)
-
Upload
thyrannus-xvee -
Category
Documents
-
view
247 -
download
0
Transcript of Acrylic pouring technique.pdf
Acrylic pouring technique (GB) Kunststof giettechniek (NL)

Vertex Dental Academy Vertex Dental Academy
Vertex Dental would like to give you, Vertex Dental wil u als specialist in uwas a specialist, as much support as vakgebied zo goed mogelijk ondersteunen.possible. Due to the fast growing Omdat de ontwikkelingen snel gaan,developments, we like to share our willen wij onze innovaties en kennisinnovations and knowledge with you. permanent met u delen.
One of the instruments hereby is our Een van de instrumenten hierbij is onzeVertex Dental Academy: a training Vertex Dental Academy: een cursus-institute for education and refresher instituut voor scholing en bijscholing,courses, comparable with a master vergelijkbaar met een masterclass. Hetclass. Making a denture is a complex vervaardigen van een gebitsprothese isprocess of individual steps. Those een complex proces van afzonderlijkesteps must be tuned to each other stappen, die een nauwkeurige afstemmingvery precisely. Vertex Dental will vragen. Vertex Dental helpt u om inzichtconstantly support you to improve te krijgen in het optimaliseren van dezethe implementation of the complex complexe processen. Het doel is uiteraardprocesses. The goal is to save time tijdbesparing en kwaliteitsverhoging in uwand to improve the quality of your dagelijkse werkzaamheden.daily work.
Met het Vertex gietsysteem wordt eenWith the Vertex pouring system you uitstekend passende gebitsprotheseare able to make an excellent fitting verkregen, zonder beetverhoging en metdenture, without raised bites and een perfecte, esthetische één op éénwith a perfect esthetical one to one overdracht. Het doel van deze cursus istransfer. The goal of this course is to om de productie-efficiency te vergroten.improve the production efficiency. Geleerd wordt om volledige protheses vanYou learn how to transfer a wax set- was om te zetten naar kunststof.up into acrylic.
Acrylic pouring technique Kunststof giettechniek
▪ Materials and equipment ▪ Materialen en apparatuur
▪ Step by step manual ▪ Stap voor stap handleiding
▪ Technical information ▪ Technische informatie
Acrylic pouring technique (GB) Kunststof giettechniek (NL)
Materials and equipment
Materialen en apparatuur
Laboratory machinery 4 - 5
Laboratorium apparatuur
Flasks, Teethholder & Canalcutters 6
Cuvetten, Tandenhouder & Kanaalstekers
Duplication materials 7
Dupliceer materiaal
Separation fluid, Castavaria acrylic & Acrylic Stain 8 - 9
Separatie vloeistof, Castavaria kunststof & Acrylic Stain
Finishing, polishing & cleaning 10 - 12
Uitwerken, polijsten & reinigen
Accessories 13
Accessoires
Step by step manual 14 - 19
Stap voor stap handleiding
Technical information & contact information 20 - 22
Technische informatie & contact informatie
Acrylic pouring technique (GB) Kunststof giettechniek (NL)
Laboratory machinery
Laboratorium apparatuur
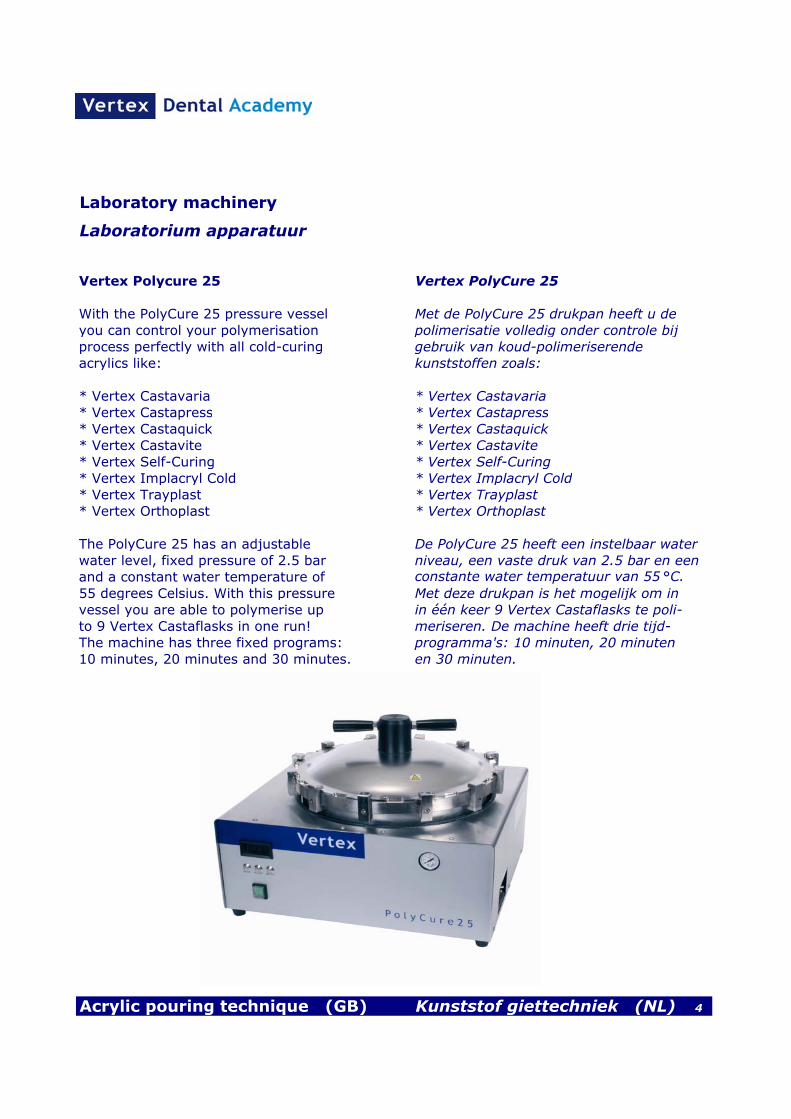
Vertex Polycure 25 Vertex PolyCure 25
With the PolyCure 25 pressure vessel Met de PolyCure 25 drukpan heeft u deyou can control your polymerisation polimerisatie volledig onder controle bijprocess perfectly with all cold-curing gebruik van koud-polimeriserendeacrylics like: kunststoffen zoals:
* Vertex Castavaria * Vertex Castavaria* Vertex Castapress * Vertex Castapress* Vertex Castaquick * Vertex Castaquick* Vertex Castavite * Vertex Castavite* Vertex Self-Curing * Vertex Self-Curing* Vertex Implacryl Cold * Vertex Implacryl Cold* Vertex Trayplast * Vertex Trayplast* Vertex Orthoplast * Vertex Orthoplast
The PolyCure 25 has an adjustable De PolyCure 25 heeft een instelbaar waterwater level, fixed pressure of 2.5 bar niveau, een vaste druk van 2.5 bar en eenand a constant water temperature of constante water temperatuur van 55 °C.55 degrees Celsius. With this pressure Met deze drukpan is het mogelijk om invessel you are able to polymerise up in één keer 9 Vertex Castaflasks te poli-to 9 Vertex Castaflasks in one run! meriseren. De machine heeft drie tijd-The machine has three fixed programs: programma's: 10 minuten, 20 minuten10 minutes, 20 minutes and 30 minutes. en 30 minuten.
Acrylic pouring technique (GB) Kunststof giettechniek (NL) 4
Laboratory machinery
Laboratorium apparatuur
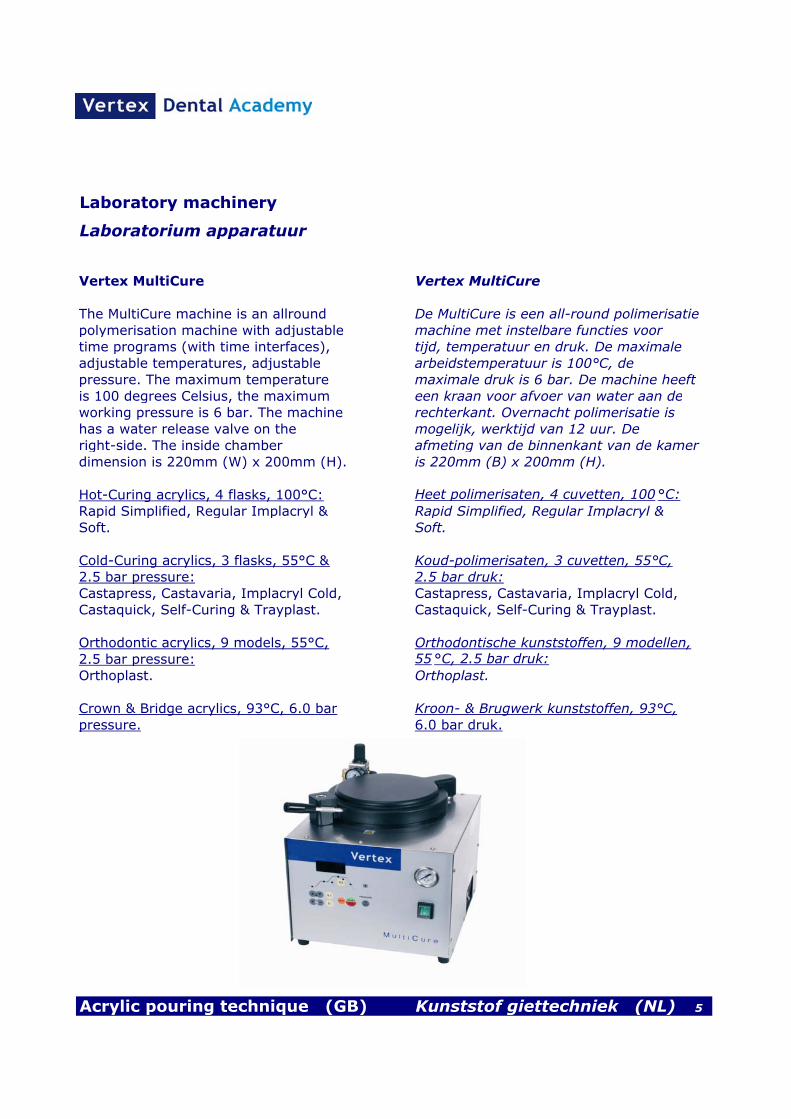
Vertex MultiCure Vertex MultiCure
The MultiCure machine is an allround De MultiCure is een all-round polimerisatiepolymerisation machine with adjustable machine met instelbare functies voortime programs (with time interfaces), tijd, temperatuur en druk. De maximaleadjustable temperatures, adjustable arbeidstemperatuur is 100°C, de pressure. The maximum temperature maximale druk is 6 bar. De machine heeftis 100 degrees Celsius, the maximum een kraan voor afvoer van water aan deworking pressure is 6 bar. The machine rechterkant. Overnacht polimerisatie ishas a water release valve on the mogelijk, werktijd van 12 uur. De right-side. The inside chamber afmeting van de binnenkant van de kamerdimension is 220mm (W) x 200mm (H). is 220mm (B) x 200mm (H).
Hot-Curing acrylics, 4 flasks, 100°C: Heet polimerisaten, 4 cuvetten, 100 °C:Rapid Simplified, Regular Implacryl & Rapid Simplified, Regular Implacryl &Soft. Soft.
Cold-Curing acrylics, 3 flasks, 55°C & Koud-polimerisaten, 3 cuvetten, 55°C,2.5 bar pressure: 2.5 bar druk:Castapress, Castavaria, Implacryl Cold, Castapress, Castavaria, Implacryl Cold,
Castaquick, Self-Curing & Trayplast. Castaquick, Self-Curing & Trayplast.
Orthodontic acrylics, 9 models, 55°C, Orthodontische kunststoffen, 9 modellen,2.5 bar pressure: 55 °C, 2.5 bar druk:Orthoplast. Orthoplast.
Crown & Bridge acrylics, 93°C, 6.0 bar Kroon- & Brugwerk kunststoffen, 93°C,pressure. 6.0 bar druk.
Acrylic pouring technique (GB) Kunststof giettechniek (NL) 5
Flasks, Teethholder & Canalcutters
Cuvetten, Tandenhouder & Kanaalstekers
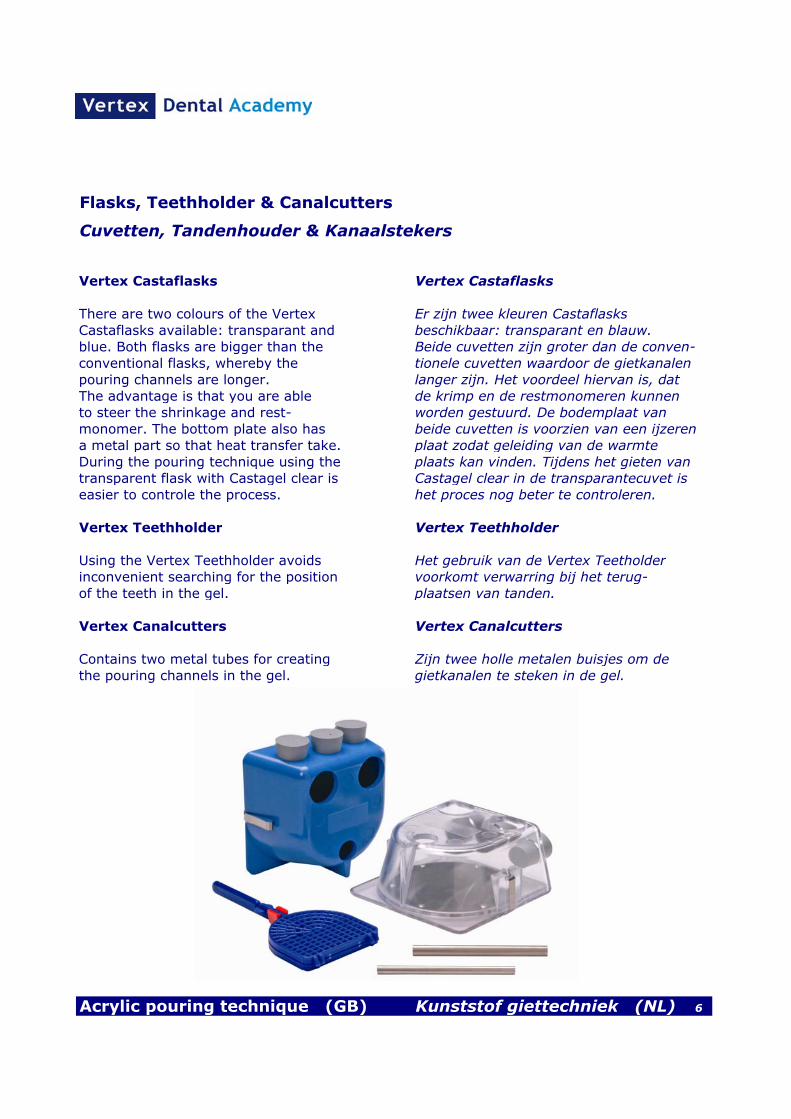
Vertex Castaflasks Vertex Castaflasks
There are two colours of the Vertex Er zijn twee kleuren CastaflasksCastaflasks available: transparant and beschikbaar: transparant en blauw.blue. Both flasks are bigger than the Beide cuvetten zijn groter dan de conven-conventional flasks, whereby the tionele cuvetten waardoor de gietkanalenpouring channels are longer. langer zijn. Het voordeel hiervan is, datThe advantage is that you are able de krimp en de restmonomeren kunnento steer the shrinkage and rest- worden gestuurd. De bodemplaat van monomer. The bottom plate also has beide cuvetten is voorzien van een ijzerena metal part so that heat transfer take. plaat zodat geleiding van de warmte During the pouring technique using the plaats kan vinden. Tijdens het gieten vantransparent flask with Castagel clear is Castagel clear in de transparantecuvet is easier to controle the process. het proces nog beter te controleren.
Vertex Teethholder Vertex Teethholder
Using the Vertex Teethholder avoids Het gebruik van de Vertex Teetholderinconvenient searching for the position voorkomt verwarring bij het terug-of the teeth in the gel. plaatsen van tanden.
Vertex Canalcutters Vertex Canalcutters
Contains two metal tubes for creating Zijn twee holle metalen buisjes om dethe pouring channels in the gel. gietkanalen te steken in de gel.
Acrylic pouring technique (GB) Kunststof giettechniek (NL) 6
Duplication materials
Dupliceer materialen
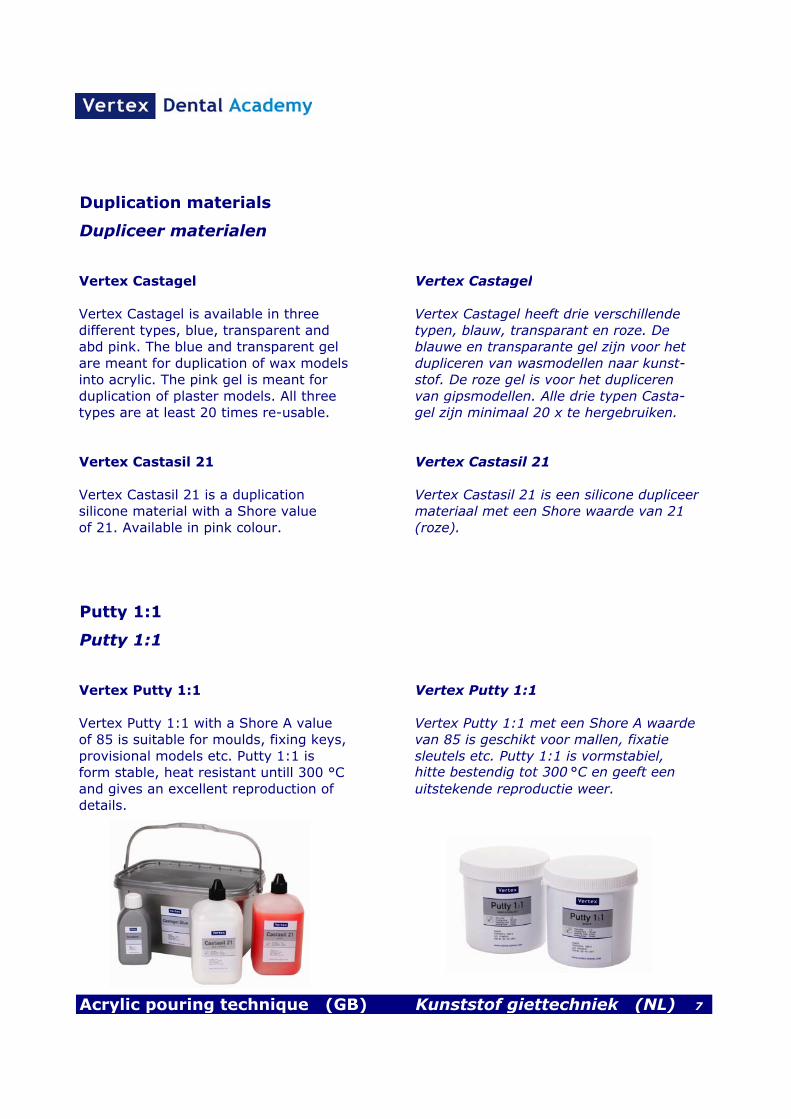
Vertex Castagel Vertex Castagel
Vertex Castagel is available in three Vertex Castagel heeft drie verschillendedifferent types, blue, transparent and typen, blauw, transparant en roze. De abd pink. The blue and transparent gel blauwe en transparante gel zijn voor hetare meant for duplication of wax models dupliceren van wasmodellen naar kunst-into acrylic. The pink gel is meant for stof. De roze gel is voor het duplicerenduplication of plaster models. All three van gipsmodellen. Alle drie typen Casta-types are at least 20 times re-usable. gel zijn minimaal 20 x te hergebruiken.
Vertex Castasil 21 Vertex Castasil 21
Vertex Castasil 21 is a duplication Vertex Castasil 21 is een silicone dupliceersilicone material with a Shore value materiaal met een Shore waarde van 21of 21. Available in pink colour. (roze).
Putty 1:1
Putty 1:1
Vertex Putty 1:1 Vertex Putty 1:1
Vertex Putty 1:1 with a Shore A value Vertex Putty 1:1 met een Shore A waardeof 85 is suitable for moulds, fixing keys, van 85 is geschikt voor mallen, fixatieprovisional models etc. Putty 1:1 is sleutels etc. Putty 1:1 is vormstabiel,form stable, heat resistant untill 300 °C hitte bestendig tot 300 °C en geeft eenand gives an excellent reproduction of uitstekende reproductie weer.details.
Acrylic pouring technique (GB) Kunststof giettechniek (NL) 7
Separation fluid
Separatie vloeistof
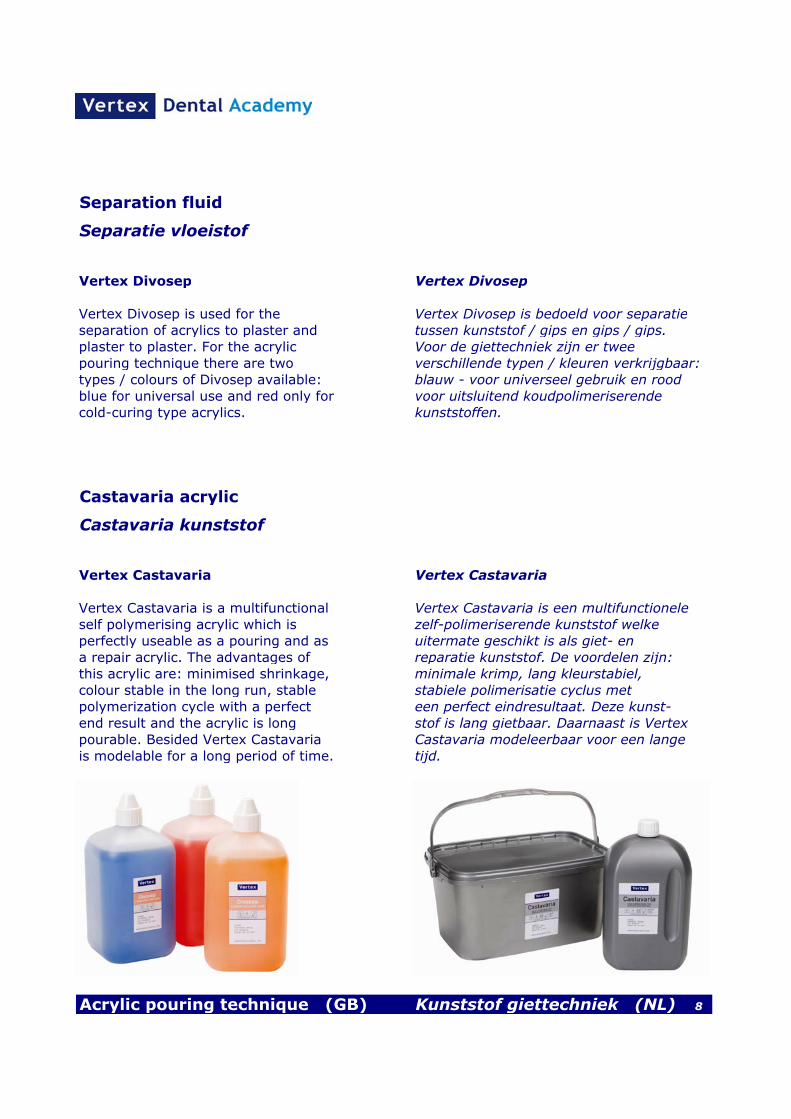
Vertex Divosep Vertex Divosep
Vertex Divosep is used for the Vertex Divosep is bedoeld voor separatieseparation of acrylics to plaster and tussen kunststof / gips en gips / gips.plaster to plaster. For the acrylic Voor de giettechniek zijn er twee pouring technique there are two verschillende typen / kleuren verkrijgbaar:types / colours of Divosep available: blauw - voor universeel gebruik en roodblue for universal use and red only for voor uitsluitend koudpolimeriserendecold-curing type acrylics. kunststoffen.
Castavaria acrylic
Castavaria kunststof
Vertex Castavaria Vertex Castavaria
Vertex Castavaria is a multifunctional Vertex Castavaria is een multifunctioneleself polymerising acrylic which is zelf-polimeriserende kunststof welkeperfectly useable as a pouring and as uitermate geschikt is als giet- ena repair acrylic. The advantages of reparatie kunststof. De voordelen zijn:this acrylic are: minimised shrinkage, minimale krimp, lang kleurstabiel,colour stable in the long run, stable stabiele polimerisatie cyclus metpolymerization cycle with a perfect een perfect eindresultaat. Deze kunst-end result and the acrylic is long stof is lang gietbaar. Daarnaast is Vertexpourable. Besided Vertex Castavaria Castavaria modeleerbaar voor een langeis modelable for a long period of time. tijd.
Acrylic pouring technique (GB) Kunststof giettechniek (NL) 8
Acrylic Stain & Spray-on bottles
Acrylic Stain & Spray-on bottles
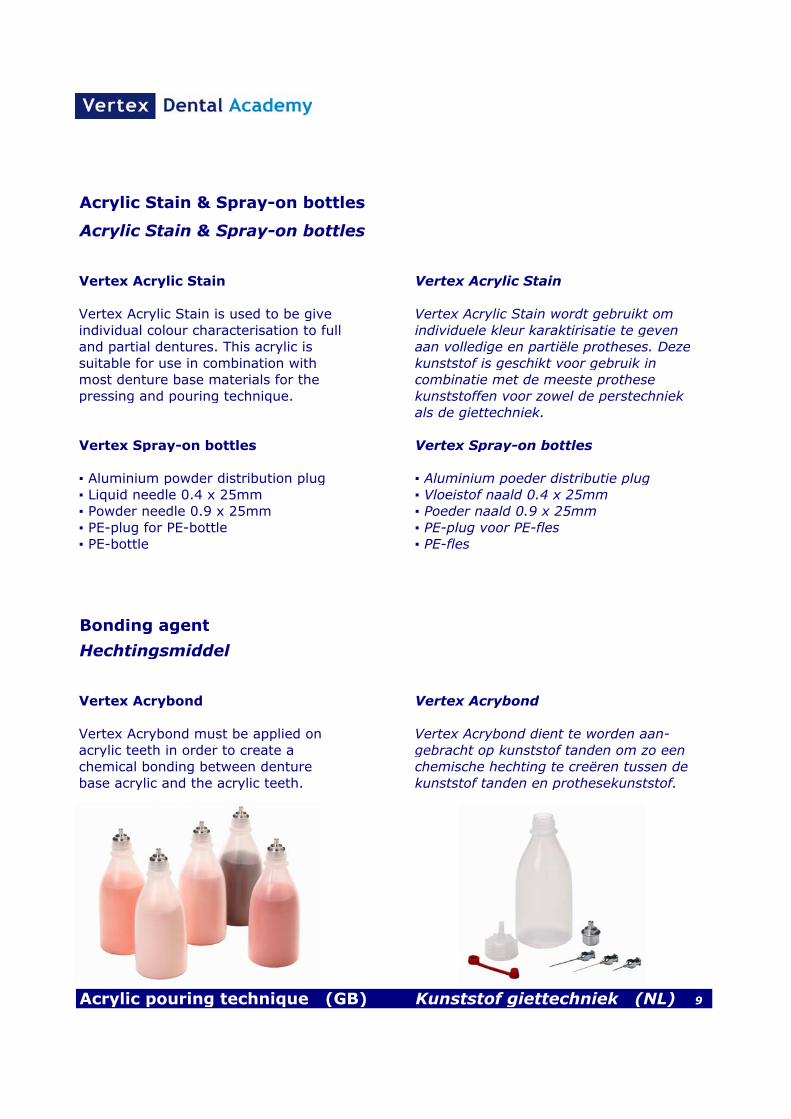
Vertex Acrylic Stain Vertex Acrylic Stain
Vertex Acrylic Stain is used to be give Vertex Acrylic Stain wordt gebruikt omindividual colour characterisation to full individuele kleur karaktirisatie te gevenand partial dentures. This acrylic is aan volledige en partiële protheses. Dezesuitable for use in combination with kunststof is geschikt voor gebruik inmost denture base materials for the combinatie met de meeste prothesepressing and pouring technique. kunststoffen voor zowel de perstechniek
als de giettechniek.
Vertex Spray-on bottles Vertex Spray-on bottles
▪ Aluminium powder distribution plug ▪ Aluminium poeder distributie plug▪ Liquid needle 0.4 x 25mm ▪ Vloeistof naald 0.4 x 25mm▪ Powder needle 0.9 x 25mm ▪ Poeder naald 0.9 x 25mm▪ PE-plug for PE-bottle ▪ PE-plug voor PE-fles▪ PE-bottle ▪ PE-fles
Bonding agent
Hechtingsmiddel
Vertex Acrybond Vertex Acrybond
Vertex Acrybond must be applied on Vertex Acrybond dient te worden aan-acrylic teeth in order to create a gebracht op kunststof tanden om zo eenchemical bonding between denture chemische hechting te creëren tussen debase acrylic and the acrylic teeth. kunststof tanden en prothesekunststof.
Acrylic pouring technique (GB) Kunststof giettechniek (NL) 9
Finishing, polishing & cleaning
Uitwerken, polijsten & reinigen
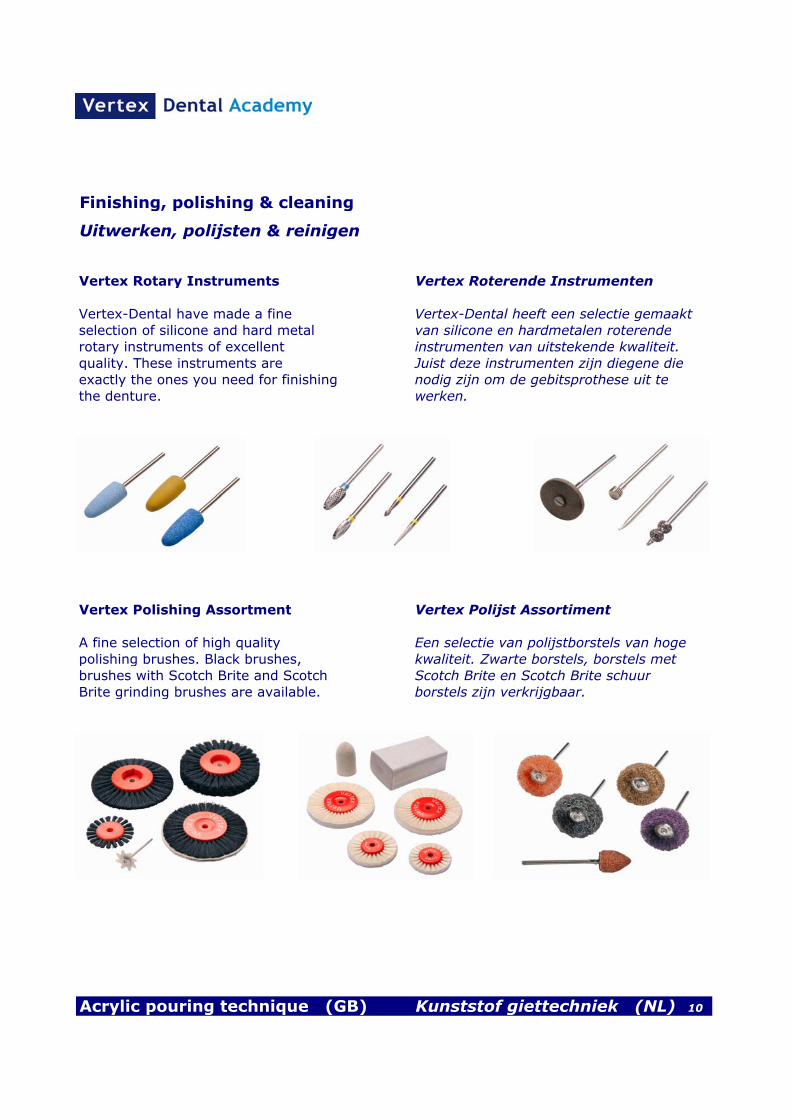
Vertex Rotary Instruments Vertex Roterende Instrumenten
Vertex-Dental have made a fine Vertex-Dental heeft een selectie gemaaktselection of silicone and hard metal van silicone en hardmetalen roterenderotary instruments of excellent instrumenten van uitstekende kwaliteit.quality. These instruments are Juist deze instrumenten zijn diegene dieexactly the ones you need for finishing nodig zijn om de gebitsprothese uit te the denture. werken.
Vertex Polishing Assortment Vertex Polijst Assortiment
A fine selection of high quality Een selectie van polijstborstels van hogepolishing brushes. Black brushes, kwaliteit. Zwarte borstels, borstels metbrushes with Scotch Brite and Scotch Scotch Brite en Scotch Brite schuurBrite grinding brushes are available. borstels zijn verkrijgbaar.
Acrylic pouring technique (GB) Kunststof giettechniek (NL) 10
Finishing, polishing & cleaning
Uitwerken, polijsten & reinigen
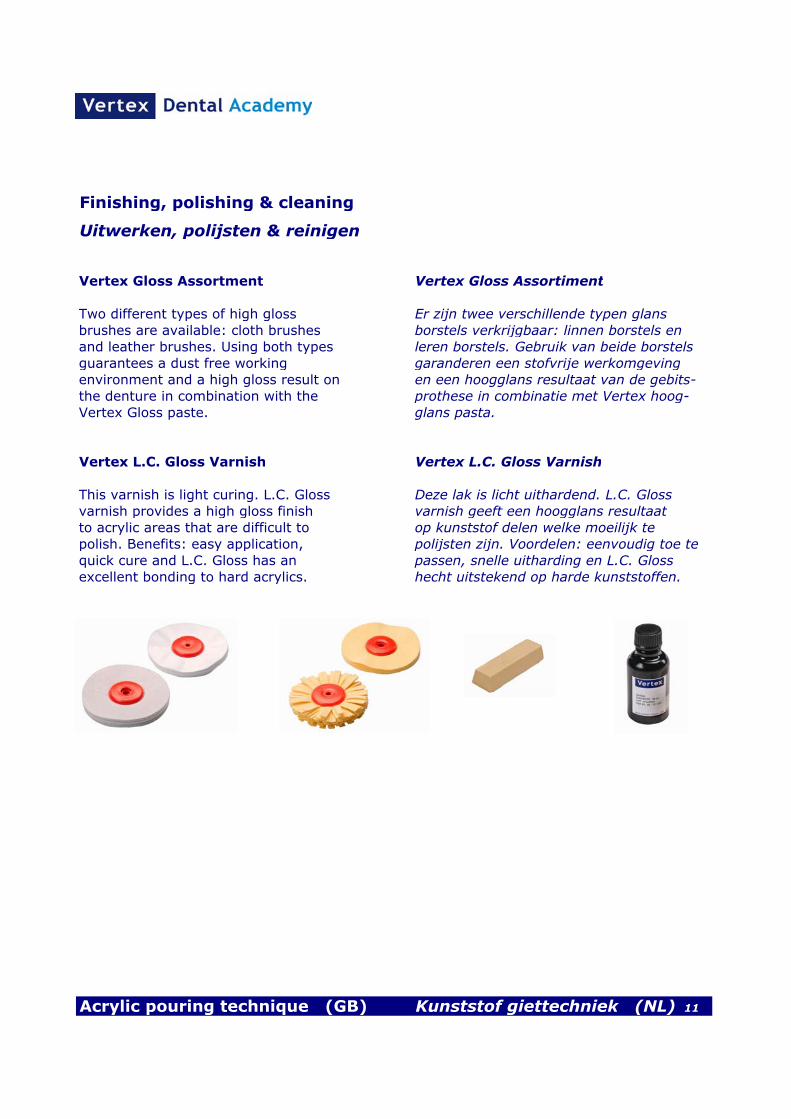
Vertex Gloss Assortment Vertex Gloss Assortiment
Two different types of high gloss Er zijn twee verschillende typen glansbrushes are available: cloth brushes borstels verkrijgbaar: linnen borstels enand leather brushes. Using both types leren borstels. Gebruik van beide borstelsguarantees a dust free working garanderen een stofvrije werkomgevingenvironment and a high gloss result on en een hoogglans resultaat van de gebits-the denture in combination with the prothese in combinatie met Vertex hoog-Vertex Gloss paste. glans pasta.
Vertex L.C. Gloss Varnish Vertex L.C. Gloss Varnish
This varnish is light curing. L.C. Gloss Deze lak is licht uithardend. L.C. Glossvarnish provides a high gloss finish varnish geeft een hoogglans resultaatto acrylic areas that are difficult to op kunststof delen welke moeilijk te polish. Benefits: easy application, polijsten zijn. Voordelen: eenvoudig toe tequick cure and L.C. Gloss has an passen, snelle uitharding en L.C. Glossexcellent bonding to hard acrylics. hecht uitstekend op harde kunststoffen.
Acrylic pouring technique (GB) Kunststof giettechniek (NL) 11
Finishing, polishing & cleaning
Uitwerken, polijsten & reinigen
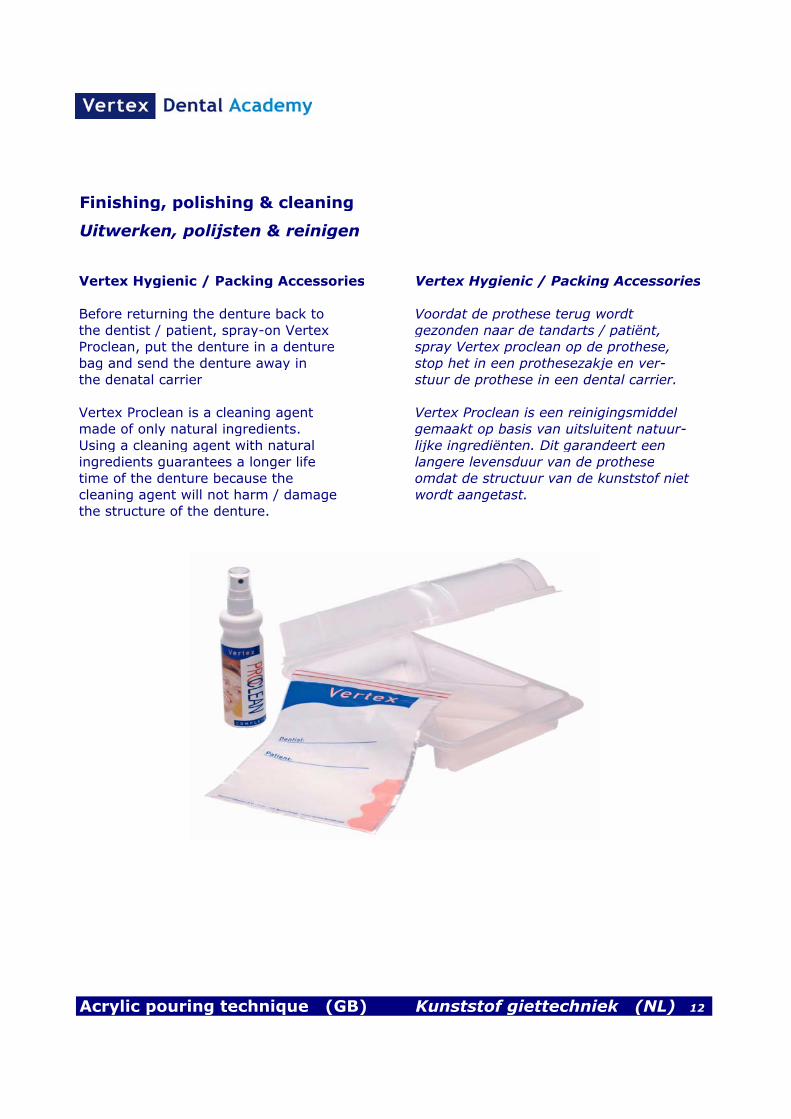
Vertex Hygienic / Packing Accessories Vertex Hygienic / Packing Accessories
Before returning the denture back to Voordat de prothese terug wordt the dentist / patient, spray-on Vertex gezonden naar de tandarts / patiënt,Proclean, put the denture in a denture spray Vertex proclean op de prothese, bag and send the denture away in stop het in een prothesezakje en ver-the denatal carrier stuur de prothese in een dental carrier.
Vertex Proclean is a cleaning agent Vertex Proclean is een reinigingsmiddelmade of only natural ingredients. gemaakt op basis van uitsluitent natuur-Using a cleaning agent with natural lijke ingrediënten. Dit garandeert een ingredients guarantees a longer life langere levensduur van de prothesetime of the denture because the omdat de structuur van de kunststof nietcleaning agent will not harm / damage wordt aangetast.the structure of the denture.
Acrylic pouring technique (GB) Kunststof giettechniek (NL) 12
Accessories
Accessoires
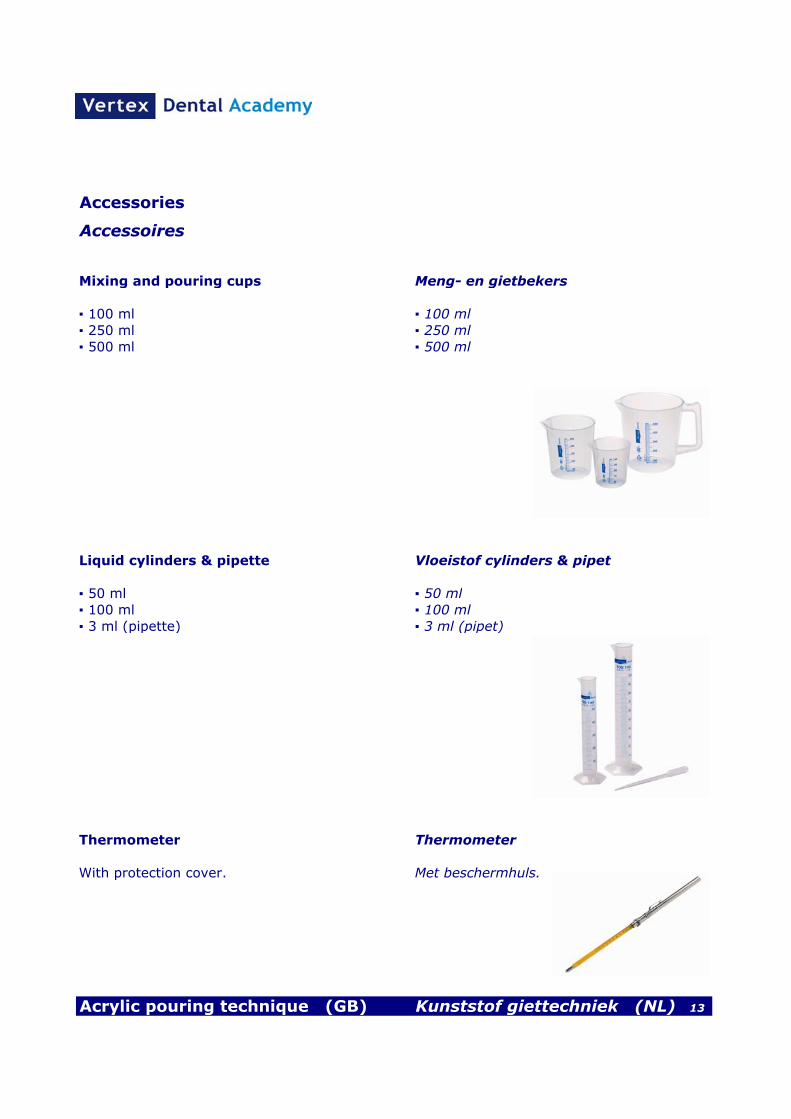
Mixing and pouring cups Meng- en gietbekers
▪ 100 ml ▪ 100 ml▪ 250 ml ▪ 250 ml▪ 500 ml ▪ 500 ml
Liquid cylinders & pipette Vloeistof cylinders & pipet
▪ 50 ml ▪ 50 ml▪ 100 ml ▪ 100 ml▪ 3 ml (pipette) ▪ 3 ml (pipet)
Thermometer Thermometer
With protection cover. Met beschermhuls.
Acrylic pouring technique (GB) Kunststof giettechniek (NL) 13
Step by step manual (full dentures with gel)
Stap voor stap handleiding (volledige protheses met gel)
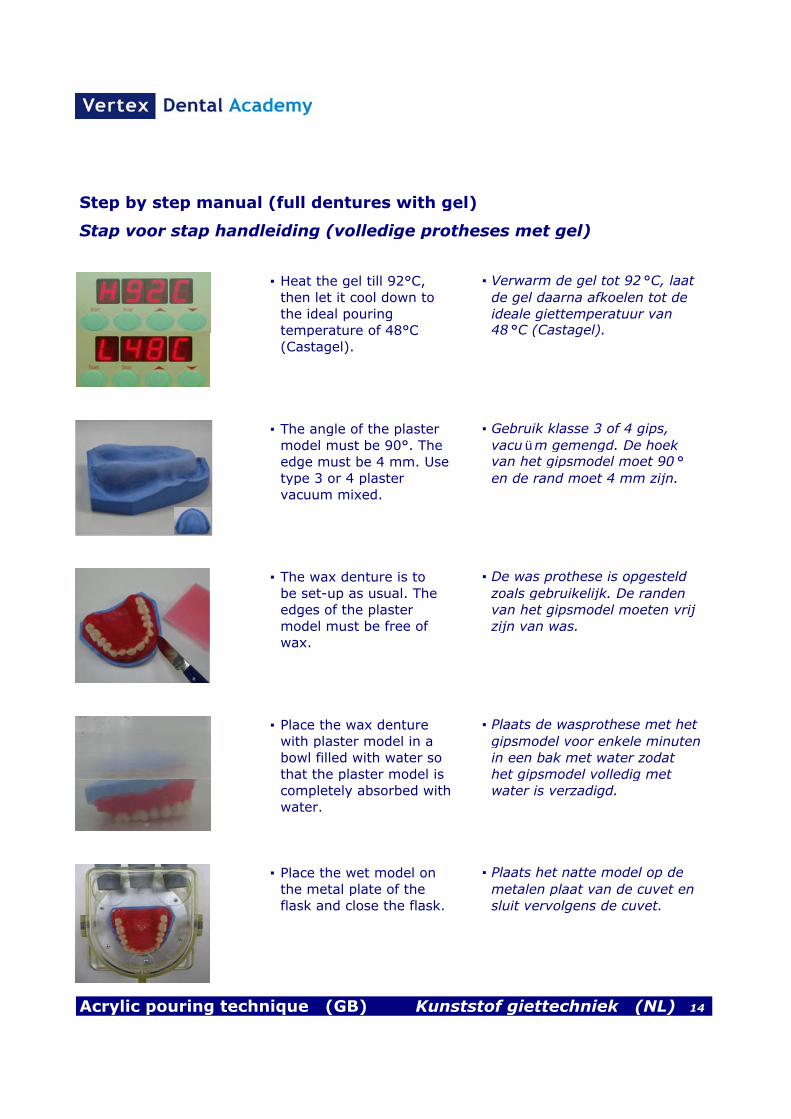
▪ Heat the gel till 92°C, ▪ Verwarm de gel tot 92 °C, laatthen let it cool down to de gel daarna afkoelen tot dethe ideal pouring ideale giettemperatuur van temperature of 48°C 48 °C (Castagel).(Castagel).
▪ The angle of the plaster ▪ Gebruik klasse 3 of 4 gips,model must be 90°. The vacu üm gemengd. De hoekedge must be 4 mm. Use van het gipsmodel moet 90 °type 3 or 4 plaster en de rand moet 4 mm zijn.vacuum mixed.
▪ The wax denture is to ▪ De was prothese is opgesteldbe set-up as usual. The zoals gebruikelijk. De randenedges of the plaster van het gipsmodel moeten vrij model must be free of zijn van was.wax.
▪ Place the wax denture ▪ Plaats de wasprothese met het with plaster model in a gipsmodel voor enkele minutenbowl filled with water so in een bak met water zodat that the plaster model is het gipsmodel volledig met completely absorbed with water is verzadigd.water.
▪ Place the wet model on ▪ Plaats het natte model op de the metal plate of the metalen plaat van de cuvet enflask and close the flask. sluit vervolgens de cuvet.
Acrylic pouring technique (GB) Kunststof giettechniek (NL) 14
Step by step manual (full dentures with gel)
Stap voor stap handleiding (volledige protheses met gel)
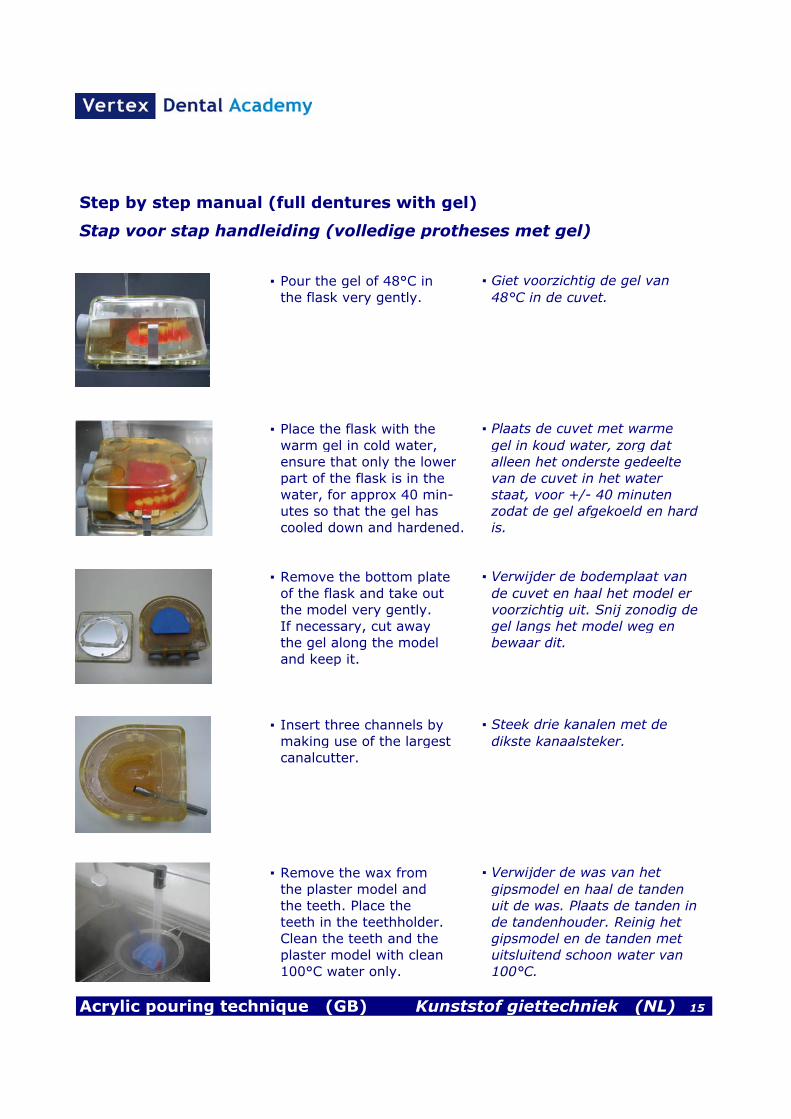
▪ Pour the gel of 48°C in ▪ Giet voorzichtig de gel van the flask very gently. 48°C in de cuvet.
▪ Place the flask with the ▪ Plaats de cuvet met warme warm gel in cold water, gel in koud water, zorg dat ensure that only the lower alleen het onderste gedeelte part of the flask is in the van de cuvet in het water water, for approx 40 min- staat, voor +/- 40 minutenutes so that the gel has zodat de gel afgekoeld en hardcooled down and hardened. is.
▪ Remove the bottom plate ▪ Verwijder de bodemplaat van of the flask and take out de cuvet en haal het model erthe model very gently. voorzichtig uit. Snij zonodig deIf necessary, cut away gel langs het model weg enthe gel along the model bewaar dit.and keep it.
▪ Insert three channels by ▪ Steek drie kanalen met de making use of the largest dikste kanaalsteker.canalcutter.
▪ Remove the wax from ▪ Verwijder de was van het the plaster model and gipsmodel en haal de tandenthe teeth. Place the uit de was. Plaats de tanden in teeth in the teethholder. de tandenhouder. Reinig hetClean the teeth and the gipsmodel en de tanden met plaster model with clean uitsluitend schoon water van 100°C water only. 100°C.
Acrylic pouring technique (GB) Kunststof giettechniek (NL) 15
Step by step manual (full dentures with gel)
Stap voor stap handleiding (volledige protheses met gel)
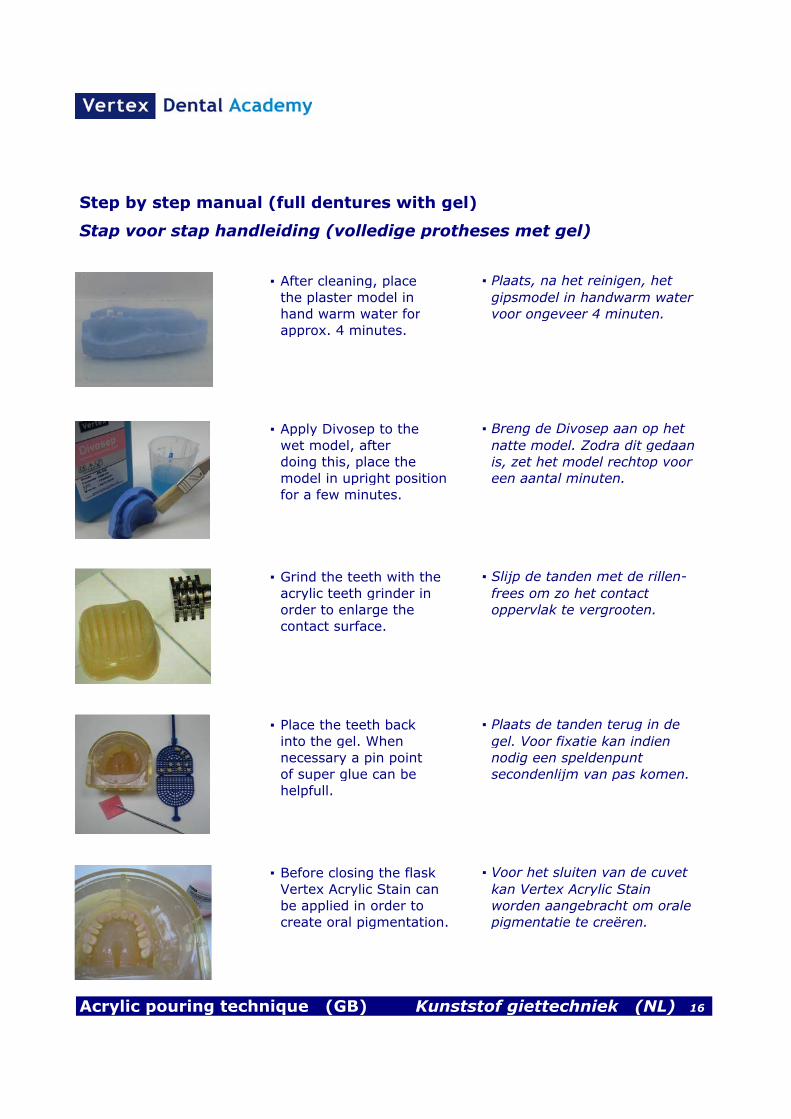
▪ After cleaning, place ▪ Plaats, na het reinigen, het the plaster model in gipsmodel in handwarm waterhand warm water for voor ongeveer 4 minuten.approx. 4 minutes.
▪ Apply Divosep to the ▪ Breng de Divosep aan op het wet model, after natte model. Zodra dit gedaandoing this, place the is, zet het model rechtop voor model in upright position een aantal minuten.for a few minutes.
▪ Grind the teeth with the ▪ Slijp de tanden met de rillen-acrylic teeth grinder in frees om zo het contactorder to enlarge the oppervlak te vergrooten.contact surface.
▪ Place the teeth back ▪ Plaats de tanden terug in de into the gel. When gel. Voor fixatie kan indien necessary a pin point nodig een speldenpunt of super glue can be secondenlijm van pas komen.helpfull.
▪ Before closing the flask ▪ Voor het sluiten van de cuvetVertex Acrylic Stain can kan Vertex Acrylic Stain be applied in order to worden aangebracht om oralecreate oral pigmentation. pigmentatie te creëren.
Acrylic pouring technique (GB) Kunststof giettechniek (NL) 16
Step by step manual (full dentures with gel)
Stap voor stap handleiding (volledige protheses met gel)
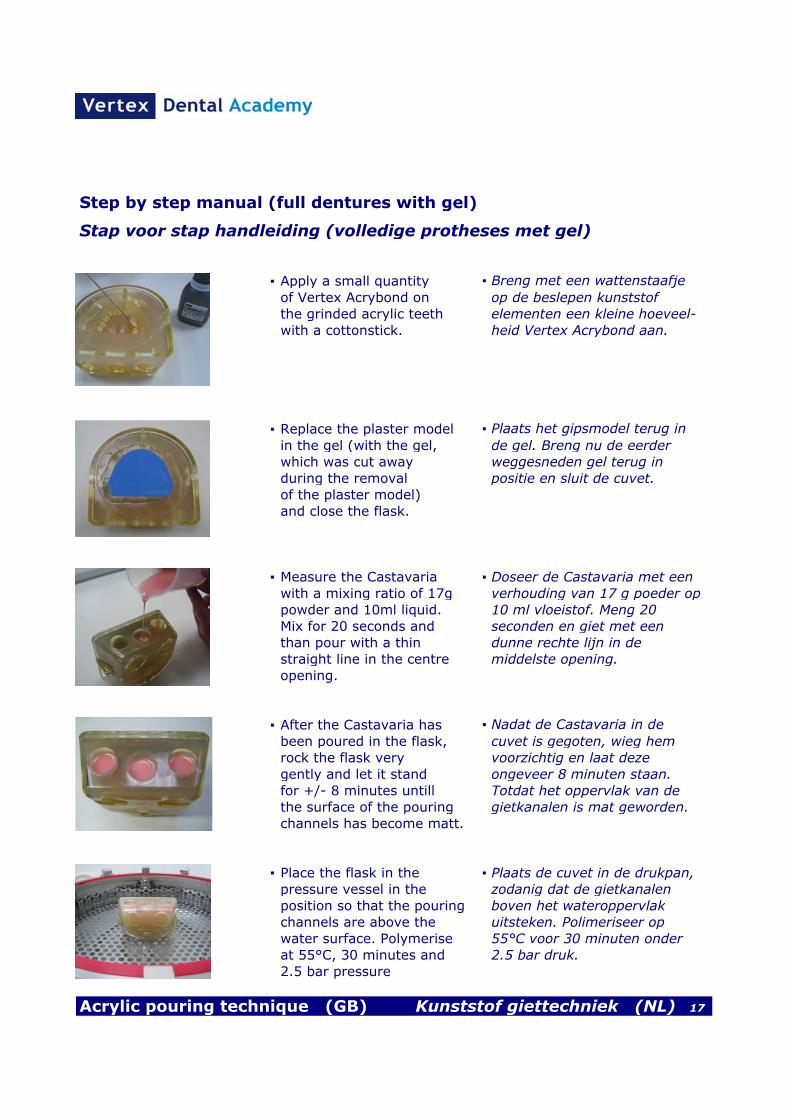
▪ Apply a small quantity ▪ Breng met een wattenstaafje of Vertex Acrybond on op de beslepen kunststofthe grinded acrylic teeth elementen een kleine hoeveel-with a cottonstick. heid Vertex Acrybond aan.
▪ Replace the plaster model ▪ Plaats het gipsmodel terug in in the gel (with the gel, de gel. Breng nu de eerder which was cut away weggesneden gel terug in during the removal positie en sluit de cuvet.of the plaster model)
and close the flask.
▪ Measure the Castavaria ▪ Doseer de Castavaria met een with a mixing ratio of 17g verhouding van 17 g poeder oppowder and 10ml liquid. 10 ml vloeistof. Meng 20 Mix for 20 seconds and seconden en giet met eenthan pour with a thin dunne rechte lijn in destraight line in the centre middelste opening.opening.
▪ After the Castavaria has ▪ Nadat de Castavaria in de been poured in the flask, cuvet is gegoten, wieg hem rock the flask very voorzichtig en laat dezegently and let it stand ongeveer 8 minuten staan.for +/- 8 minutes untill Totdat het oppervlak van de the surface of the pouring gietkanalen is mat geworden.channels has become matt.
▪ Place the flask in the ▪ Plaats de cuvet in de drukpan,pressure vessel in the zodanig dat de gietkanalenposition so that the pouring boven het wateroppervlakchannels are above the uitsteken. Polimeriseer op water surface. Polymerise 55°C voor 30 minuten onder at 55°C, 30 minutes and 2.5 bar druk.2.5 bar pressure
Acrylic pouring technique (GB) Kunststof giettechniek (NL) 17
Step by step manual (full dentures with gel)
Stap voor stap handleiding (volledige protheses met gel)
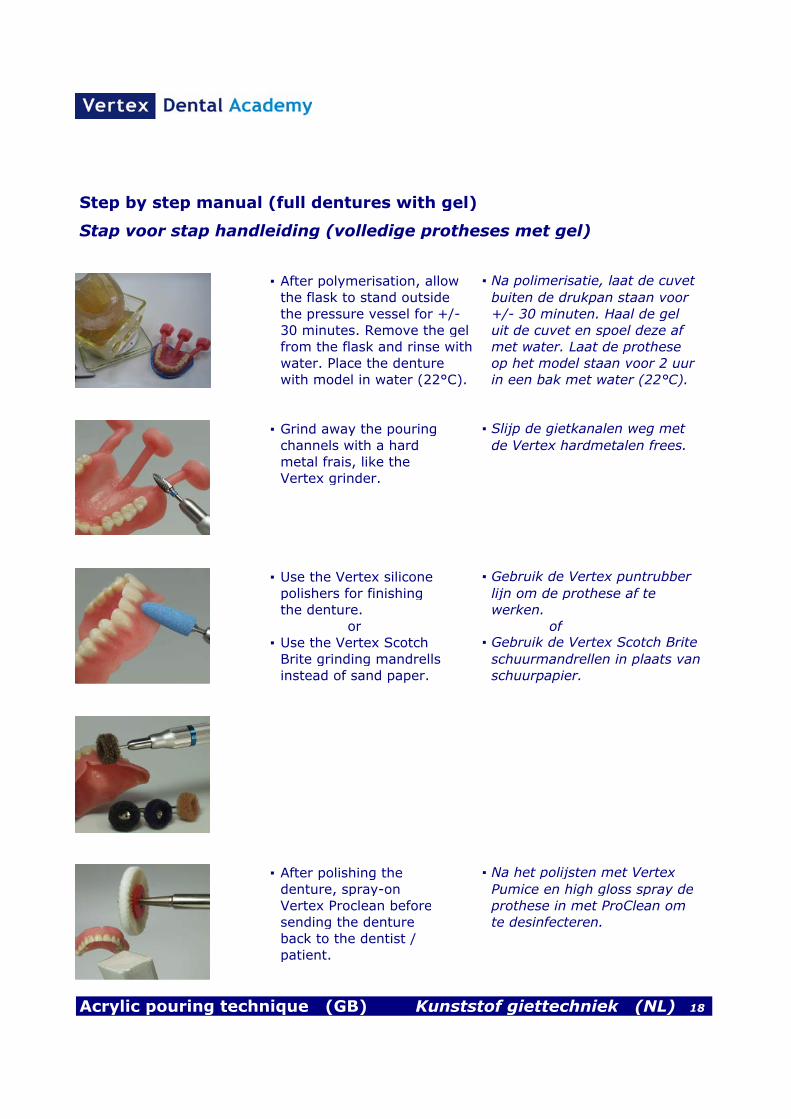
▪ After polymerisation, allow ▪ Na polimerisatie, laat de cuvetthe flask to stand outside buiten de drukpan staan voor the pressure vessel for +/- +/- 30 minuten. Haal de gel30 minutes. Remove the gel uit de cuvet en spoel deze af from the flask and rinse with met water. Laat de prothesewater. Place the denture op het model staan voor 2 uurwith model in water (22°C). in een bak met water (22°C).
▪ Grind away the pouring ▪ Slijp de gietkanalen weg metchannels with a hard de Vertex hardmetalen frees.metal frais, like the
Vertex grinder.
▪ Use the Vertex silicone ▪ Gebruik de Vertex puntrubberpolishers for finishing lijn om de prothese af te the denture. werken.
or of▪ Use the Vertex Scotch ▪ Gebruik de Vertex Scotch BriteBrite grinding mandrells schuurmandrellen in plaats vaninstead of sand paper. schuurpapier.
▪ After polishing the ▪ Na het polijsten met Vertexdenture, spray-on Pumice en high gloss spray deVertex Proclean before prothese in met ProClean omsending the denture te desinfecteren.back to the dentist /
patient.
Acrylic pouring technique (GB) Kunststof giettechniek (NL) 18
Step by step manual (full dentures with gel)
Stap voor stap handleiding (volledige protheses met gel)
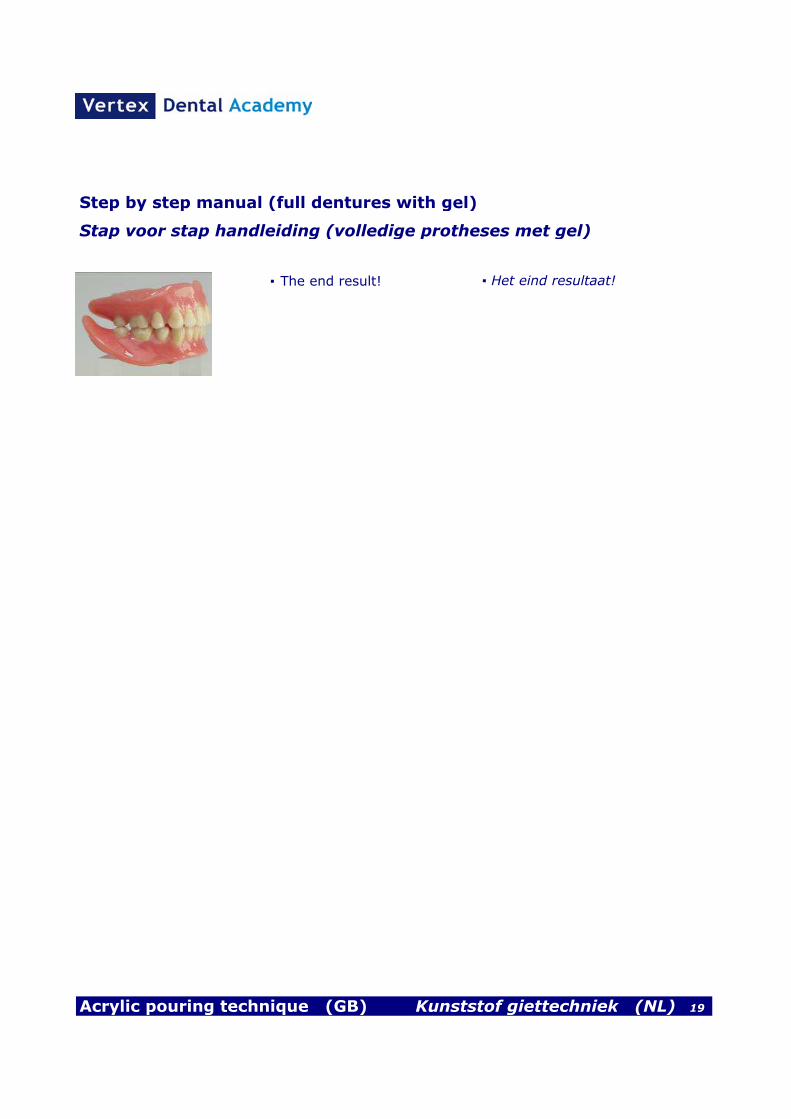
▪ The end result! ▪ Het eind resultaat!
Acrylic pouring technique (GB) Kunststof giettechniek (NL) 19
Technical information
Technische informatie
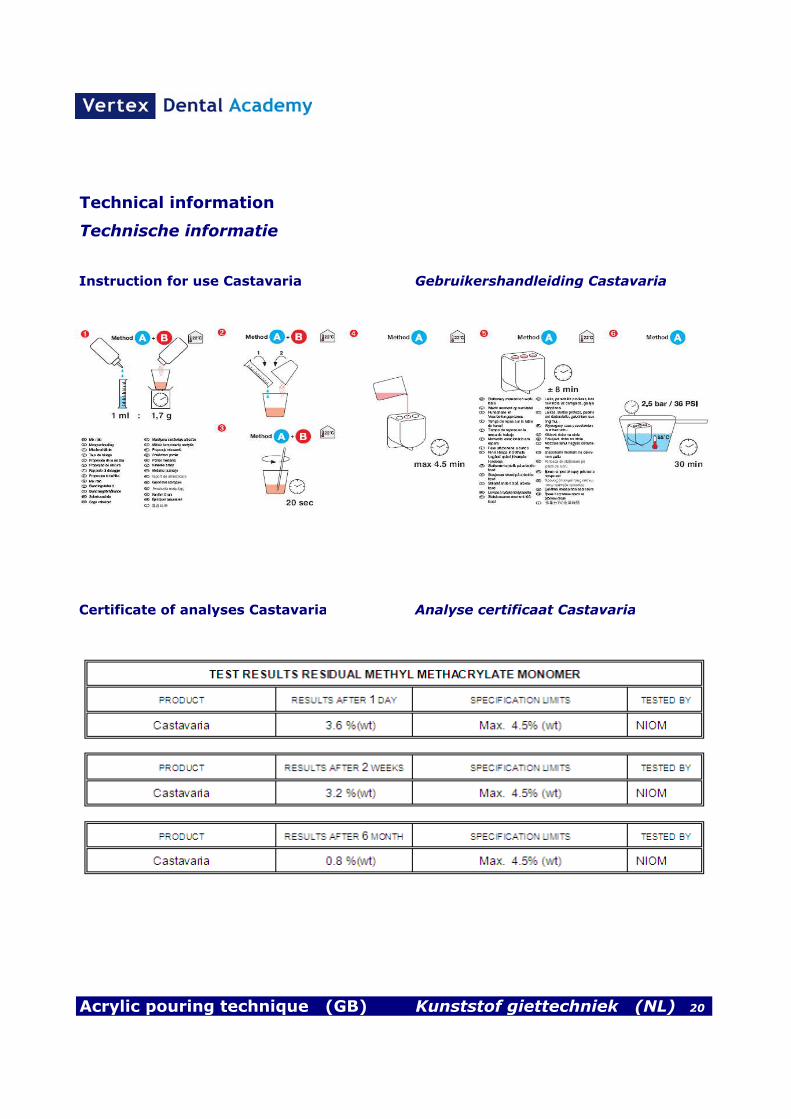
Instruction for use Castavaria Gebruikershandleiding Castavaria
Certificate of analyses Castavaria Analyse certificaat Castavaria
Acrylic pouring technique (GB) Kunststof giettechniek (NL) 20

Technical information
Technische informatie
Additional information Additionele informatie
The purpose of this course is to save Het doel van de cursus bestaat uit een time in the denture department by grote tijdwinst op de protheseafdeling using a clean, simple and accurate door gebruik te maken van een schoon, system. A significant cost saving in eenvoudig en accuraat systeem.the laboratory is the result. After Een significante kostenbesparing binnenhaving followed this course it is het laboratorium is het gevolg. Na hetpossible to produce 20 dentures volgen van deze cursus is men in staat(40 Vertex Castaflasks) per day. om 20 volledige gebitsprotheses (40
cuvetten) per dag te vervaardigen.During the course oral pigmentation
using Vertex Acrylic Stain will be Tijdens de cursus wordt ook individueledemonstrated. orale pigmentatie met Vertex Acrylic
Stain behandeld.The course has been produced
for the manager of the denture De cursus is bedoeld voor de prothese-department and the responsible afdeling en de verantwoordelijketechnicians. Additionally for all tandtechnici / opstellers. Verder voor alledenturists. tandprothetisten.
Training program
Cursusprogramma
▪ Soft base
▪ High Impact acrylic in implant work ▪ Weekblijvende basis▪ Using acrylic on frames ▪ High Impact kunststof op ▪ Authentic pressing technique implantologisch werk▪ Set-up complete ▪ Kunststofverwerking op frames
▪ Authentieke persmethode▪ Opstellen compleet
References
Referenties
▪ TP Exkies
▪ Tandtechnisch Magazine ▪ TP Exkies▪ Dental Labor Poland ▪ Tandtechnisch Magazine▪ Dental Labor Spain ▪ Dental Labor Poland
▪ Dental Labor Spain
Acrylic pouring technique (GB) Kunststof giettechniek (NL) 21
Contact information
Contact informatie
Head Office Hoofdkantoor
Visiting address: Bezoekadres:
Vertex Dental BV Vertex Dental BVJohan van Oldenbarneveltlaan 62 Johan van Oldenbarneveltlaan 623705 HJ ZEIST 3705 HJ ZEISTThe Netherlands Nederland
Postal address: Postadres:
P.O. Box 10 Postbus 103700 AA ZEIST 3700 AA ZEIST
T: +31 30 697 6749 T: +31 30 697 6749F: +31 30 695 5188 F: +31 30 695 5188E: [email protected] E: [email protected] www.vertex-dental.com
Singapore Representative Office China Representative Mr. Hendry Ren
The Alpha # 04-16 Room 201, Building No. 2Singapore Sience Park II Beijing Airport Industrial Zone10 Sience Park Road Shunyi DistrictSingapore 117684 110130 BeijingSingapore China
T: +65 68 729 315 T: +86 10 8110 5532F: +65 67 757 963 F: +86 10 8048 55629E: [email protected] E: [email protected] www.vertex-dental.com
Zeist, The Netherlands Singapore, Singapore Beijing, China
Acrylic pouring technique (GB) Kunststof giettechniek (NL) 22

Step by step manual (with silicones)
Stap voor stap handleiding (met silicone)
▪ The angle of the plaster ▪ Gebruik klasse 3 of 4 gips,model must be 90°. The vacu üm gemengd. De hoekedge must be 4 mm. Use van het gipsmodel moet 90 °type 3 or 4 plaster en de rand moet 4 mm zijn.vacuum mixed.
▪ The wax denture is to ▪ De was prothese is opgesteldbe set-up as usual. The zoals gebruikelijk. De randenedges of the plaster van het gipsmodel moeten vrij model must be free of zijn van was.wax. ▪ Modelleer de gietkanalen van▪ Create the pouring was.channels with wax.
▪ Place the wax denture ▪ Plaats de wasprothese met het with plaster model in a gipsmodel voor enkele minutenbowl filled with water so in een bak met water zodat that the plaster model is het gipsmodel volledig met completely absorbed with water is verzadigd.water.
▪ Place the wet model on ▪ Plaats het natte model op de the metal plate of the metalen plaat van de cuvet enflask and close the flask. sluit vervolgens de cuvet.
▪ Take 240 ml part A and ▪ Neem 240 ml deel A en 240 ml 240 ml part B of the deel B van de silicone en mengsilicone and mix. The het geheel. De giettijd is 5Pouring time is 5 minutes 5 minuten.
Acrylic pouring technique (GB) Kunststof giettechniek (NL) 14
Step by step manual (with silicones)
Stap voor stap handleiding (met silicone)
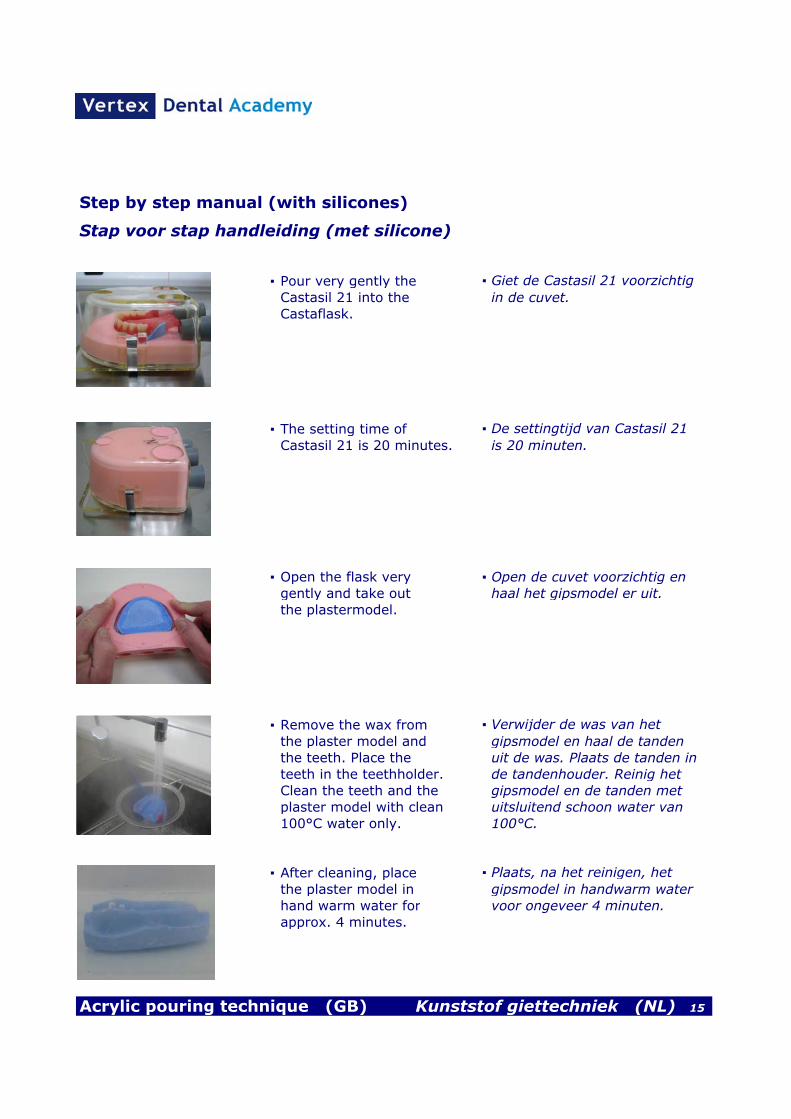
▪ Pour very gently the ▪ Giet de Castasil 21 voorzichtigCastasil 21 into the in de cuvet.Castaflask.
▪ The setting time of ▪ De settingtijd van Castasil 21Castasil 21 is 20 minutes. is 20 minuten.
▪ Open the flask very ▪ Open de cuvet voorzichtig engently and take out haal het gipsmodel er uit.the plastermodel.
▪ Remove the wax from ▪ Verwijder de was van het the plaster model and gipsmodel en haal de tandenthe teeth. Place the uit de was. Plaats de tanden in teeth in the teethholder. de tandenhouder. Reinig hetClean the teeth and the gipsmodel en de tanden met plaster model with clean uitsluitend schoon water van 100°C water only. 100°C.
▪ After cleaning, place ▪ Plaats, na het reinigen, het the plaster model in gipsmodel in handwarm waterhand warm water for voor ongeveer 4 minuten.approx. 4 minutes.
Acrylic pouring technique (GB) Kunststof giettechniek (NL) 15
Step by step manual (with silicones)
Stap voor stap handleiding (met silicone)
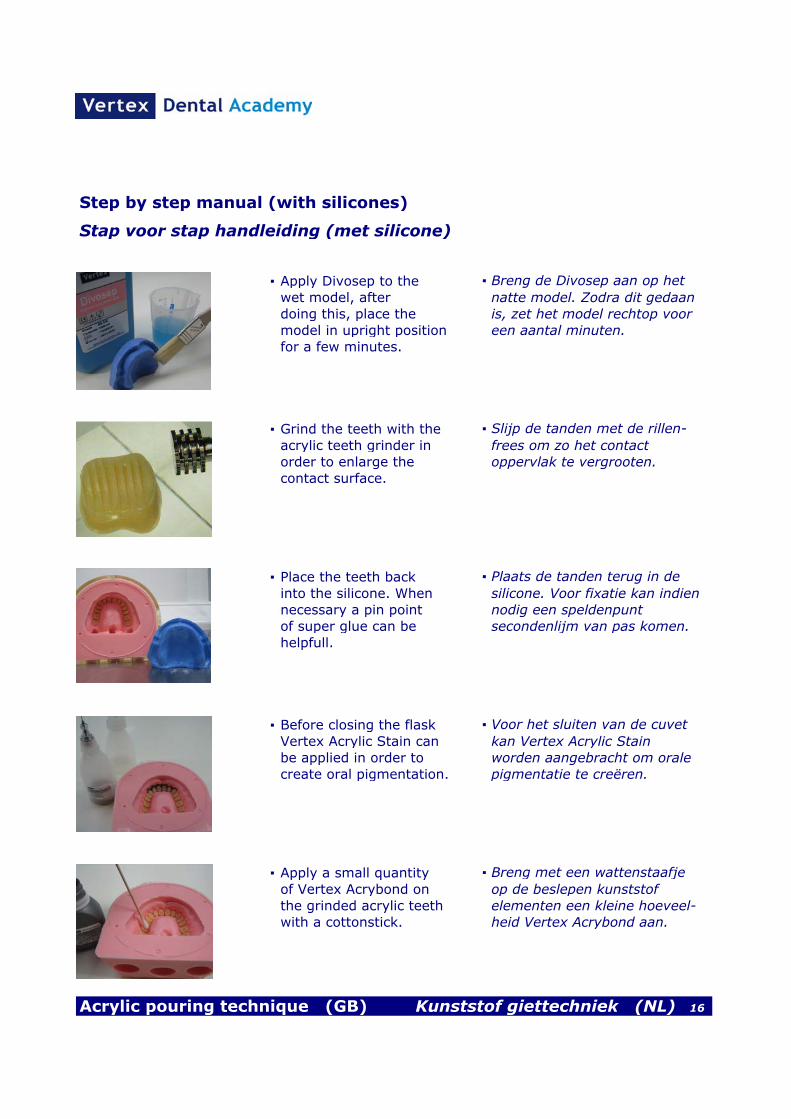
▪ Apply Divosep to the ▪ Breng de Divosep aan op het wet model, after natte model. Zodra dit gedaandoing this, place the is, zet het model rechtop voor model in upright position een aantal minuten.for a few minutes.
▪ Grind the teeth with the ▪ Slijp de tanden met de rillen-acrylic teeth grinder in frees om zo het contactorder to enlarge the oppervlak te vergrooten.contact surface.
▪ Place the teeth back ▪ Plaats de tanden terug in de into the silicone. When silicone. Voor fixatie kan indien necessary a pin point nodig een speldenpunt of super glue can be secondenlijm van pas komen.helpfull.
▪ Before closing the flask ▪ Voor het sluiten van de cuvetVertex Acrylic Stain can kan Vertex Acrylic Stain be applied in order to worden aangebracht om oralecreate oral pigmentation. pigmentatie te creëren.
▪ Apply a small quantity ▪ Breng met een wattenstaafje of Vertex Acrybond on op de beslepen kunststofthe grinded acrylic teeth elementen een kleine hoeveel-with a cottonstick. heid Vertex Acrybond aan.
Acrylic pouring technique (GB) Kunststof giettechniek (NL) 16
Step by step manual (with silicones)
Stap voor stap handleiding (met silicone)
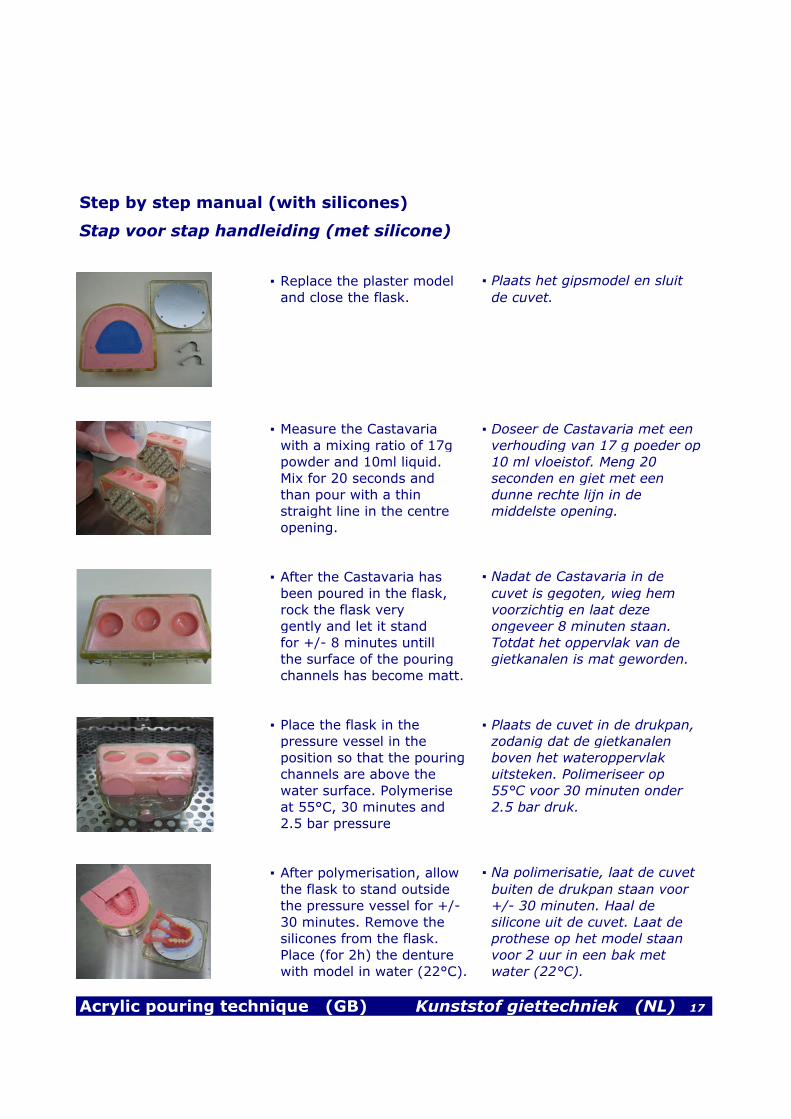
▪ Replace the plaster model ▪ Plaats het gipsmodel en sluit and close the flask. de cuvet.
▪ Measure the Castavaria ▪ Doseer de Castavaria met een with a mixing ratio of 17g verhouding van 17 g poeder oppowder and 10ml liquid. 10 ml vloeistof. Meng 20 Mix for 20 seconds and seconden en giet met eenthan pour with a thin dunne rechte lijn in destraight line in the centre middelste opening.opening.
▪ After the Castavaria has ▪ Nadat de Castavaria in de been poured in the flask, cuvet is gegoten, wieg hem rock the flask very voorzichtig en laat dezegently and let it stand ongeveer 8 minuten staan.for +/- 8 minutes untill Totdat het oppervlak van de the surface of the pouring gietkanalen is mat geworden.channels has become matt.
▪ Place the flask in the ▪ Plaats de cuvet in de drukpan,pressure vessel in the zodanig dat de gietkanalenposition so that the pouring boven het wateroppervlakchannels are above the uitsteken. Polimeriseer op water surface. Polymerise 55°C voor 30 minuten onder at 55°C, 30 minutes and 2.5 bar druk.2.5 bar pressure
▪ After polymerisation, allow ▪ Na polimerisatie, laat de cuvetthe flask to stand outside buiten de drukpan staan voor the pressure vessel for +/- +/- 30 minuten. Haal de 30 minutes. Remove the silicone uit de cuvet. Laat de silicones from the flask. prothese op het model staanPlace (for 2h) the denture voor 2 uur in een bak metwith model in water (22°C). water (22°C).
Acrylic pouring technique (GB) Kunststof giettechniek (NL) 17
Step by step manual (with silicones)
Stap voor stap handleiding (met silicone)
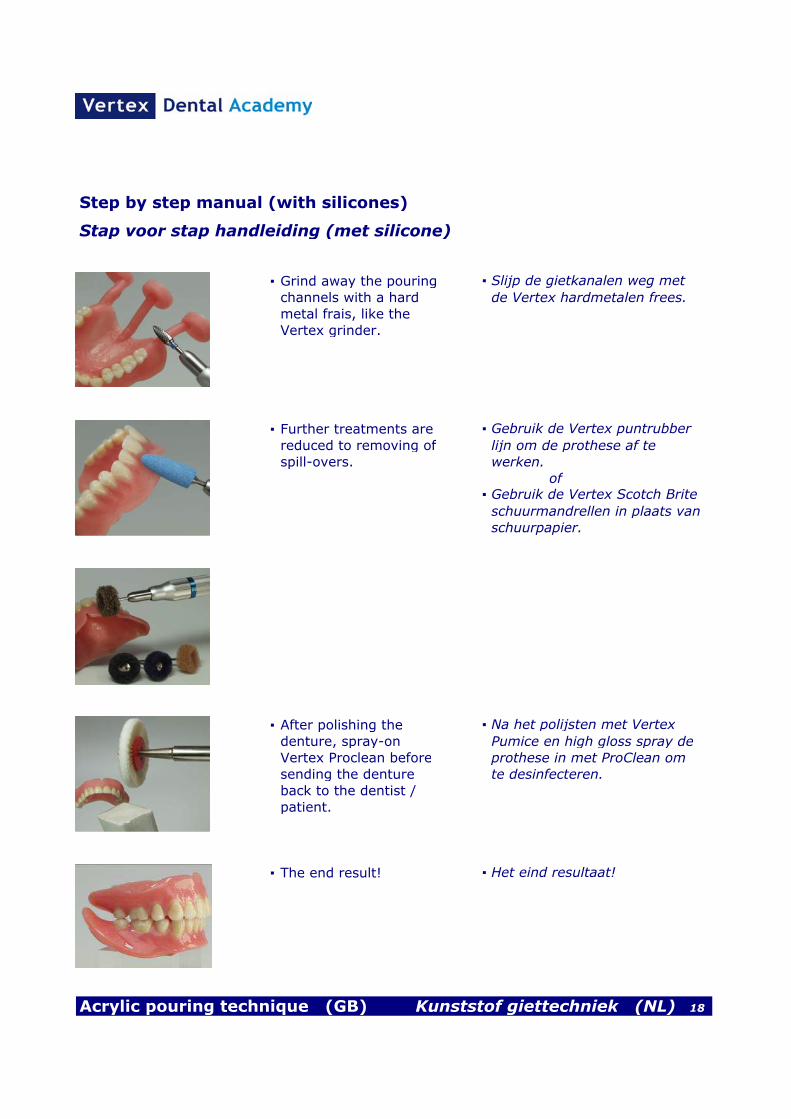
▪ Grind away the pouring ▪ Slijp de gietkanalen weg metchannels with a hard de Vertex hardmetalen frees.metal frais, like the
Vertex grinder.
▪ Further treatments are ▪ Gebruik de Vertex puntrubberreduced to removing of lijn om de prothese af te spill-overs. werken.
of▪ Gebruik de Vertex Scotch Brite schuurmandrellen in plaats van schuurpapier.
▪ After polishing the ▪ Na het polijsten met Vertexdenture, spray-on Pumice en high gloss spray deVertex Proclean before prothese in met ProClean omsending the denture te desinfecteren.back to the dentist /
patient.
▪ The end result! ▪ Het eind resultaat!
Acrylic pouring technique (GB) Kunststof giettechniek (NL) 18
Step by step manual (partial dentures with gel)
Stap voor stap handleiding (partiële protheses met gel)
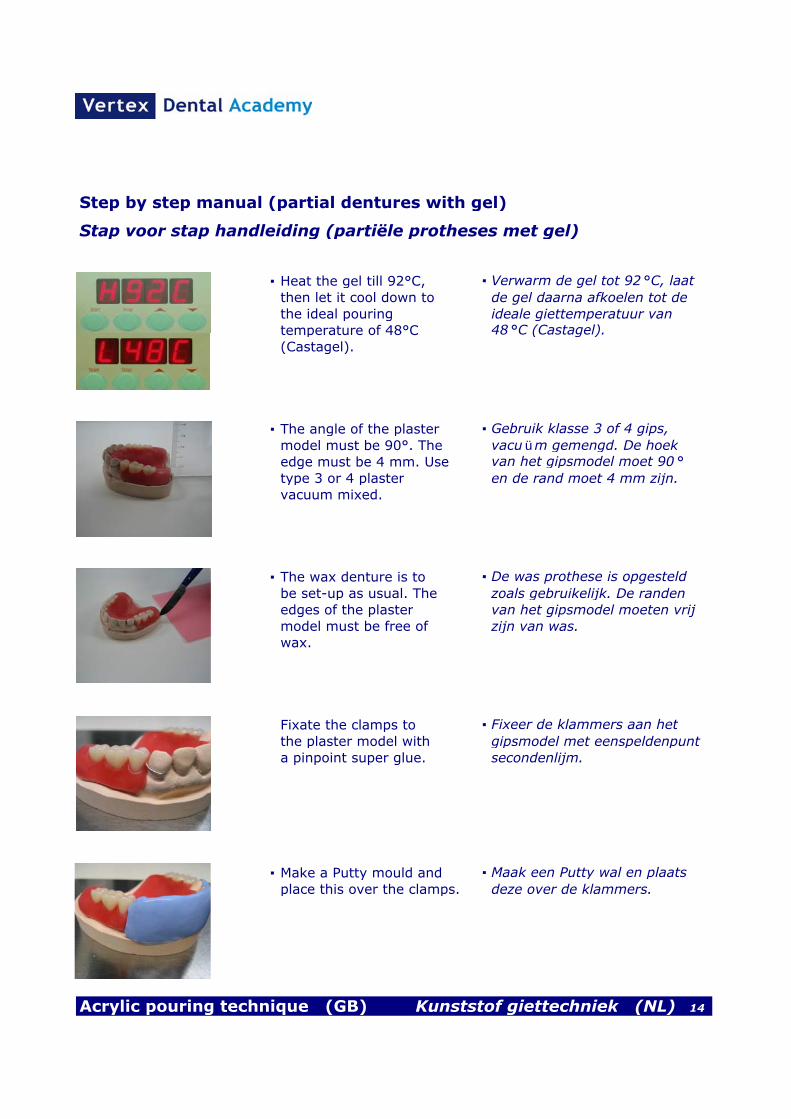
▪ Heat the gel till 92°C, ▪ Verwarm de gel tot 92 °C, laatthen let it cool down to de gel daarna afkoelen tot dethe ideal pouring ideale giettemperatuur van temperature of 48°C 48 °C (Castagel).(Castagel).
▪ The angle of the plaster ▪ Gebruik klasse 3 of 4 gips,model must be 90°. The vacu üm gemengd. De hoekedge must be 4 mm. Use van het gipsmodel moet 90 °type 3 or 4 plaster en de rand moet 4 mm zijn.vacuum mixed.
▪ The wax denture is to ▪ De was prothese is opgesteldbe set-up as usual. The zoals gebruikelijk. De randenedges of the plaster van het gipsmodel moeten vrij model must be free of zijn van was.wax.
Fixate the clamps to ▪ Fixeer de klammers aan hetthe plaster model with gipsmodel met eenspeldenpunt a pinpoint super glue. secondenlijm.
▪ Make a Putty mould and ▪ Maak een Putty wal en plaatsplace this over the clamps. deze over de klammers.
Acrylic pouring technique (GB) Kunststof giettechniek (NL) 14
Step by step manual (partial dentures with gel)
Stap voor stap handleiding (partiële protheses met gel)
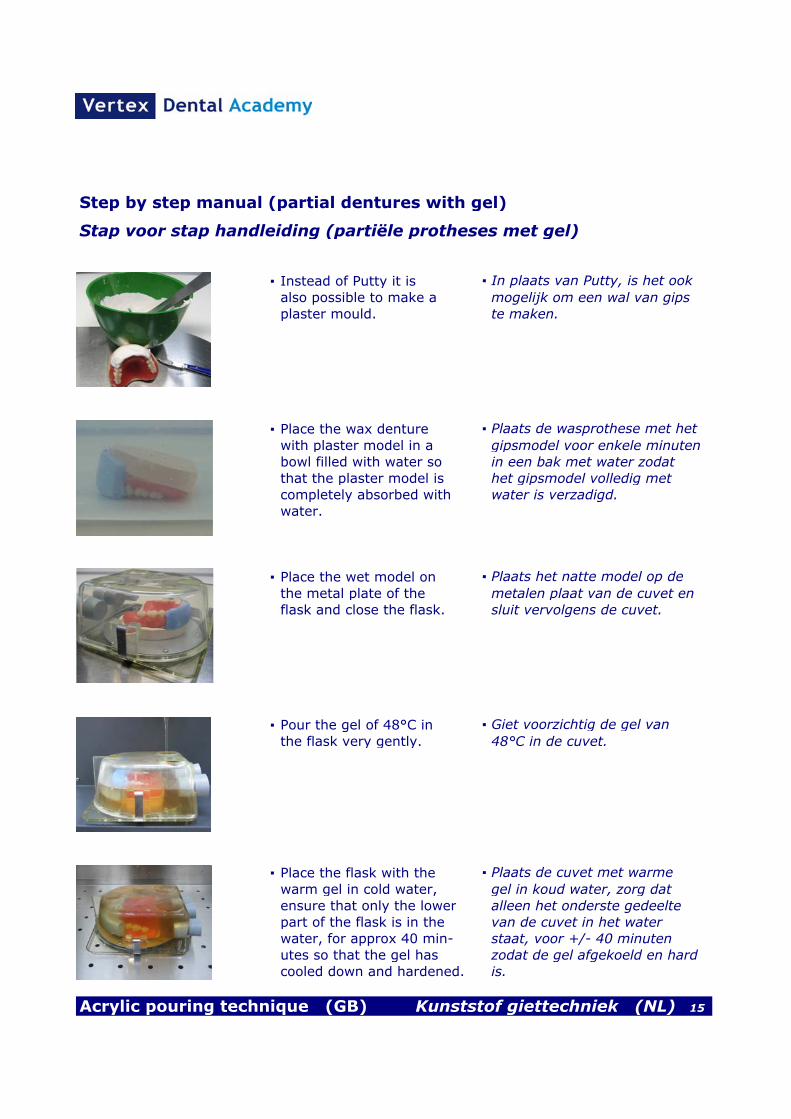
▪ Instead of Putty it is ▪ In plaats van Putty, is het ookalso possible to make a mogelijk om een wal van gipsplaster mould. te maken.
▪ Place the wax denture ▪ Plaats de wasprothese met het with plaster model in a gipsmodel voor enkele minutenbowl filled with water so in een bak met water zodat that the plaster model is het gipsmodel volledig met completely absorbed with water is verzadigd.water.
▪ Place the wet model on ▪ Plaats het natte model op de the metal plate of the metalen plaat van de cuvet enflask and close the flask. sluit vervolgens de cuvet.
▪ Pour the gel of 48°C in ▪ Giet voorzichtig de gel van the flask very gently. 48°C in de cuvet.
▪ Place the flask with the ▪ Plaats de cuvet met warme warm gel in cold water, gel in koud water, zorg dat ensure that only the lower alleen het onderste gedeelte part of the flask is in the van de cuvet in het water water, for approx 40 min- staat, voor +/- 40 minutenutes so that the gel has zodat de gel afgekoeld en hardcooled down and hardened. is.
Acrylic pouring technique (GB) Kunststof giettechniek (NL) 15

Step by step manual (partial dentures with gel)
Stap voor stap handleiding (partiële protheses met gel)
▪ Remove the bottom plate ▪ Verwijder de bodemplaat van of the flask and take out de cuvet en haal het model erthe model very gently. voorzichtig uit. Snij zonodig deIf necessary, cut away gel langs het model weg enthe gel along the model bewaar dit.and keep it.
▪ Insert three channels by ▪ Steek drie kanalen met de making use of the largest dikste kanaalsteker.canalcutter.
▪ Remove the wax from ▪ Verwijder de was van het the plaster model and gipsmodel en haal de tandenthe teeth. Place the uit de was. Plaats de tanden in teeth in the teethholder. de tandenhouder. Reinig hetClean the teeth and the gipsmodel en de tanden met plaster model with clean uitsluitend schoon water van 100°C water only. 100°C.
▪ After cleaning, place ▪ Plaats, na het reinigen, het the plaster model in gipsmodel in handwarm waterhand warm water for voor ongeveer 4 minuten.approx. 4 minutes.
▪ Apply Divosep to the ▪ Breng de Divosep aan op het wet model, after natte model. Zodra dit gedaandoing this, place the is, zet het model rechtop voor model in upright position een aantal minuten.for a few minutes.
Acrylic pouring technique (GB) Kunststof giettechniek (NL) 16
Step by step manual (partial dentures with gel)
Stap voor stap handleiding (partiële protheses met gel)
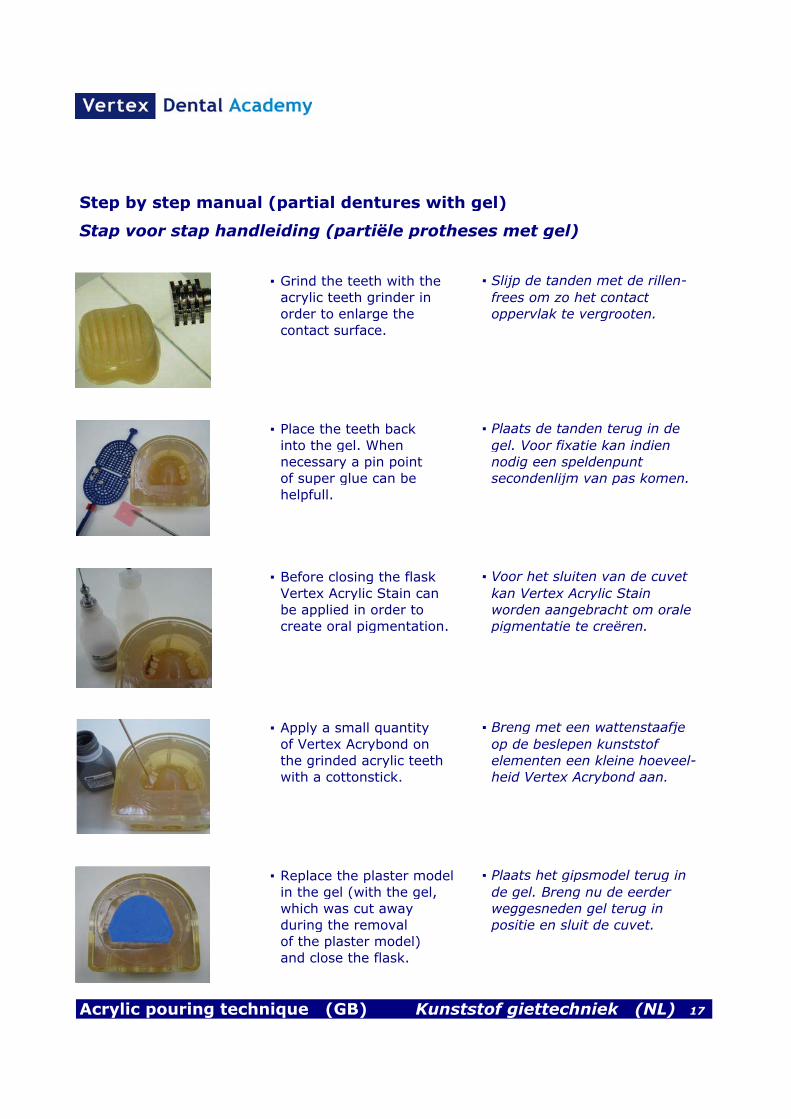
▪ Grind the teeth with the ▪ Slijp de tanden met de rillen-acrylic teeth grinder in frees om zo het contactorder to enlarge the oppervlak te vergrooten.contact surface.
▪ Place the teeth back ▪ Plaats de tanden terug in de into the gel. When gel. Voor fixatie kan indien necessary a pin point nodig een speldenpunt of super glue can be secondenlijm van pas komen.helpfull.
▪ Before closing the flask ▪ Voor het sluiten van de cuvetVertex Acrylic Stain can kan Vertex Acrylic Stain be applied in order to worden aangebracht om oralecreate oral pigmentation. pigmentatie te creëren.
▪ Apply a small quantity ▪ Breng met een wattenstaafje of Vertex Acrybond on op de beslepen kunststofthe grinded acrylic teeth elementen een kleine hoeveel-with a cottonstick. heid Vertex Acrybond aan.
▪ Replace the plaster model ▪ Plaats het gipsmodel terug in in the gel (with the gel, de gel. Breng nu de eerder which was cut away weggesneden gel terug in during the removal positie en sluit de cuvet.of the plaster model)
and close the flask.
Acrylic pouring technique (GB) Kunststof giettechniek (NL) 17
Step by step manual (partial dentures with gel)
Stap voor stap handleiding (partiële protheses met gel)
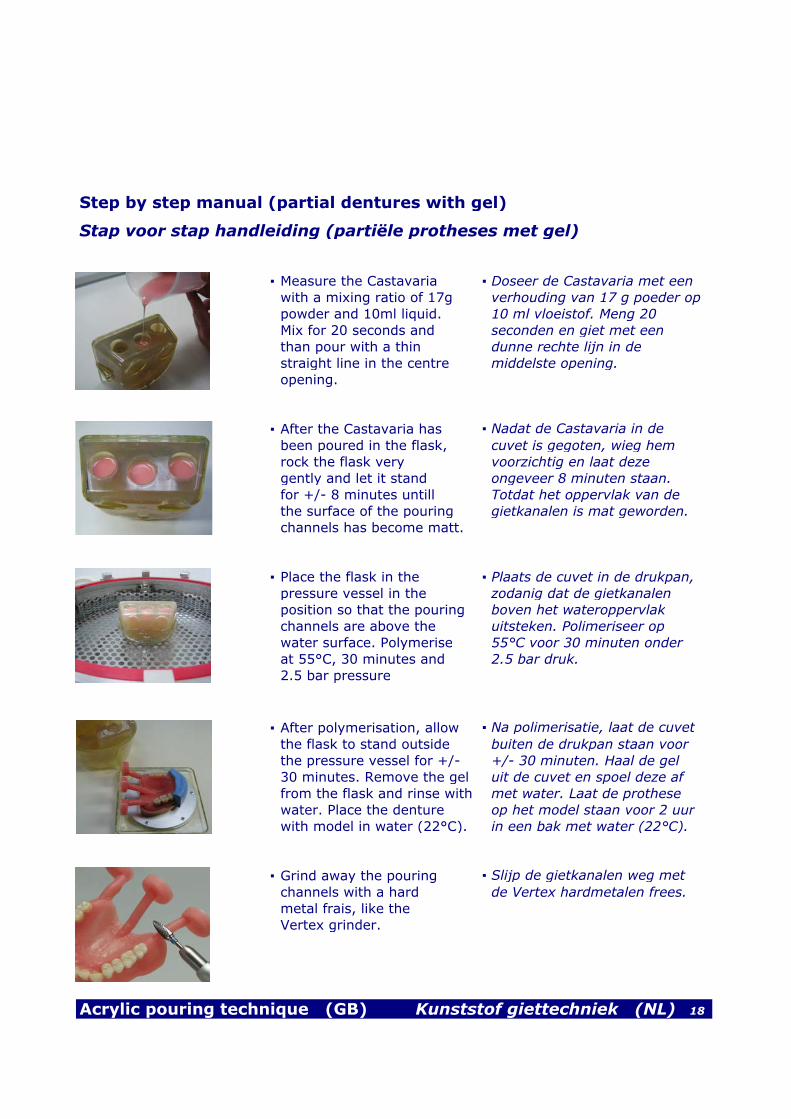
▪ Measure the Castavaria ▪ Doseer de Castavaria met een with a mixing ratio of 17g verhouding van 17 g poeder oppowder and 10ml liquid. 10 ml vloeistof. Meng 20 Mix for 20 seconds and seconden en giet met eenthan pour with a thin dunne rechte lijn in destraight line in the centre middelste opening.opening.
▪ After the Castavaria has ▪ Nadat de Castavaria in de been poured in the flask, cuvet is gegoten, wieg hem rock the flask very voorzichtig en laat dezegently and let it stand ongeveer 8 minuten staan.for +/- 8 minutes untill Totdat het oppervlak van de the surface of the pouring gietkanalen is mat geworden.channels has become matt.
▪ Place the flask in the ▪ Plaats de cuvet in de drukpan,pressure vessel in the zodanig dat de gietkanalenposition so that the pouring boven het wateroppervlakchannels are above the uitsteken. Polimeriseer op water surface. Polymerise 55°C voor 30 minuten onder at 55°C, 30 minutes and 2.5 bar druk.2.5 bar pressure
▪ After polymerisation, allow ▪ Na polimerisatie, laat de cuvetthe flask to stand outside buiten de drukpan staan voor the pressure vessel for +/- +/- 30 minuten. Haal de gel30 minutes. Remove the gel uit de cuvet en spoel deze af from the flask and rinse with met water. Laat de prothesewater. Place the denture op het model staan voor 2 uurwith model in water (22°C). in een bak met water (22°C).
▪ Grind away the pouring ▪ Slijp de gietkanalen weg metchannels with a hard de Vertex hardmetalen frees.metal frais, like the
Vertex grinder.
Acrylic pouring technique (GB) Kunststof giettechniek (NL) 18
Step by step manual (partial dentures with gel)
Stap voor stap handleiding (partiële protheses met gel)
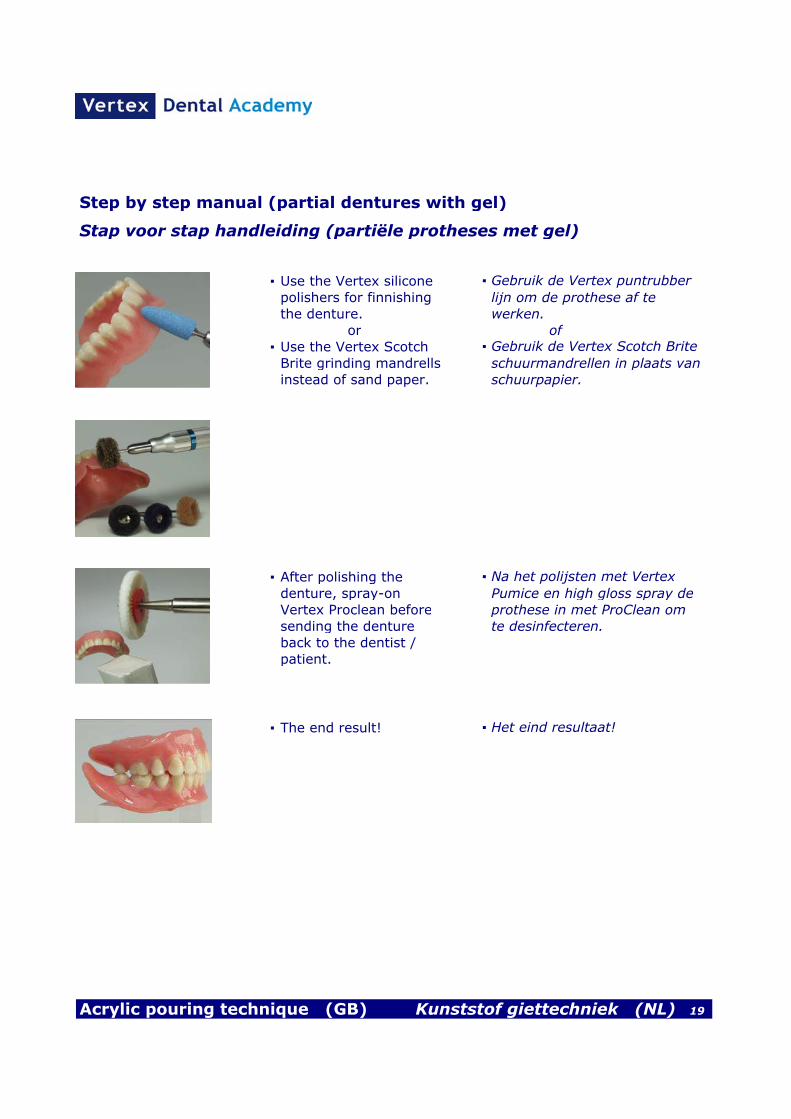
▪ Use the Vertex silicone ▪ Gebruik de Vertex puntrubberpolishers for finnishing lijn om de prothese af te the denture. werken.
or of▪ Use the Vertex Scotch ▪ Gebruik de Vertex Scotch BriteBrite grinding mandrells schuurmandrellen in plaats vaninstead of sand paper. schuurpapier.
▪ After polishing the ▪ Na het polijsten met Vertexdenture, spray-on Pumice en high gloss spray deVertex Proclean before prothese in met ProClean omsending the denture te desinfecteren.back to the dentist /
patient.
▪ The end result! ▪ Het eind resultaat!
Acrylic pouring technique (GB) Kunststof giettechniek (NL) 19